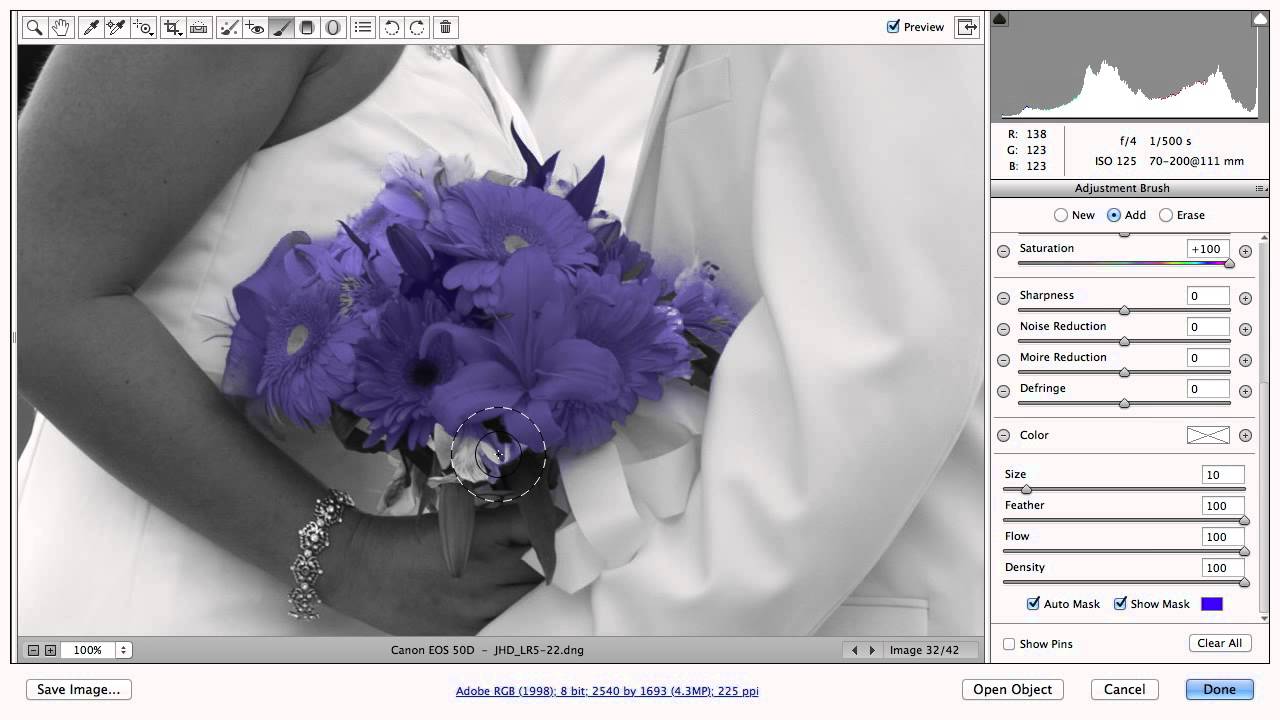
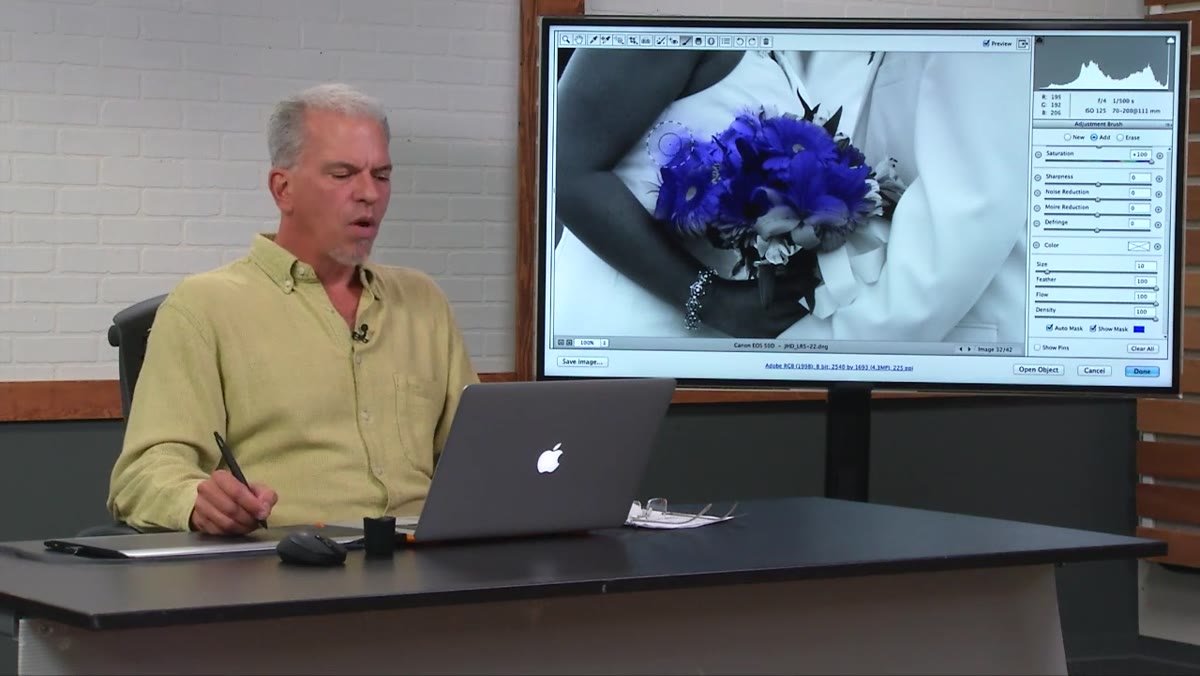
There’s a specific kind of frustration that comes from working backward in Photoshop. You desaturate something, you decide you want that color back, and the software gives you nothing. Pushing saturation on a desaturated layer is like squeezing an empty tube of paint. The data is gone. Or rather, it feels gone. The real answer lives somewhere more interesting, and in this CreativeLive tutorial, Jack Davis makes the case that Camera Raw’s Auto Mask brush is one of the most underrated tools for doing surgical color work without touching your Layers panel at all. Watch the full tutorial on YouTube
I came to this technique sideways, the way most useful things find me. I was working on a book cover that needed one element to pop with full saturation while everything around it sat muted and cool. My instinct was to reach for a Hue/Saturation layer, paint a mask, refine edges, argue with the feathering. Forty minutes later I had a serviceable but slightly soft result. Davis’s approach cuts through all of that. The logic underneath it reframes how you think about color data entirely.
The core insight is this: even after you’ve desaturated an image, the underlying pixel math still points back to the original color values. Camera Raw can read that information. The Auto Mask brush uses it to stay inside color boundaries with remarkable accuracy, which means you can paint aggressive adjustments with a large, sloppy brush and the tool will do the edge work for you. Here’s how it actually works.
Step 1: Set Up Your Adjustment with the Targeted Brush Tool in Camera Raw
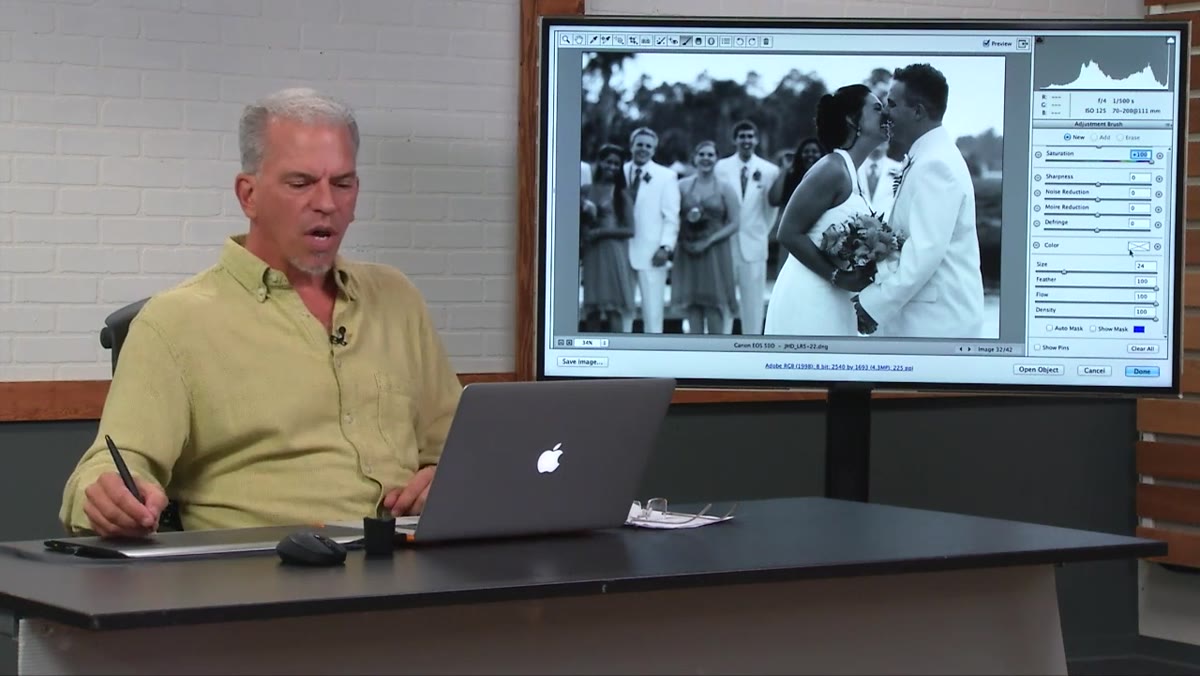 Saturation slider pushed to plus 100 in Camera Raw panel
Open your image in Camera Raw. Select the Adjustment Brush (the shortcut is K). Before touching the canvas, set your saturation value to something exaggerated, something like plus 100. Davis works at this extreme intentionally. The point isn’t subtlety yet. The point is to see the effect clearly so you can judge where the mask is working and where it isn’t. Dial your other sliders to zero so saturation is the only variable in play.
Saturation slider pushed to plus 100 in Camera Raw panel
Open your image in Camera Raw. Select the Adjustment Brush (the shortcut is K). Before touching the canvas, set your saturation value to something exaggerated, something like plus 100. Davis works at this extreme intentionally. The point isn’t subtlety yet. The point is to see the effect clearly so you can judge where the mask is working and where it isn’t. Dial your other sliders to zero so saturation is the only variable in play.
Step 2: Enable Auto Mask Before Your First Stroke
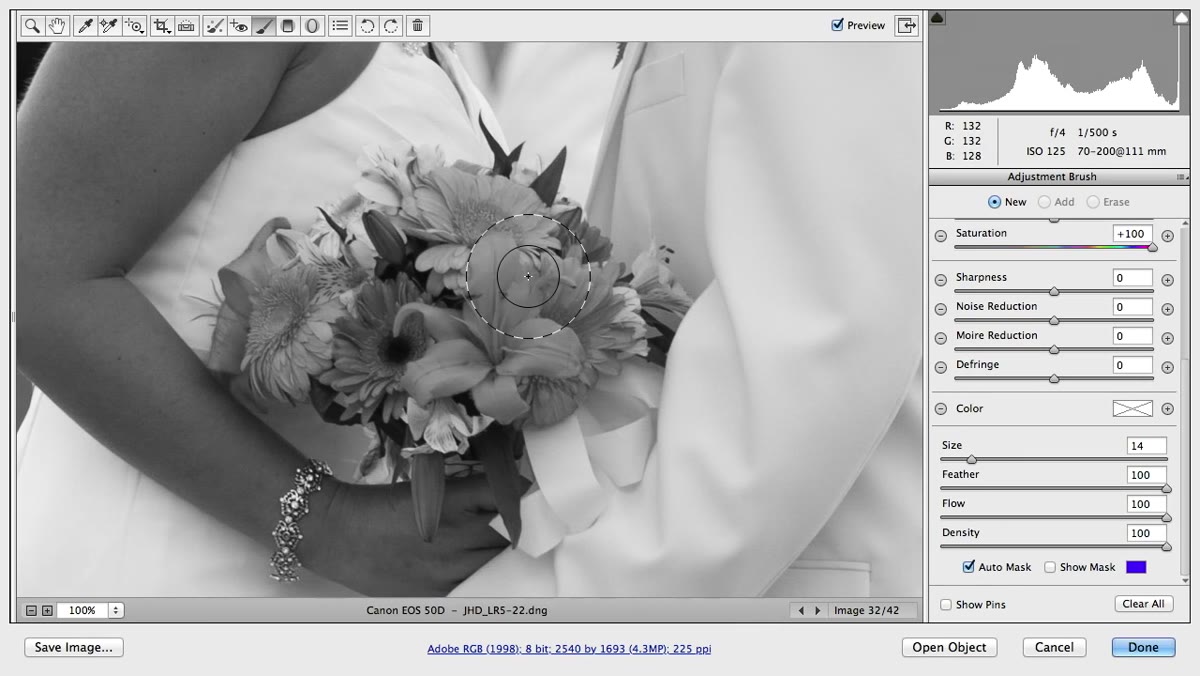 Auto Mask checkbox being enabled in the brush options
At the bottom of the Adjustment Brush panel, check the Auto Mask box before you paint a single pixel. This is the step most people skip because they start painting first and enable Auto Mask after the fact. That works, but it’s messier. With Auto Mask active from the start, Camera Raw samples the color beneath your cursor’s center point and uses that sample to build its edge detection in real time. The brush knows what it’s supposed to be painting and what it’s supposed to avoid.
Auto Mask checkbox being enabled in the brush options
At the bottom of the Adjustment Brush panel, check the Auto Mask box before you paint a single pixel. This is the step most people skip because they start painting first and enable Auto Mask after the fact. That works, but it’s messier. With Auto Mask active from the start, Camera Raw samples the color beneath your cursor’s center point and uses that sample to build its edge detection in real time. The brush knows what it’s supposed to be painting and what it’s supposed to avoid.
Step 3: Start Your First Stroke Well Inside the Subject
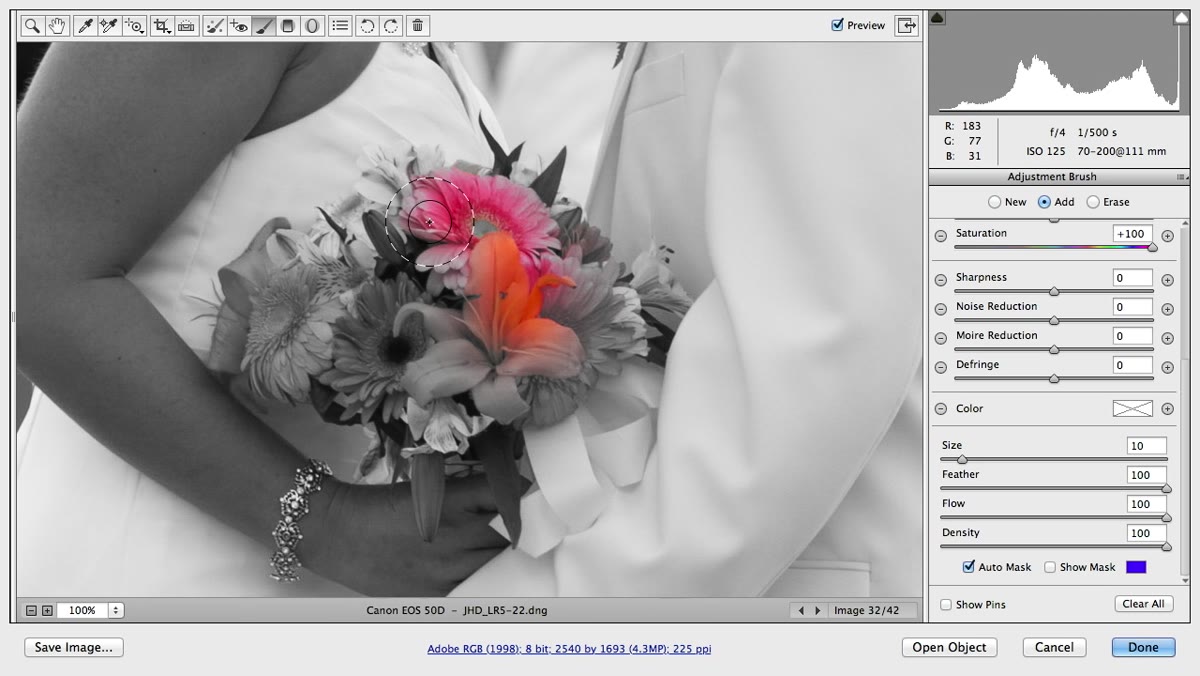 Brush cursor positioned deep inside flower, away from edges
Davis is emphatic about this: your first stroke needs to start in the interior of the shape you’re targeting, well away from any edge. The center of the brush is what Camera Raw uses to sample color and drive the edge detection logic. If you start near a boundary, you’re handing the algorithm ambiguous information and it will make decisions you won’t like. Plant your cursor in the middle of the subject, click, then paint outward. You’ll see the adjustment fill the shape with surprising accuracy even as you move the brush close to edges.
Brush cursor positioned deep inside flower, away from edges
Davis is emphatic about this: your first stroke needs to start in the interior of the shape you’re targeting, well away from any edge. The center of the brush is what Camera Raw uses to sample color and drive the edge detection logic. If you start near a boundary, you’re handing the algorithm ambiguous information and it will make decisions you won’t like. Plant your cursor in the middle of the subject, click, then paint outward. You’ll see the adjustment fill the shape with surprising accuracy even as you move the brush close to edges.
Step 4: Use the Y Key to Toggle the Mask Overlay and Check for Spill
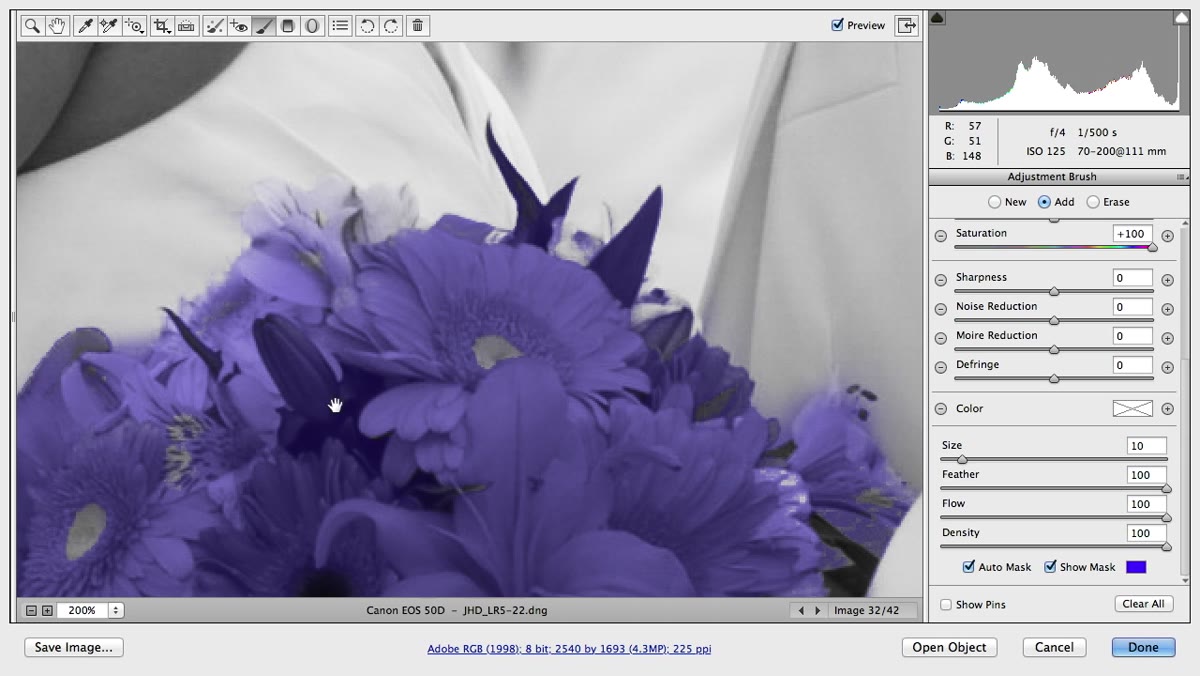
 Mask overlay visible in red showing painted area on flowers
Press Y to toggle the mask overlay on and off. This is your quality-control step. The red overlay shows exactly where the adjustment is applied. Look for spill, areas where the color has crept outside the boundary you intended. On a detailed subject like flower petals, some spill is almost inevitable, especially near areas with high contrast or complex texture. Don’t panic. This is where the second half of the Auto Mask trick comes in.
Mask overlay visible in red showing painted area on flowers
Press Y to toggle the mask overlay on and off. This is your quality-control step. The red overlay shows exactly where the adjustment is applied. Look for spill, areas where the color has crept outside the boundary you intended. On a detailed subject like flower petals, some spill is almost inevitable, especially near areas with high contrast or complex texture. Don’t panic. This is where the second half of the Auto Mask trick comes in.
Step 5: Hold Alt (Option on Mac) to Switch to the Intelligent Eraser
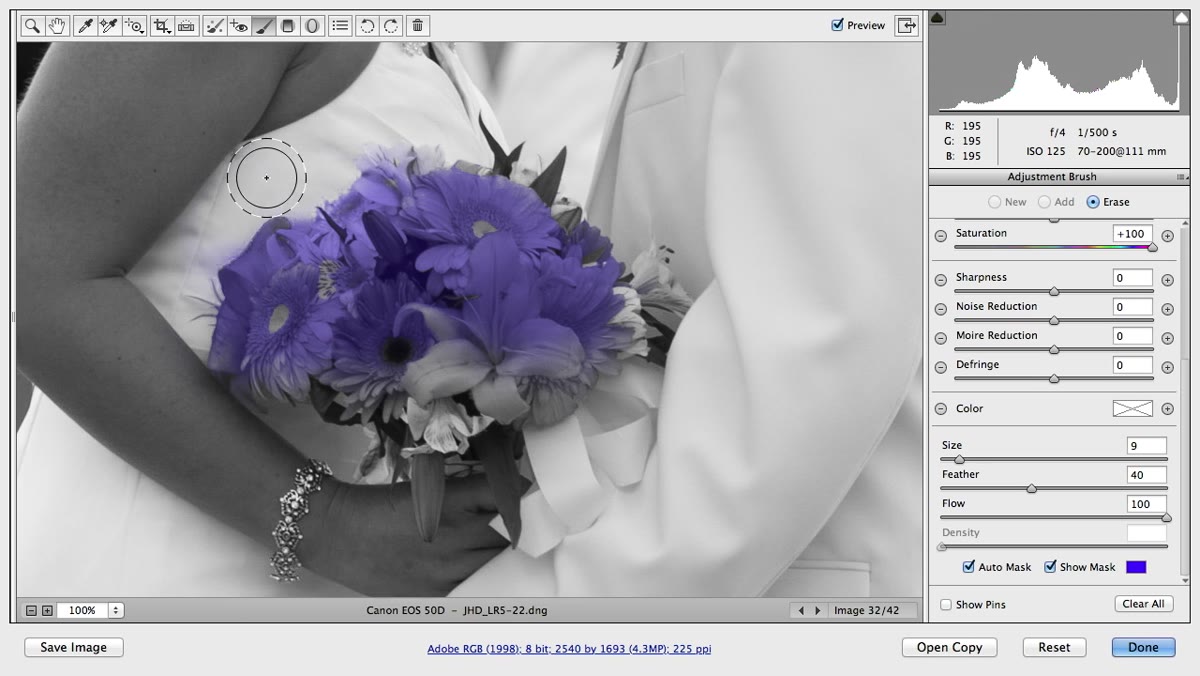 Eraser cursor cleaning spill near flower petal edge
Holding Alt or Option while the Adjustment Brush is active flips you into erase mode. And here is the part Davis drives home: the eraser is just as intelligent as the paintbrush. It uses the same color-sampling logic to avoid erasing inside your subject. You can come at the edge with a brush that’s visibly larger than the area you’re cleaning up, and Camera Raw will pull back the adjustment only on the pixels that fall outside the target color range. Run along the edge, clean up the spill, and watch the tool make the call for you.
Eraser cursor cleaning spill near flower petal edge
Holding Alt or Option while the Adjustment Brush is active flips you into erase mode. And here is the part Davis drives home: the eraser is just as intelligent as the paintbrush. It uses the same color-sampling logic to avoid erasing inside your subject. You can come at the edge with a brush that’s visibly larger than the area you’re cleaning up, and Camera Raw will pull back the adjustment only on the pixels that fall outside the target color range. Run along the edge, clean up the spill, and watch the tool make the call for you.
Step 6: Know When to Turn Auto Mask Off
 Auto Mask checkbox being unchecked for interior detail work
Auto Mask is not a universal fix. Davis is honest about this. Certain interior regions of a subject, areas with strong texture variation or color transitions within the shape itself, can confuse the algorithm. When you notice the mask getting patchy or inconsistent inside the subject rather than at the edges, turn Auto Mask off and paint those interior regions manually. The edge intelligence isn’t useful when you’re not near an edge. Switching back and forth between Auto Mask on and off during the same pass is not a workaround. It’s the correct workflow.
Auto Mask checkbox being unchecked for interior detail work
Auto Mask is not a universal fix. Davis is honest about this. Certain interior regions of a subject, areas with strong texture variation or color transitions within the shape itself, can confuse the algorithm. When you notice the mask getting patchy or inconsistent inside the subject rather than at the edges, turn Auto Mask off and paint those interior regions manually. The edge intelligence isn’t useful when you’re not near an edge. Switching back and forth between Auto Mask on and off during the same pass is not a workaround. It’s the correct workflow.
What I’d Add From My Own Work
The thing Davis doesn’t have time to get into, but that I’ve learned from running this technique on complex composites, is how well it holds up when you use it not just to restore color but to push it somewhere it never was. I’ve used this exact workflow to selectively shift the hue of an element, painting a targeted adjustment that moves a subject from a warm tone to a cooler one while leaving the surrounding image untouched. The Auto Mask doesn’t care whether you’re restoring original data or inventing new color. It cares about boundaries, and boundaries are what it’s good at.
One caveat worth naming: this technique lives in Camera Raw, which means it’s most powerful when you’re working on a raw file or a Smart Object. If you’re working on a flattened JPEG that’s already been pushed through several edits, the color boundary information is less clean and the Auto Mask will work harder for less accurate results. Start upstream when you can.
The single most important thing Davis demonstrates here is that the Auto Mask brush gets smarter when you use the eraser to correct it. That counter-intuitive behavior, where fixing a mistake actually improves the tool’s future decisions, is worth sitting with. It changes how you approach the brush. You stop being careful and start being deliberate, knowing that the correction pass is part of the process, not a sign that something went wrong.
Watch the full tutorial on YouTube and pay particular attention to the moment Davis runs a brush that’s twice the size of the petal tip along the flower’s edge and it stays clean. That moment is worth pausing on. It’s the kind of thing that changes what you reach for first.
Comments (1)
I've been looking for exactly this kind of tutorial. Perfect timing.
Leave a Comment