There is a shadow in my first published composite that points the wrong direction. The client approved it, the art director signed off on it, and it ran on a book cover that sold several thousand copies. I am the only person who ever noticed, and it lives in my head rent-free to this day. That single mistake taught me more about realism in compositing than any technique I learned in the years before it. The lesson was not about shadows specifically. It was about the chain of decisions that starts before you ever open Photoshop, and how one broken link anywhere in that chain will poison everything downstream.
That is why I keep coming back to foundational tutorials even now, fifteen years into doing this professionally. In this Aaron Nace (PHLEARN) tutorial, Watch the full tutorial on YouTube, Aaron answers viewer questions on two subjects that sound simple and turn out to be enormous: how to choose the right camera angle for a composite subject, and how smart objects protect your work from the kind of irreversible mistakes that haunt you. The questions come from real users, which means the confusion is real too, and Aaron’s answers are precise enough to act on immediately.
What follows is my breakdown of the key techniques he covers, with notes from my own workflow wherever they add something his tutorial does not spell out.
Step 1: Understand What a Smart Object Actually Is
 Aaron explaining smart object reference file concept in Photoshop
A smart object is not a copy of your layer. It is a reference to a file that lives inside your Photoshop document. When you edit a smart object, you are editing the reference, not the pixel data itself. That distinction is everything. It means Photoshop is preserving the original information underneath every change you make, and you can go back to any of those changes at any point, even after saving and closing the file.
Aaron explaining smart object reference file concept in Photoshop
A smart object is not a copy of your layer. It is a reference to a file that lives inside your Photoshop document. When you edit a smart object, you are editing the reference, not the pixel data itself. That distinction is everything. It means Photoshop is preserving the original information underneath every change you make, and you can go back to any of those changes at any point, even after saving and closing the file.
The practical implication for compositing is significant. When you are building a complex scene with multiple elements, you will resize things constantly. You will scale a figure down to test proportions, decide it is too small, and scale it back up. On a raster layer, that round trip destroys information. On a smart object, you return to the original quality every time. Think of it as working with a live link rather than a photocopy.
Step 2: Apply Filters Non-Destructively Using Smart Objects
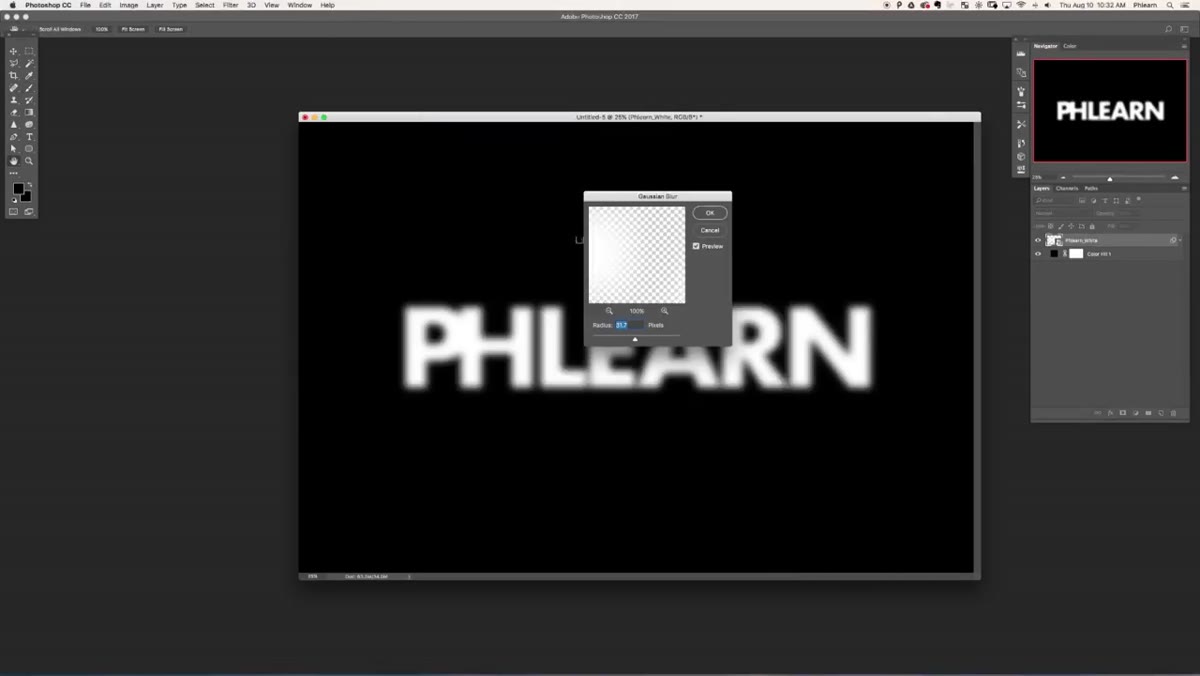 Demonstrating adjustable blur filter applied to a smart object layer
When you apply a filter like Gaussian Blur to a raster layer, that blur is baked into the pixels permanently. Change your mind later and you are either undoing a chain of history states or starting over. Apply that same blur to a smart object and it becomes a Smart Filter, which sits as an editable entry beneath the layer in your Layers panel. Double-click it any time to change the radius, toggle it off to compare, or delete it entirely without touching the underlying image.
Demonstrating adjustable blur filter applied to a smart object layer
When you apply a filter like Gaussian Blur to a raster layer, that blur is baked into the pixels permanently. Change your mind later and you are either undoing a chain of history states or starting over. Apply that same blur to a smart object and it becomes a Smart Filter, which sits as an editable entry beneath the layer in your Layers panel. Double-click it any time to change the radius, toggle it off to compare, or delete it entirely without touching the underlying image.
For compositing specifically, this matters during the depth-of-field matching phase. When I am integrating a subject into an environment and trying to match the background’s natural blur, I will adjust that Smart Filter value a dozen times before it looks right. Doing that on a raster layer would mean destroying the subject’s edge detail on each iteration. Smart objects let me stay in a testing mindset without paying a pixel cost.
Step 3: Rasterize Only When You Are Finished
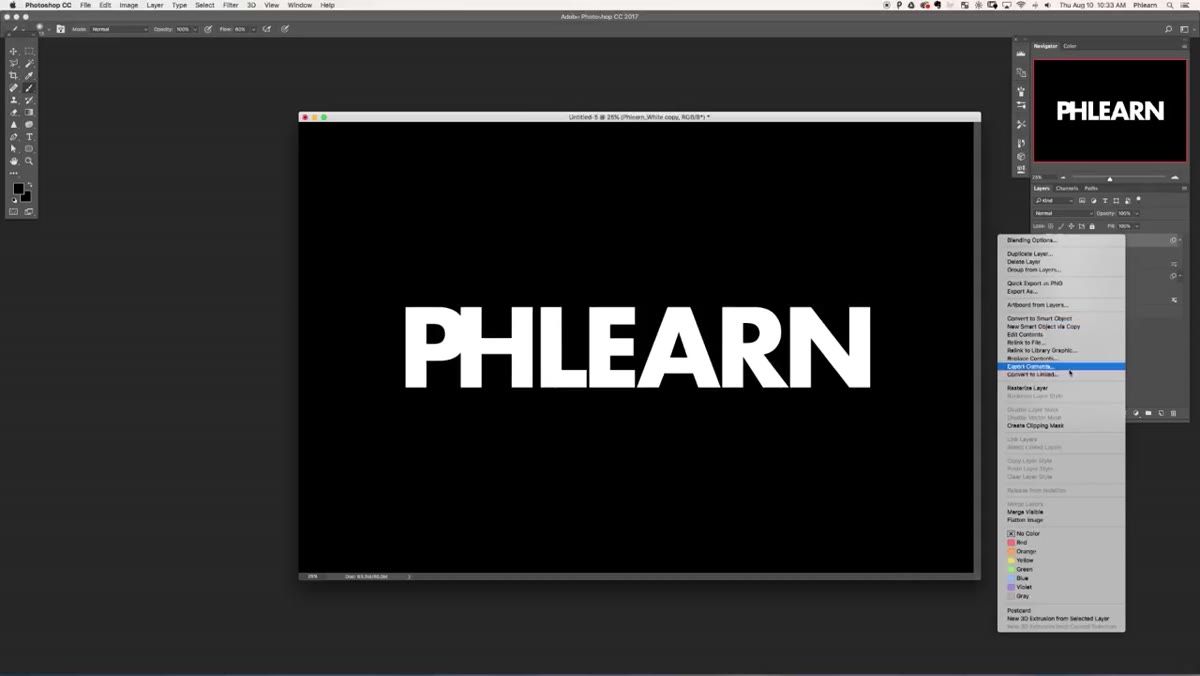 Right-click menu showing Rasterize Layer option in Photoshop
Smart objects do increase file size because of the embedded reference data. On a large composite with twenty or thirty layers, that overhead adds up. Aaron’s advice here is direct: convert to smart object while you are working, rasterize when you are done. Right-click the layer and choose Rasterize Layer to flatten it back to standard pixel data and recover that file weight.
Right-click menu showing Rasterize Layer option in Photoshop
Smart objects do increase file size because of the embedded reference data. On a large composite with twenty or thirty layers, that overhead adds up. Aaron’s advice here is direct: convert to smart object while you are working, rasterize when you are done. Right-click the layer and choose Rasterize Layer to flatten it back to standard pixel data and recover that file weight.
I would add one caveat from experience. Do not rasterize until the entire composite is locked. I have rasterized layers to save space mid-project and then needed to go back and adjust a blur radius that no longer existed as a Smart Filter. Build the habit of treating rasterization as a final-delivery step, not a housekeeping step.
Step 4: Match Your Camera Angle to the Emotional Effect You Want
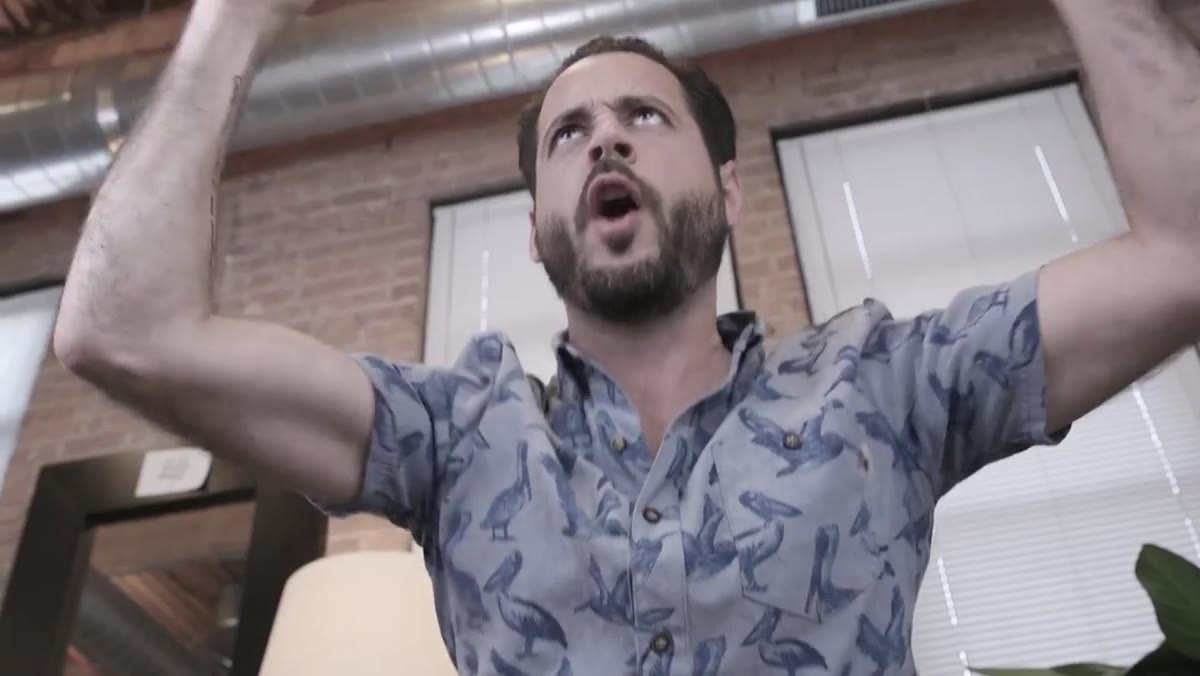 Aaron describing low angle versus high angle camera perspective effects
Camera angle is not just a compositional choice. It is a psychological one. Shooting from below your subject makes them appear large, authoritative, and powerful. This is why superhero posters almost always use a low camera position. Shooting from above has the opposite effect: it diminishes the subject, makes them look vulnerable or small, and introduces distortion that compresses the body and inflates the head.
Aaron describing low angle versus high angle camera perspective effects
Camera angle is not just a compositional choice. It is a psychological one. Shooting from below your subject makes them appear large, authoritative, and powerful. This is why superhero posters almost always use a low camera position. Shooting from above has the opposite effect: it diminishes the subject, makes them look vulnerable or small, and introduces distortion that compresses the body and inflates the head.
For a neutral portrait, eye level is the default for a reason. It puts the viewer on equal footing with the subject, creating a sense of presence without implicit judgment. When I am photographing a subject specifically for a composite, I decide the camera height before I set up the shoot by looking at the environment image first. The environment has already made that decision. My job is to match it, not impose a new angle over the top of it.
Step 5: Use Negative Space Intentionally
 Diagram showing subject on left looking right into frame space
Where your subject looks within the frame determines whether the composition feels balanced or claustrophobic. Aaron’s guideline is clean and easy to remember: if the subject is on the left side of the frame, have them look right. If they are on the right, have them look left. This creates breathing room in the direction of their gaze, which the viewer’s eye naturally wants to travel into.
Diagram showing subject on left looking right into frame space
Where your subject looks within the frame determines whether the composition feels balanced or claustrophobic. Aaron’s guideline is clean and easy to remember: if the subject is on the left side of the frame, have them look right. If they are on the right, have them look left. This creates breathing room in the direction of their gaze, which the viewer’s eye naturally wants to travel into.
This also applies to body orientation in full-figure composites. A figure facing into the negative space feels like they are part of a larger scene. A figure facing out of the frame creates tension that the rest of your composition has to justify. Both can work, but you need to make the choice deliberately.
Step 6: Identify Your Central Subject Before You Build Anything
 Aaron discussing subject placement and compositional centering decisions
Aaron closes the composition section with a point that sounds obvious and is routinely ignored: know what your central subject is before you make any decisions about placement. Everything else in the frame exists to support that subject, and centering is not required. Off-center placement is often more dynamic, more interesting, and more consistent with how the eye actually moves across an image.
Aaron discussing subject placement and compositional centering decisions
Aaron closes the composition section with a point that sounds obvious and is routinely ignored: know what your central subject is before you make any decisions about placement. Everything else in the frame exists to support that subject, and centering is not required. Off-center placement is often more dynamic, more interesting, and more consistent with how the eye actually moves across an image.
I sketch every composite on paper before opening Photoshop. That habit forces me to commit to a compositional hierarchy before I start building, and it surfaces problems that would otherwise eat hours inside the software. Where is the subject? Where does the eye enter the frame? Where does it exit? Those questions have answers before a single layer is created.
What I Would Add From My Own Work
The throughline connecting camera angles and smart objects is the same principle: decisions made early determine what is possible later. Choosing the wrong angle when you shoot your subject creates a mismatch that no amount of Photoshop technique will fully fix. Rasterizing a layer before you are done editing it closes a door you may desperately need open. The composites that hold up under scrutiny are the ones where the foundational decisions were made carefully and protected throughout the process.
If you are newer to compositing, I would suggest watching this tutorial with one specific project in mind. Apply the smart object workflow to something you are actively building, and let that work change the habit. Watching technique in the abstract does not stick the same way working technique does.
The single thing I want you to take from this breakdown: protect your decisions. Smart objects protect your editing decisions. Intentional camera angles protect your compositional decisions. Both give you the ability to change your mind without losing everything. That flexibility is not just convenient. For working compositors, it is the difference between a polished final image and a published mistake you will see every time you close your eyes.
Watch the full tutorial on YouTube and bring your current project with you when you do.
Comments
Leave a Comment