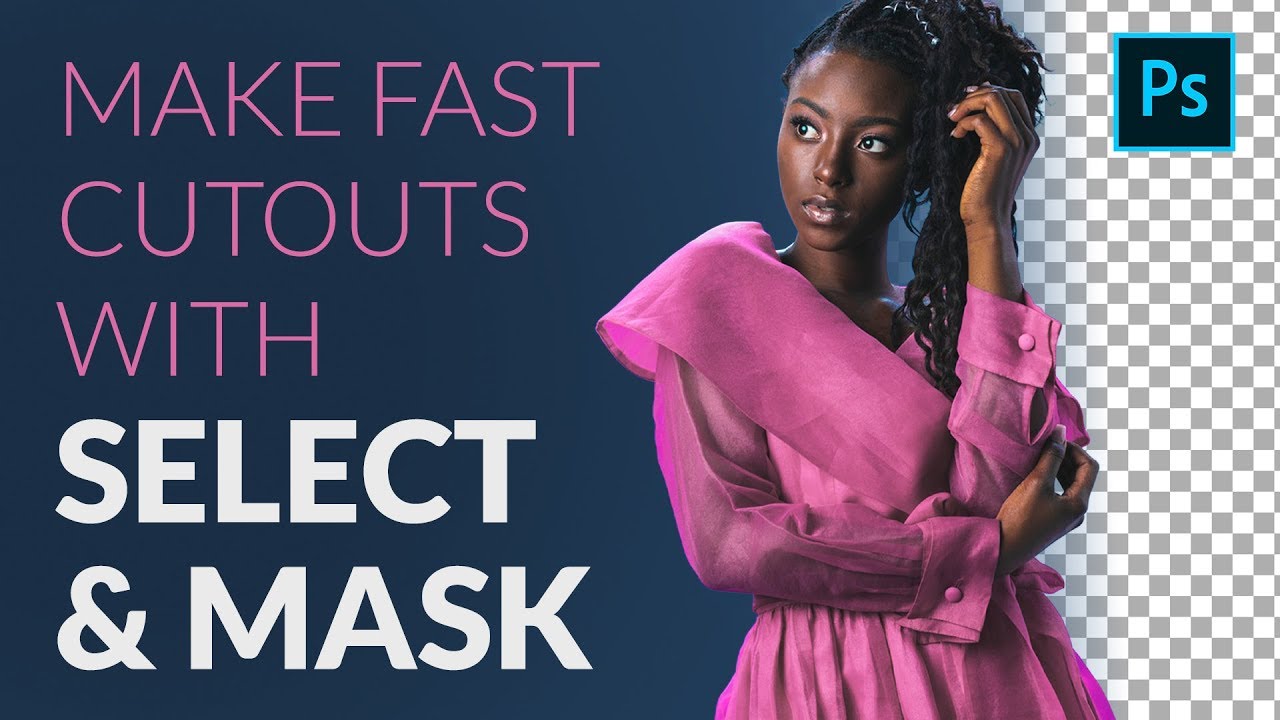
Every composite starts with the same problem: getting the subject off its original background cleanly enough that the new world you’re building around them feels believable. I’ve spent entire afternoons on a single strand of hair. I’ve rebuilt masks from scratch because the edge detail wasn’t holding up at print resolution. When you do this work professionally, on movie posters and album covers where people zoom into the files looking for mistakes, a sloppy cutout isn’t a minor flaw. It’s the thing that unravels the whole image.
So when I came across this tutorial by Aaron Nace over at PHLEARN, I paid attention. Not because I expected to learn something radically new, but because watching how another experienced operator moves through a problem teaches you things that reading documentation never will. The specific technique here, using Photoshop’s Select and Mask dialog to cut out a person quickly and then refining the hair separately, is exactly the kind of workflow shortcut that takes years to arrive at on your own. Watch the full tutorial on YouTube if you want to follow along with the video directly. Below, I’m walking through each step in enough detail that you can execute it without the video open.
One caveat before we start: this technique performs best when your subject is photographed against a simple, high-contrast background. A clean blue or green backdrop, even a plain white wall, gives the algorithm something unambiguous to grab onto. The messier the background, the more manual refinement you’ll need on the back end.
Step 1: Open Select and Mask from the Select Menu
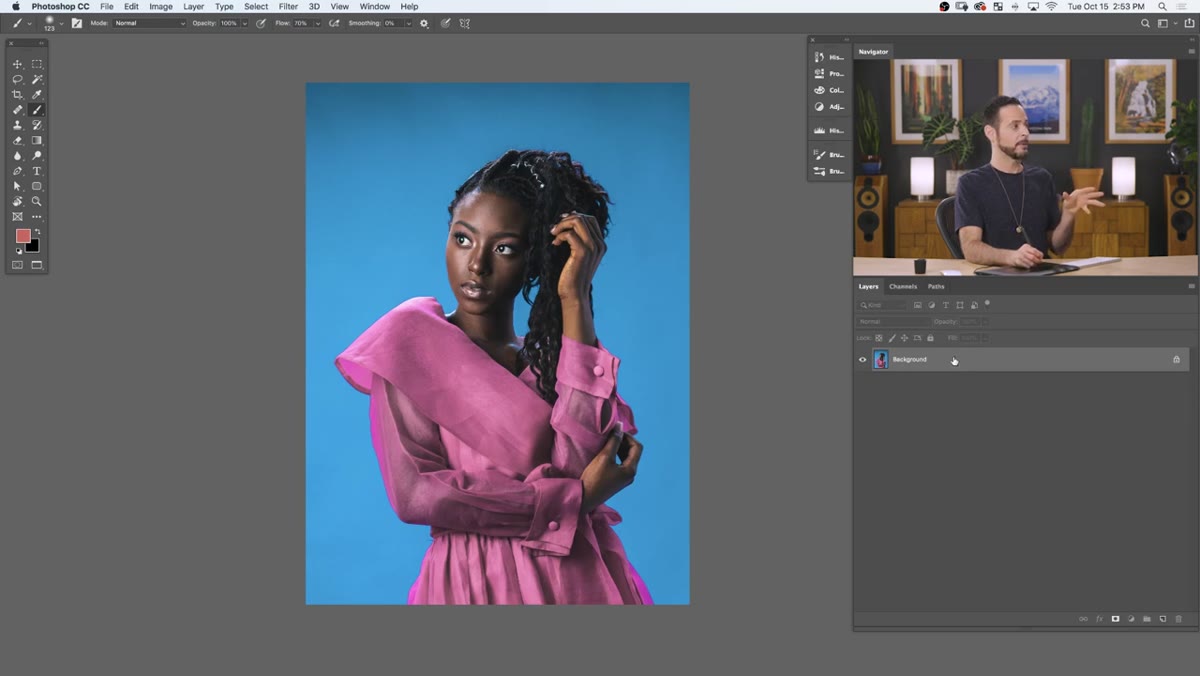 Select menu open, cursor hovering over Select and Mask
With your image open and your background layer selected in the Layers panel, go to Select in the top menu bar, then scroll down to Select and Mask. This opens a dedicated workspace that keeps your selection tools and refinement options all in one place. It is not just a dialog box. It is a full environment designed specifically for this kind of edge work, and it is worth getting comfortable in.
Select menu open, cursor hovering over Select and Mask
With your image open and your background layer selected in the Layers panel, go to Select in the top menu bar, then scroll down to Select and Mask. This opens a dedicated workspace that keeps your selection tools and refinement options all in one place. It is not just a dialog box. It is a full environment designed specifically for this kind of edge work, and it is worth getting comfortable in.
You do not need to make a rough selection before entering the workspace. Select and Mask handles the initial selection pass internally through its Quick Selection tool, which is the first tool in the toolbar on the left side of the workspace.
Step 2: Paint the Background with the Quick Selection Tool
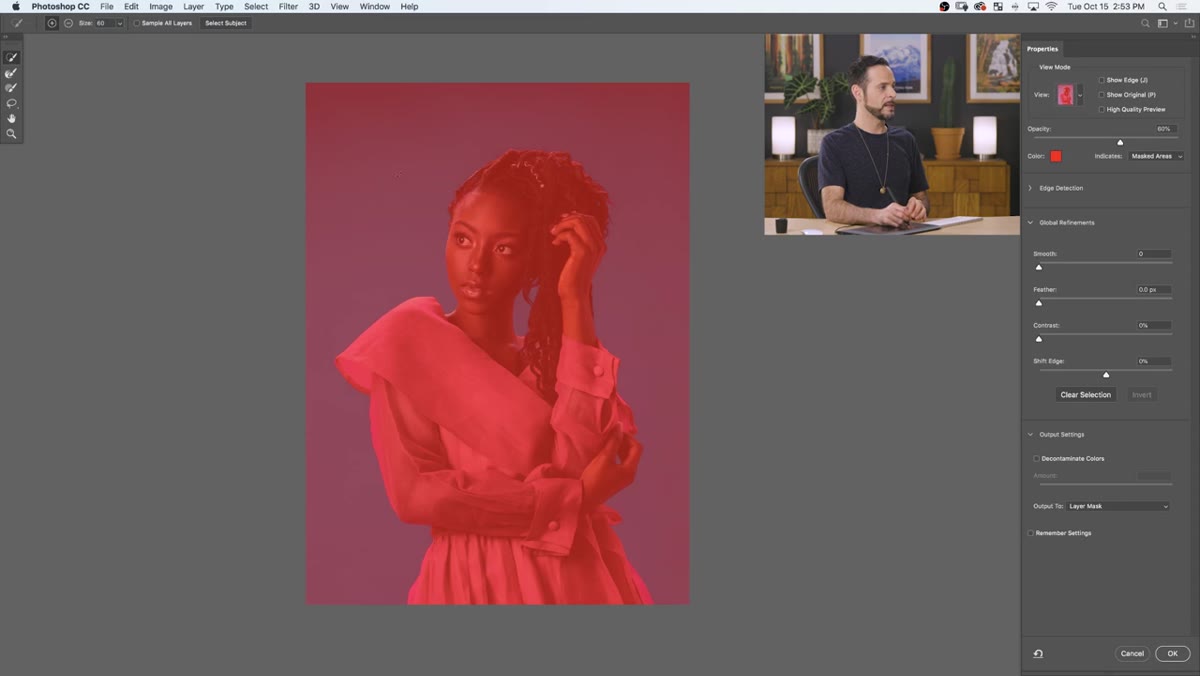 Quick Selection tool active, painting over the blue background
Select the Quick Selection tool from the top of the left toolbar inside the Select and Mask workspace. Then paint over the background, not the subject. The tool reads local color and contrast information and expands the selection outward to find the natural edge of the shape you are painting over. On a simple background like a solid blue, it moves fast. A few broad strokes covering most of the background is typically enough to get a working rough selection.
Quick Selection tool active, painting over the blue background
Select the Quick Selection tool from the top of the left toolbar inside the Select and Mask workspace. Then paint over the background, not the subject. The tool reads local color and contrast information and expands the selection outward to find the natural edge of the shape you are painting over. On a simple background like a solid blue, it moves fast. A few broad strokes covering most of the background is typically enough to get a working rough selection.
Do not worry about perfection here. The hair, fine fabric edges, and anything else with soft or complex edges will be handled separately. The goal at this stage is a reasonably clean selection of the background mass. Paint into the corners, get the large areas covered, and move on.
Step 3: Output the Selection as a Layer Mask
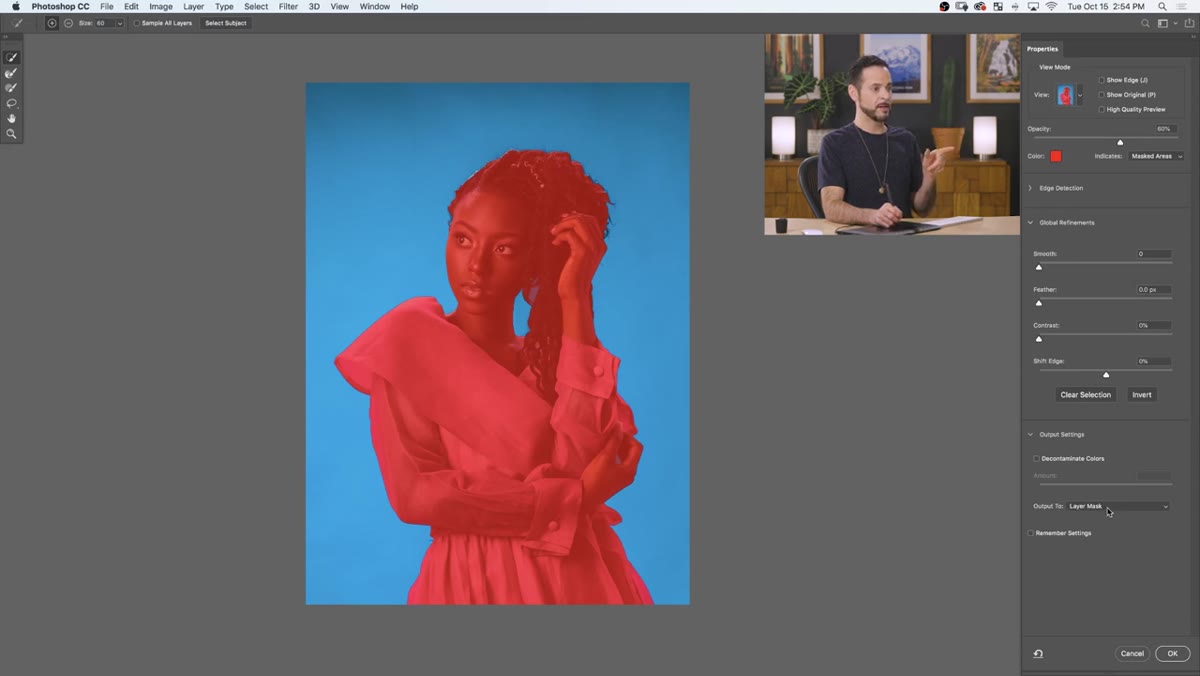 Output To dropdown showing Layer Mask option selected
At the bottom of the Select and Mask properties panel on the right side, you will find an Output To dropdown menu. Set this to Layer Mask. Leave the other output options alone for now. Hit OK, and Photoshop will apply the selection as a mask directly to your layer.
Output To dropdown showing Layer Mask option selected
At the bottom of the Select and Mask properties panel on the right side, you will find an Output To dropdown menu. Set this to Layer Mask. Leave the other output options alone for now. Hit OK, and Photoshop will apply the selection as a mask directly to your layer.
Here is the catch: because you selected the background rather than the subject, the mask will be inverted from what you need. The subject will be hidden and the background will be visible. Click on the layer mask thumbnail in the Layers panel to make sure it is active, then press Ctrl+I on Windows or Command+I on Mac to invert the mask. Now the subject is visible and the background is knocked out.
Step 4: Add a Temporary Background Color
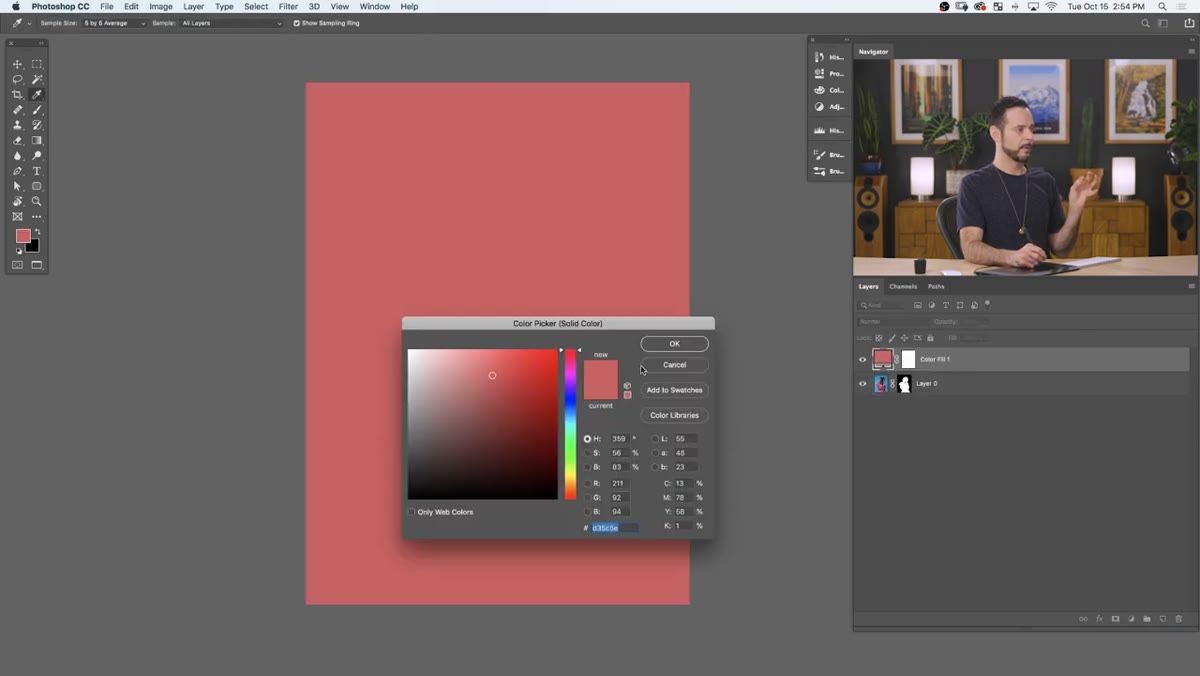 Solid color fill layer placed beneath the subject layer
Before refining the mask, create a solid color fill layer and place it directly beneath your subject layer. Use a color that is noticeably different from both the original background and the subject’s clothing or skin. A saturated teal or warm orange works well because it makes any leftover fringe color from the original background immediately visible.
Solid color fill layer placed beneath the subject layer
Before refining the mask, create a solid color fill layer and place it directly beneath your subject layer. Use a color that is noticeably different from both the original background and the subject’s clothing or skin. A saturated teal or warm orange works well because it makes any leftover fringe color from the original background immediately visible.
This is a diagnostic layer as much as a design choice. The contrast between your new background and any color contamination bleeding through the mask edges tells you exactly where the mask needs work. In this case, you will likely see blue fringing around the hair.
Step 5: Reopen Select and Mask and Use the Refine Edge Brush
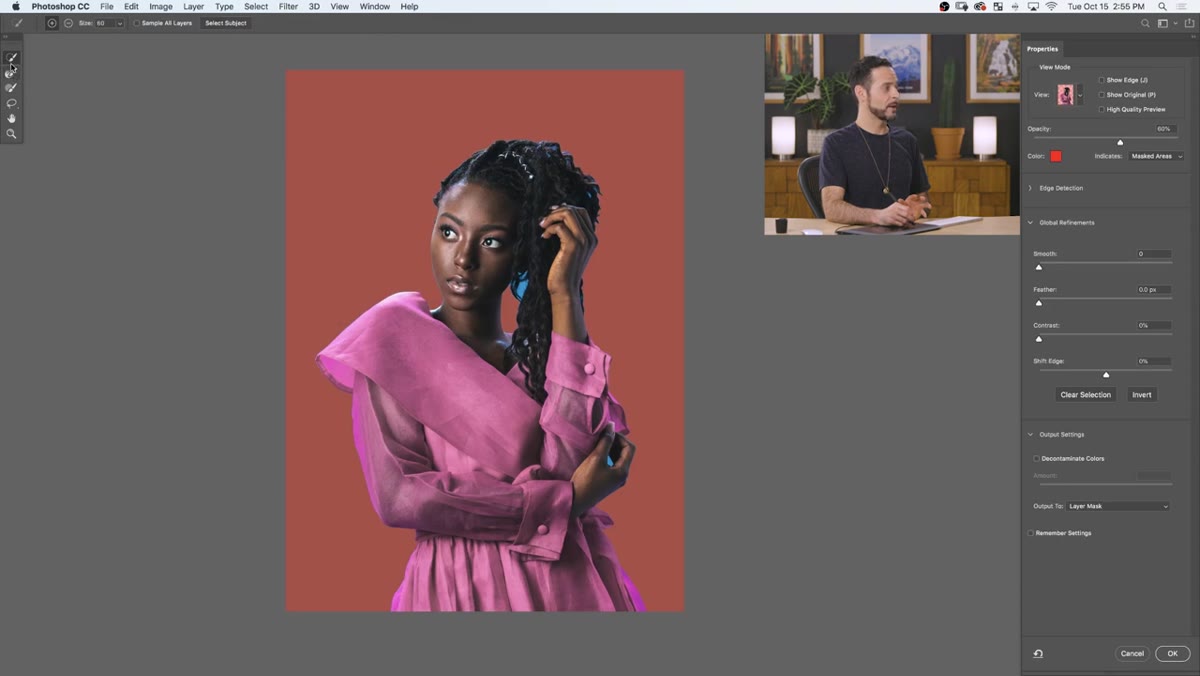 Refine Edge Brush tool active, painting over subject’s hair strands
Click on the layer mask thumbnail to select it, then go back to Select and Mask through the Select menu. This time, choose the Refine Edge Brush tool, which sits just below the Quick Selection tool in the left toolbar. It looks like a brush with a dotted circle around it.
Refine Edge Brush tool active, painting over subject’s hair strands
Click on the layer mask thumbnail to select it, then go back to Select and Mask through the Select menu. This time, choose the Refine Edge Brush tool, which sits just below the Quick Selection tool in the left toolbar. It looks like a brush with a dotted circle around it.
Paint directly over the hair. Cover the full edge zone, the area where individual strands are blending into what used to be the background. The algorithm analyzes the pixel data in that region and recalculates the mask to preserve fine detail while dropping the background color. It works by detecting the difference between foreground texture and background color, even when individual pixels contain both. Paint slowly enough to cover all the hair, but you do not need multiple passes. One thorough pass is usually enough. Set the output to Layer Mask again and hit OK. The hair edge will update automatically.
Step 6: Add a Finishing Light with a Curves Adjustment
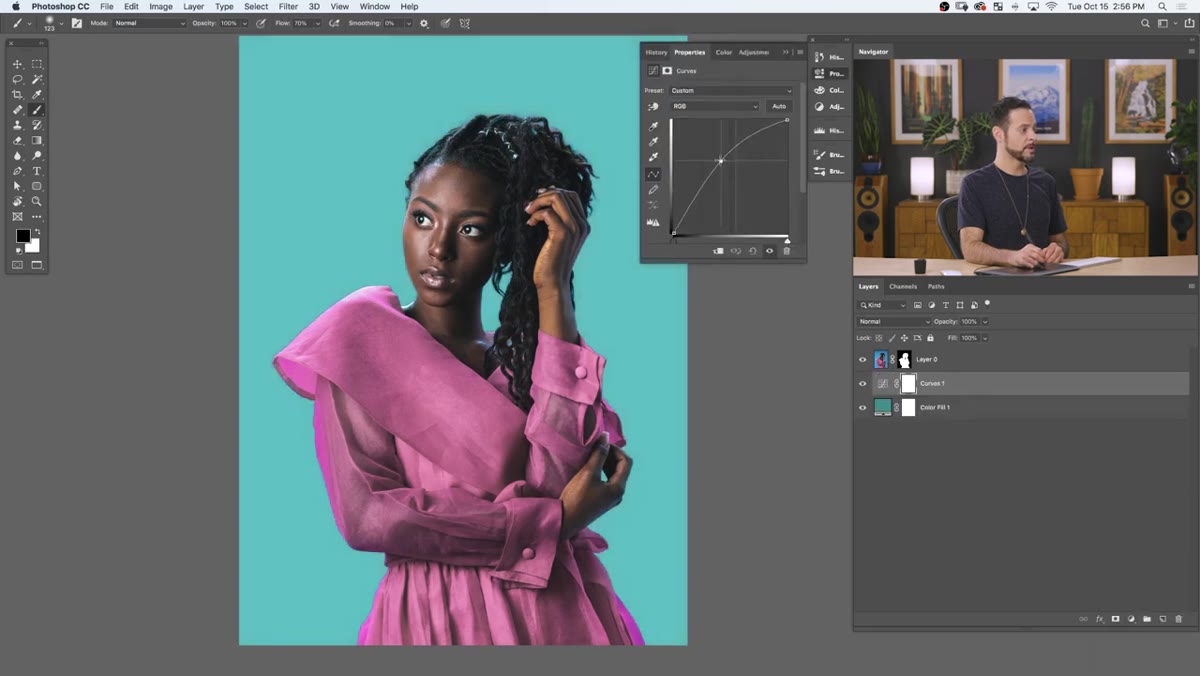 Curves adjustment layer with radial gradient mask creating backlight effect
Once the mask is clean, a simple curves adjustment can sell the composite. Create a Curves adjustment layer above the subject layer, pull the center of the curve upward to increase brightness, and then invert the layer mask attached to that adjustment layer by pressing Ctrl+I or Command+I. This hides the brightening effect entirely.
Curves adjustment layer with radial gradient mask creating backlight effect
Once the mask is clean, a simple curves adjustment can sell the composite. Create a Curves adjustment layer above the subject layer, pull the center of the curve upward to increase brightness, and then invert the layer mask attached to that adjustment layer by pressing Ctrl+I or Command+I. This hides the brightening effect entirely.
Now select the Gradient tool, set it to Radial gradient, make sure your foreground color is white, and draw a gradient from the center of where you want the light to originate outward. This reveals the brightening effect in a circular fade, simulating a light source behind or around the subject. Scale and reposition the result using Free Transform if the falloff needs adjustment. It is a small finishing move that gives the composite a sense of depth it would not otherwise have.
What I Do Differently in Production Work
The Select and Mask approach gets you 80 to 90 percent of the way there remarkably fast. For quick turnarounds, that is often enough. But for print work, I always zoom into the mask at 100 percent and check the edges manually before signing off. Specifically, I look at areas where the subject’s clothing meets the background, because the Refine Edge Brush is optimized for hair and fur textures. Hard-edged fabric can sometimes come out slightly soft when you have been aggressive with the refinement brush. In those cases, a quick cleanup pass with a hard-edged brush directly on the mask, painting black to sharpen the edge, takes less than a minute and removes any ambiguity.
I also keep the diagnostic background layer in the file until the very end of the project. Colors shift as you add adjustment layers and blend modes above the stack, and that high-contrast fill color keeps edge contamination visible throughout the process rather than letting it hide until you flatten for delivery.
The single most important thing Aaron demonstrates in this tutorial is the separation of concerns: rough selection first, hair refinement second. Trying to do both in one pass almost always produces a worse result than handling them in sequence. Build the rough mask, then go back and fix what the first pass couldn’t handle. That order of operations applies well beyond this one dialog.
Watch the full tutorial on YouTube to see the real-time speed at which this workflow moves. Seeing it executed without hesitation is its own kind of instruction.
Comments (3)
Simple but effective. Sometimes that's all you need.
Never thought of approaching it this way. Really creative.
This is the kind of content that keeps me coming back.
Leave a Comment