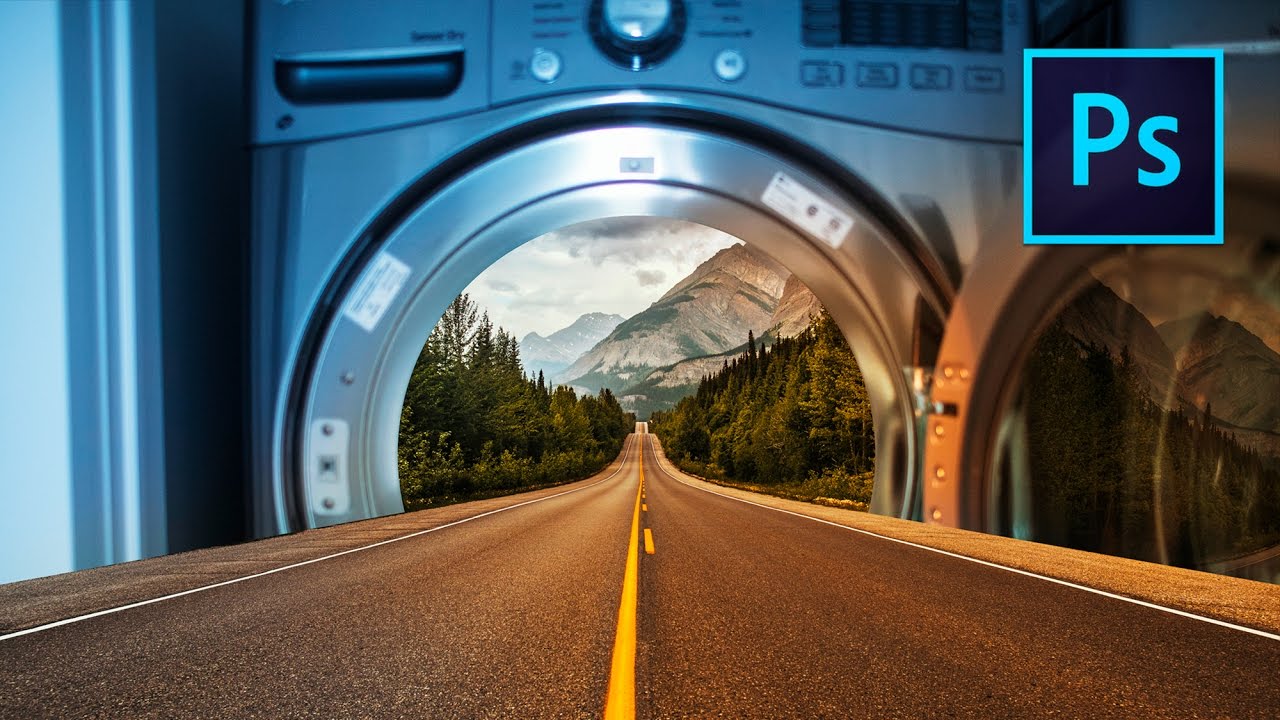
Every composite artist hits the same wall eventually. You’ve got a folder full of strong individual shots, landscapes and portraits and textures, but nothing that belongs together. You’re waiting for the perfect concept to arrive fully formed instead of building one from what you already have. I’ve been doing this professionally for over a decade, working on movie posters and album art, and I still fall into that trap. What snapped me out of it recently was watching Peter McKinnon approach compositing from a completely different angle. In Watch the full tutorial on YouTube, he builds a fantasy composite by opening a clothes dryer and dropping a national park inside it. Absurd on paper. Visually stunning in practice.
What McKinnon is really teaching here isn’t a Photoshop technique so much as a way of seeing. A dryer door becomes a portal. A refrigerator becomes a window. The composite isn’t created in software, it’s conceived the moment you stop walking past ordinary objects and start asking what they could contain. That shift in perception is what separates artists who have a limitless supply of ideas from those who are always waiting for inspiration. The technical execution in this tutorial is accessible enough for intermediate Photoshop users, but the conceptual framework underneath it is worth paying attention to no matter where you are in your career.
The breakdown below follows the actual tutorial sequence. I’ve added context where my own workflow diverges, but the core steps are McKinnon’s.
Step 1: Shoot with the composite in mind
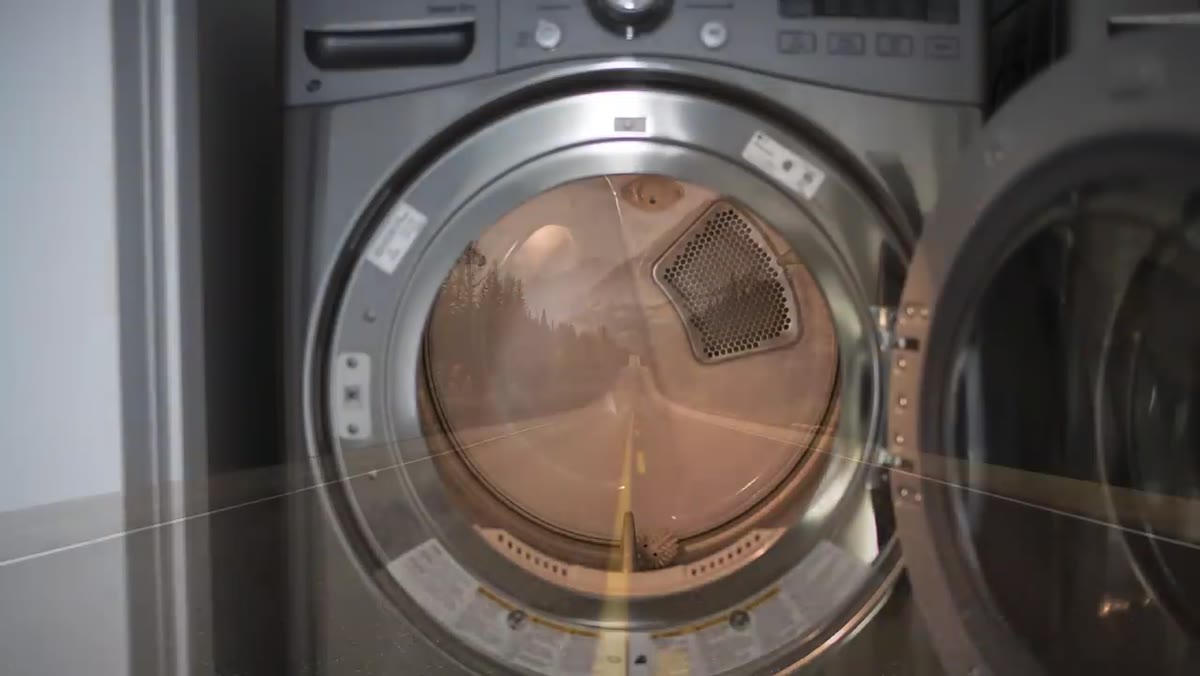 Before and after fantasy composite photos side by side
This is the step that happens before Photoshop opens, and it’s the one most tutorials skip. McKinnon’s concept is built around a physical object that frames the secondary scene, in this case a clothes dryer with a circular door opening. The key is that the object creates a natural boundary between two worlds. When you’re scouting your own subject, think about openings: doors, windows, mirrors, pots, jars, picture frames. The frame doesn’t have to make logical sense. It has to create visual tension between what’s inside and what’s outside.
Before and after fantasy composite photos side by side
This is the step that happens before Photoshop opens, and it’s the one most tutorials skip. McKinnon’s concept is built around a physical object that frames the secondary scene, in this case a clothes dryer with a circular door opening. The key is that the object creates a natural boundary between two worlds. When you’re scouting your own subject, think about openings: doors, windows, mirrors, pots, jars, picture frames. The frame doesn’t have to make logical sense. It has to create visual tension between what’s inside and what’s outside.
Shoot both elements separately. Your “container” object and your secondary landscape or scene don’t need to be photographed at the same time or in the same light, because you’ll be adjusting both in post. What matters is that you’ve thought about scale and perspective before you sit down to edit. I sketch every composite on paper before opening Photoshop. Even a rough thumbnail forces you to commit to a light direction and a focal point, which saves hours of second-guessing later.
Step 2: Open and adjust your base image in Camera Raw
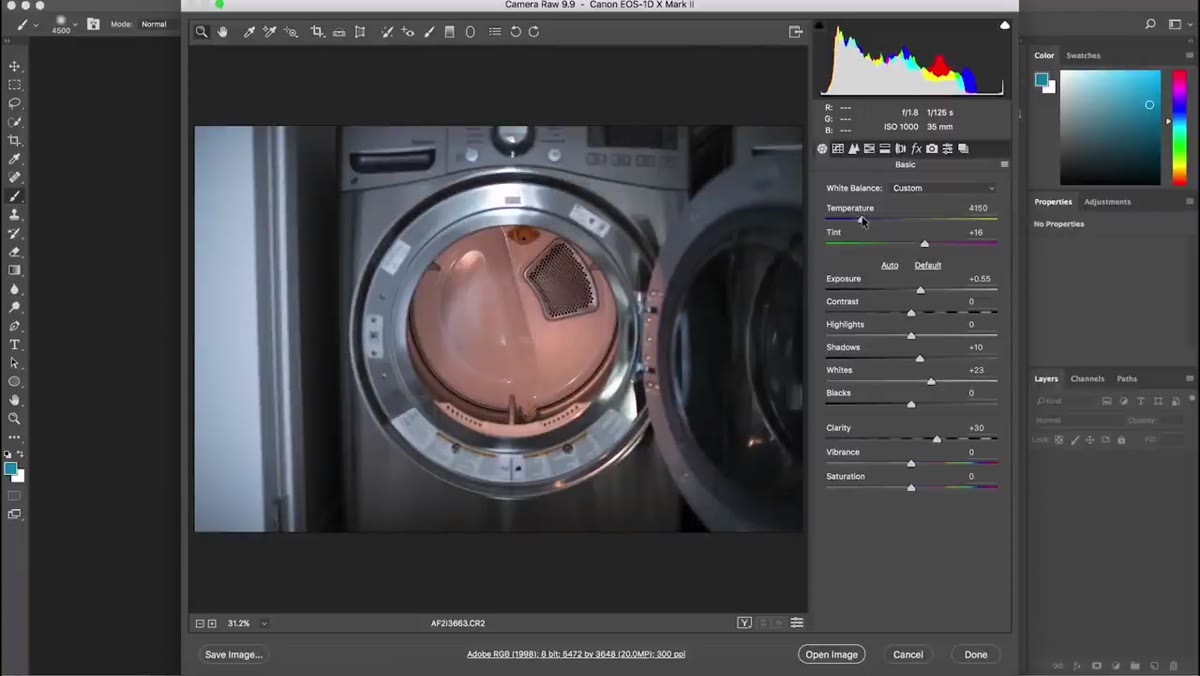
 Camera Raw interface with dryer photo open and sliders adjusted
Bring your primary “container” image into Photoshop. It will open in Camera Raw first, which is where you want to make your foundational exposure and color decisions. McKinnon pushes his version toward a cooler, bluer tone deliberately. He doesn’t explain why until later in the video, but the logic is sound: he’s pre-matching the mood of the landscape he plans to drop inside. If your secondary image has a golden hour warmth, warm up your base. If it’s a moody overcast scene, cool it down. Making these decisions in Camera Raw is non-destructive and gives you far more latitude than trying to color-correct later with adjustment layers.
Camera Raw interface with dryer photo open and sliders adjusted
Bring your primary “container” image into Photoshop. It will open in Camera Raw first, which is where you want to make your foundational exposure and color decisions. McKinnon pushes his version toward a cooler, bluer tone deliberately. He doesn’t explain why until later in the video, but the logic is sound: he’s pre-matching the mood of the landscape he plans to drop inside. If your secondary image has a golden hour warmth, warm up your base. If it’s a moody overcast scene, cool it down. Making these decisions in Camera Raw is non-destructive and gives you far more latitude than trying to color-correct later with adjustment layers.
Once your exposure, white balance, and tone curve are where you want them, click “Open Image” to bring the file into the main Photoshop workspace.
Step 3: Duplicate the background layer
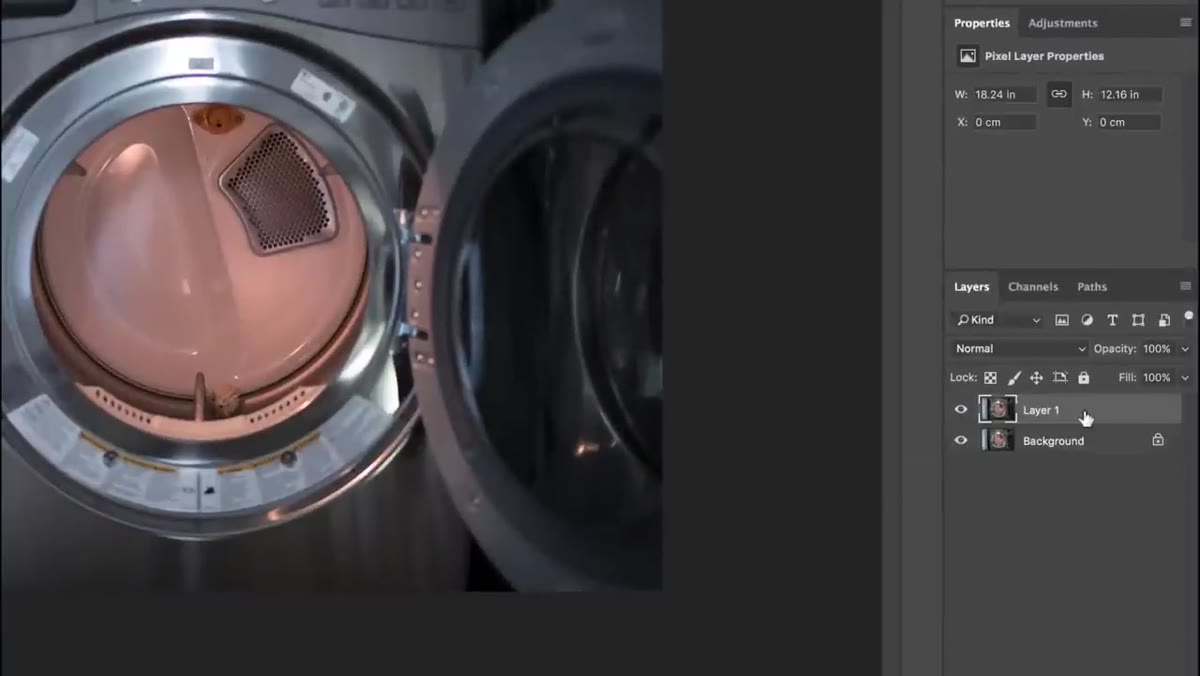 Layers panel showing duplicated background layer with Command J
Before touching anything else, duplicate your background layer using Command+J (Mac) or Ctrl+J (Windows). This is a non-negotiable habit. Your original layer stays locked at the bottom as a reference you can always return to. Everything you do from this point forward happens on the duplicate or on new layers above it. It sounds basic, but the number of composites I’ve seen ruined by someone editing directly on the background layer is not small.
Layers panel showing duplicated background layer with Command J
Before touching anything else, duplicate your background layer using Command+J (Mac) or Ctrl+J (Windows). This is a non-negotiable habit. Your original layer stays locked at the bottom as a reference you can always return to. Everything you do from this point forward happens on the duplicate or on new layers above it. It sounds basic, but the number of composites I’ve seen ruined by someone editing directly on the background layer is not small.
Working with your duplicate selected, you’re now ready to start isolating the opening in your container object.
Step 4: Select and isolate the opening
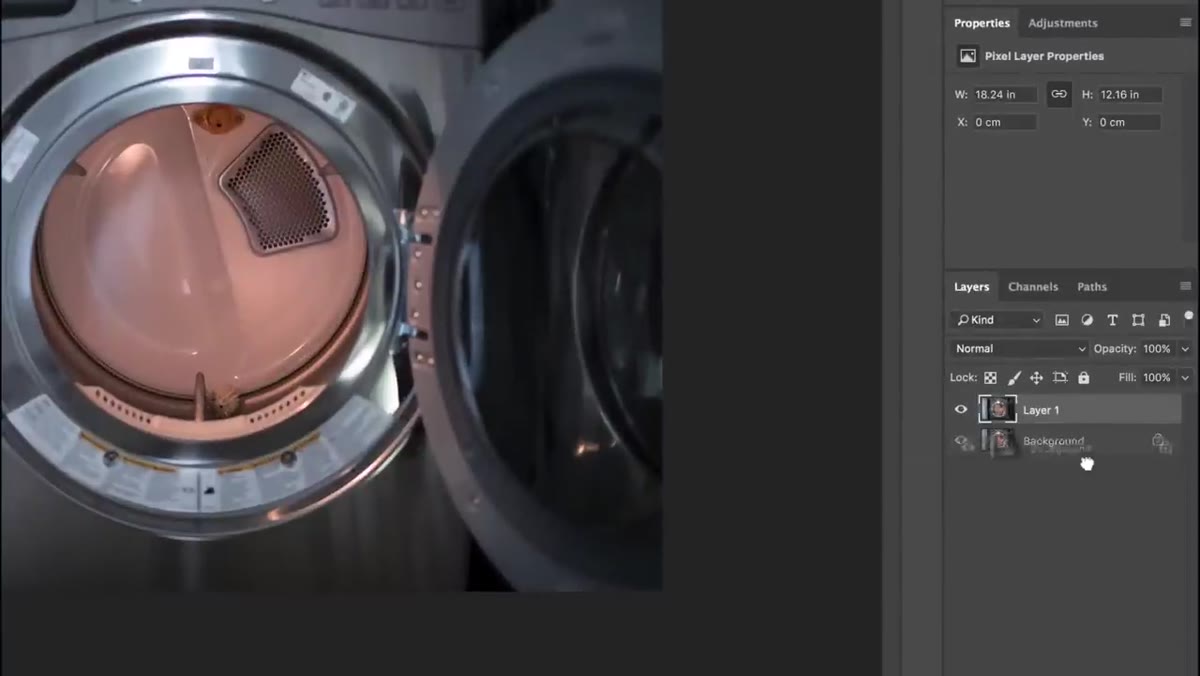 Selection tool being used to isolate the dryer door opening
This is the technical heart of the whole composite. You need to create a clean selection of the interior opening in your container object, the drum of the dryer, the inside of the fridge, whatever you’re using. McKinnon uses this selection to define exactly where the landscape will appear. The cleaner this selection, the more convincing the final result.
Selection tool being used to isolate the dryer door opening
This is the technical heart of the whole composite. You need to create a clean selection of the interior opening in your container object, the drum of the dryer, the inside of the fridge, whatever you’re using. McKinnon uses this selection to define exactly where the landscape will appear. The cleaner this selection, the more convincing the final result.
For a circular or irregular opening, the Elliptical Marquee tool works as a starting point, but you’ll likely want to refine it with the Pen tool for accuracy, especially if the opening has perspective or distortion. If your object is photographed at an angle, the ellipse of the opening won’t be a perfect circle. Match the actual shape of what’s in your photo, not an idealized version of it. A slightly imperfect mask that follows the real geometry will always read as more believable than a perfect geometric shape that ignores the optics of the lens.
Step 5: Place and warp your secondary image into the selection
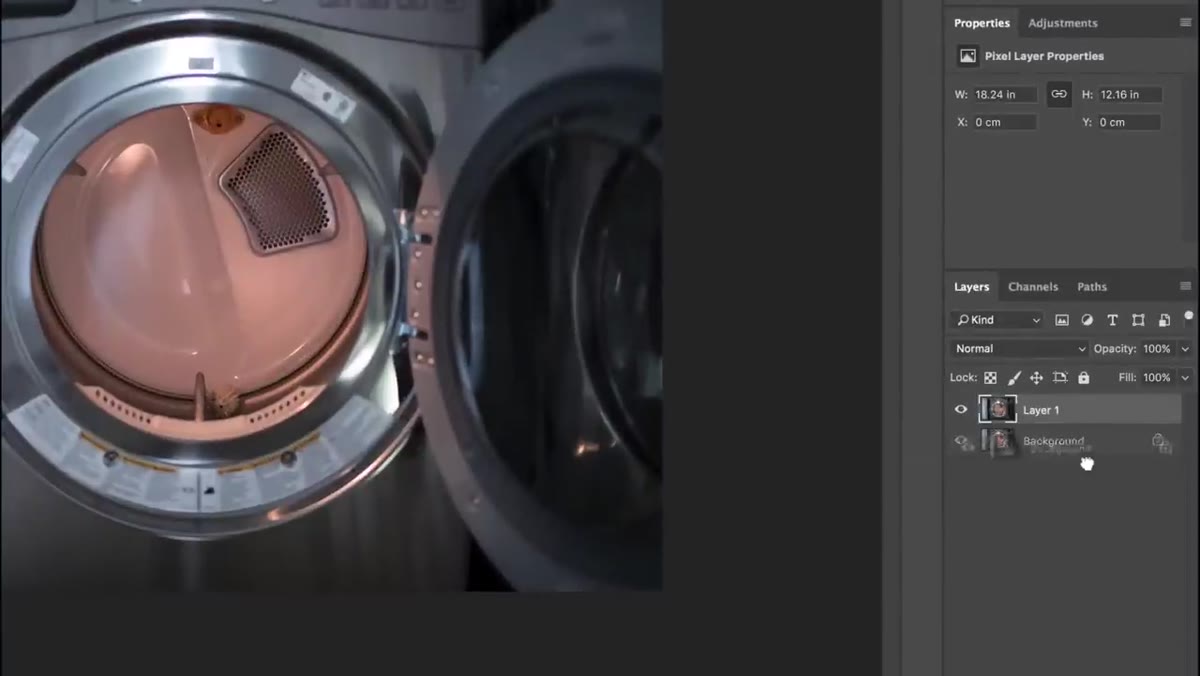 Landscape image being placed inside the dryer drum selection
With your selection active, bring in your secondary image as a new layer placed directly above the base. Use Edit > Transform > Warp or Perspective Warp to fit the landscape into the shape and angle of your opening. The goal is to make the scene look like it exists inside the container, not like it’s been dropped on top of it. Pay attention to the edges: any straight horizon line in the landscape will need to curve slightly if the opening has any barrel distortion from your lens.
Landscape image being placed inside the dryer drum selection
With your selection active, bring in your secondary image as a new layer placed directly above the base. Use Edit > Transform > Warp or Perspective Warp to fit the landscape into the shape and angle of your opening. The goal is to make the scene look like it exists inside the container, not like it’s been dropped on top of it. Pay attention to the edges: any straight horizon line in the landscape will need to curve slightly if the opening has any barrel distortion from your lens.
Clip the landscape layer to your selection so it only shows through the masked opening. This keeps the exterior of your container object intact while the interior becomes a window into somewhere else entirely.
Step 6: Unify the light and color between both images
 Color and tone adjustments being applied to composite layers
This is where composites live or die. McKinnon’s decision to shift the base image toward blue in Camera Raw was about meeting the landscape halfway on color temperature. Now you do the fine-tuning. Add a Hue/Saturation or Color Balance adjustment layer clipped to your landscape layer and pull it toward the ambient light color of your container scene. Add a soft gradient or a Curves adjustment to darken the edges of the landscape where it meets the interior walls of the opening.
Color and tone adjustments being applied to composite layers
This is where composites live or die. McKinnon’s decision to shift the base image toward blue in Camera Raw was about meeting the landscape halfway on color temperature. Now you do the fine-tuning. Add a Hue/Saturation or Color Balance adjustment layer clipped to your landscape layer and pull it toward the ambient light color of your container scene. Add a soft gradient or a Curves adjustment to darken the edges of the landscape where it meets the interior walls of the opening.
Shadows are the detail that separates a composite that reads as real from one that just looks like a collage. Add a subtle shadow or darkening along the rim where the outside world meets the inside world. Even a few pixels of darkened edge sells the depth of the opening.
What I’d add from my own practice
McKinnon’s tutorial is clean and efficient, but there’s one step I always include that he doesn’t show here: adding atmospheric haze between the foreground object and the background scene. A very low-opacity layer of the background image’s color, blurred out and set to Screen or Soft Light mode, creates the sense that light is actually spilling out of the opening. It’s the difference between two images touching and two worlds interacting. On the album cover work I’ve done, this single adjustment has been the thing art directors respond to most without being able to name exactly why.
The other habit worth building is McKinnon’s conceptual starting point. Look at your existing photo archive before you pick up a camera. That shot you took eighteen months ago of light coming through a barn door might be exactly what you need to drop into something you photograph this weekend. The best composite ingredient is often already sitting in a folder you’ve forgotten about.
The most important thing this tutorial reinforces is that a compelling fantasy composite starts with a simple perceptual question: what if this ordinary thing contained something extraordinary? The Photoshop technique is the easy part. Learning to ask that question every time you open a dryer or a fridge or a car door, that takes practice.
Watch the full tutorial on YouTube to see Peter McKinnon build this from start to finish, including the Camera Raw adjustments and the final color grade.
Comments (3)
Finally someone explains this in a way that actually makes sense.
Clear and practical. No fluff. Appreciate that.
I tried this on a client project yesterday and the results were way better than expected.
Leave a Comment