Every composite I build starts with a sketch on paper. It is a habit I cannot shake, and honestly I do not want to. But there is a specific problem that sketch cannot solve: I can draw a teacup mid-shatter, liquid arcing through the air, chaos frozen at the exact right millisecond. What I cannot draw is the light. Not the way it actually behaves when water is moving that fast, catching a strobe at a particular angle, throwing secondary reflections onto surfaces I did not plan for. That gap between the sketch and the physics is where composites fall apart or come together.
I have been thinking about this problem since taking on a project that required suspended liquid elements integrated into a dark, theatrical scene. The reference pulls looked incredible. My test shots looked like someone dropped a glass and grabbed a camera too late. That is when I found this breakdown.
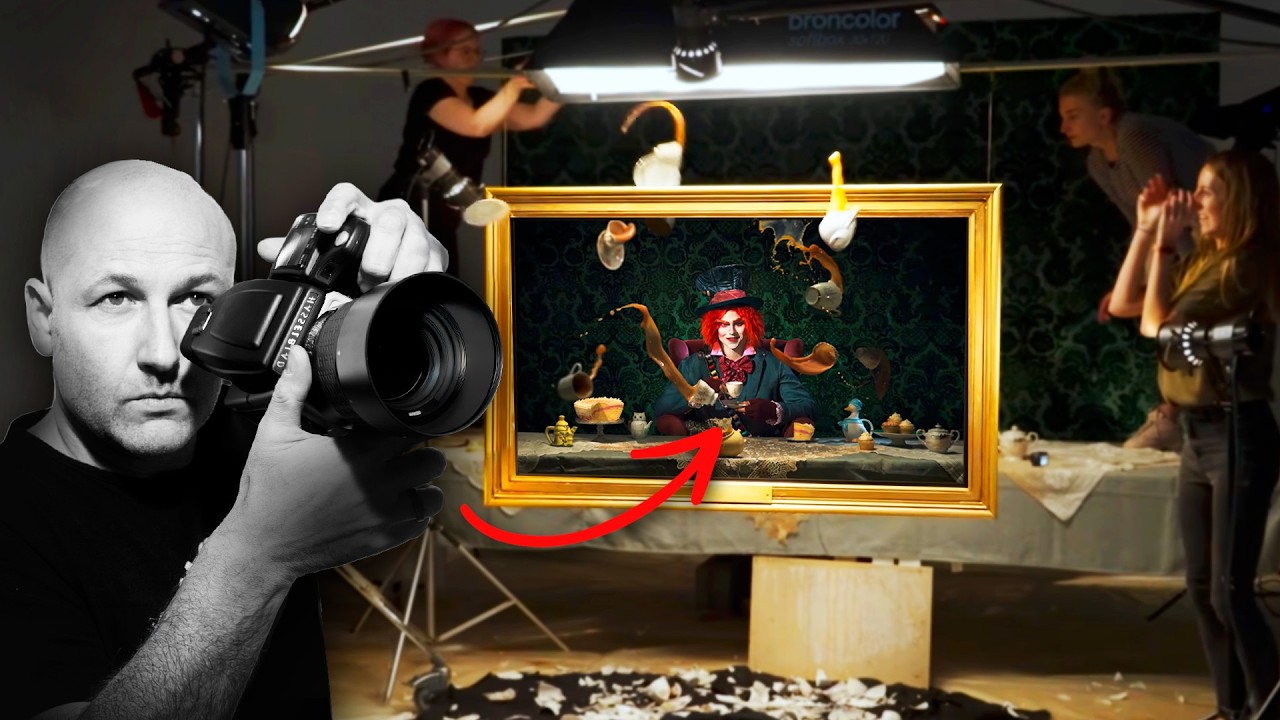
In this Visual Education tutorial, the team builds a full conceptual set inspired by the Mad Hatter’s tea party and uses it as a vehicle for teaching high-speed photography fundamentals. The scale is theatrical, but the creator is explicit: the same physics apply to a single glass of water on a kitchen table. That framing matters. It means you can test every principle here in an afternoon before committing it to a larger production.
Why the Set Design Is Actually a Lighting Document
The first thing I noticed is how much of the set construction is really a conversation about light control. Distressed props, dark wood, aged fabric. None of that is purely aesthetic. Every surface choice is a decision about how light will behave. Rough, weathered textures scatter light diffusely. That diffusion softens the hard specular highlights that would otherwise make composited liquid elements look pasted in.
The team deliberately built a low-key environment, what cinematographers call a dark field setup. When your background is absorbing light rather than reflecting it, your splashes and flying props become the brightest elements in the frame. That contrast is what sells the drama. It also gives you much more flexibility in post, because you are not fighting competing highlights when you try to integrate separately shot elements.
The Drop Test: Making Smashing Predictable
One of the most practically useful sections covers testing drop heights for crockery. This is not glamorous work. It is dropping plates from measured heights, documenting what breaks at what speed, and repeating until the behavior becomes predictable. The goal is consistency, not spectacle. A smash you cannot reproduce is useless on a composite shoot.
The principle carries directly into liquid work. Before any hero shot, the team runs timing tests on the pours and drops, adjusting the height of the liquid source and the delay between the pour trigger and the shutter. High-speed liquid photography is a timing problem dressed up as an aesthetic one. You are solving for a window that can be under ten milliseconds wide. Knowing your liquid’s behavior from a given height narrows that window into something you can reliably hit.
Strobe Timing and the Frozen Frame
The lighting setup here uses strobes rather than continuous light, and that choice is doing most of the technical heavy lifting. At the flash durations used for stopping fast motion, roughly 1/4000th of a second or shorter at high power, the strobe itself becomes the effective shutter. The camera shutter is open, but the strobe duration is what determines how sharp the freeze is.
The tutorial walks through the shaping of those strobes carefully. A key light is positioned to rake across the liquid at a low angle, which picks up the translucency and internal structure of the water. A second source, softer and positioned behind, creates separation between the splash and the dark background. The ratio between those two sources is what gives the liquid its three-dimensionality. Kill the backlight and the water reads flat. Kill the key and you lose the texture that makes it feel real.
Where I Would Push This Further (and Where I Have Burned Myself)
The tutorial focuses on capturing elements that will be used in composites, and it does that job well. What it does not address, understandably given the scope, is how those elements integrate once you are in Photoshop. Liquid is one of the hardest subjects to composite convincingly, and most of the failure points come down to edge luminosity and color temperature matching.
I spent a long stretch on an album cover project studying water in a controlled environment, specifically how the edges of a splash pick up ambient color. Clean white edges on a liquid cutout are the fastest way to signal to a viewer that something is wrong, even if they cannot name what they are seeing. The fix is in the capture: your set ambient needs to match the environment your splash will live in. If your final scene is warm candlelight, your splash environment cannot be lit with daylight-balanced strobes. I learned that the hard way. The failure is sitting in a folder I still review once a month to remind myself what I missed.
Controlled Chaos Is Just a Testing Loop
The most durable idea in this tutorial is the one the creator returns to throughout: unpredictability is a variable you can shrink. Chaos-looking results come from a methodical process of reducing unknowns. Drop height, pour timing, strobe duration, surface behavior. Each variable gets isolated, tested, and documented before it is combined with the others.
That is exactly how I approach complex composites, and it is good to see it applied on the capture side of the process.
Watch the full Visual Education tutorial for the visual demonstration of the strobe setups and timing sequences. Those are difficult to fully appreciate without seeing them in motion: https://www.youtube.com/watch?v=pTolK_UHKII
Comments
Leave a Comment