Every composite I build starts with a reference sketch on paper. I need to see the light logic before I open a single application. But there’s one category of problem that sketching can’t fully prepare you for: the moment a client hands you a group photo and says “can you adjust just his jacket?” or “her beard looks too light, can you deepen it?” In Photoshop, that kind of targeted isolation is a full production task. In Lightroom, it used to mean rough selections and a lot of cleanup. That’s changed.
Watch the full tutorial on YouTube
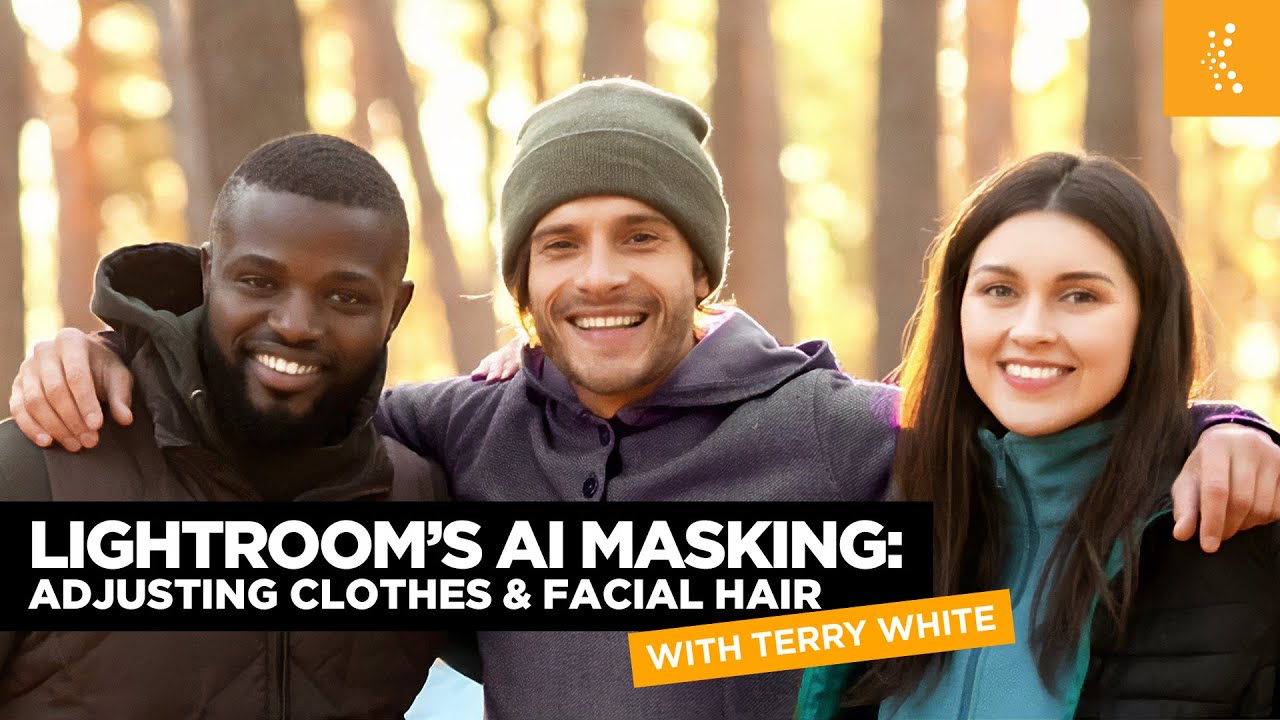
In this KelbyOne tutorial, photographer and educator Terry White walks through Lightroom’s AI-powered People masking to show just how granular the tool has become. Not “select a person and hope for the best” granular. We’re talking clothes, facial hair, and collar-level precision on multiple people in the same frame. For anyone doing editorial retouching, product photography with talent, or prep work before a composite, this is the kind of workflow that cuts hours off a session.
Step 1: Open the Masking Panel and Let AI Detect People
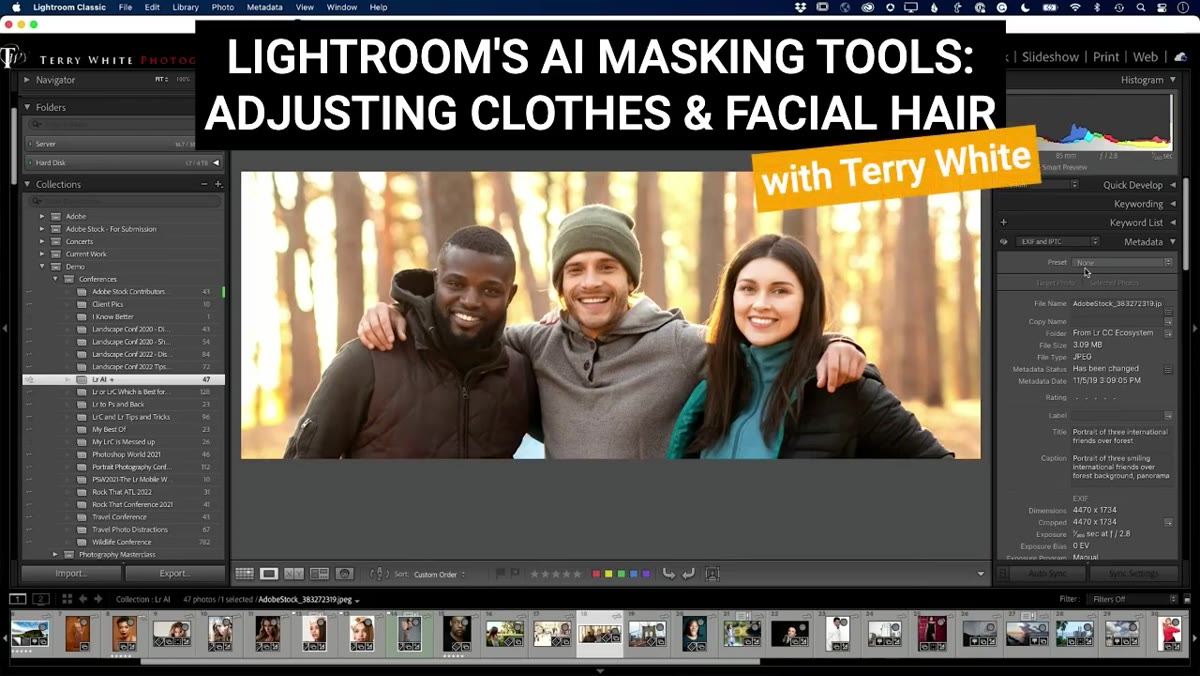 Masking panel open, three people detected in frame
Start in the Develop module with your group photo open. Click the Masking icon in the toolbar (it looks like a dotted circle) to open the Masking panel. From there, select “People” as your mask type. Lightroom’s AI will scan the image and return every identifiable person in the frame, labeled as Person 1, Person 2, and so on. The tool doesn’t assign names or priority, it just finds faces and figures. In the tutorial, a three-person shot is used, and all three subjects are detected cleanly.
Masking panel open, three people detected in frame
Start in the Develop module with your group photo open. Click the Masking icon in the toolbar (it looks like a dotted circle) to open the Masking panel. From there, select “People” as your mask type. Lightroom’s AI will scan the image and return every identifiable person in the frame, labeled as Person 1, Person 2, and so on. The tool doesn’t assign names or priority, it just finds faces and figures. In the tutorial, a three-person shot is used, and all three subjects are detected cleanly.
This detection step costs you nothing. Let it run. Even if you only intend to work on one person, letting the AI index everyone in the frame gives you flexibility to come back and adjust others without re-running detection.
Step 2: Select One Person and Target Their Clothing
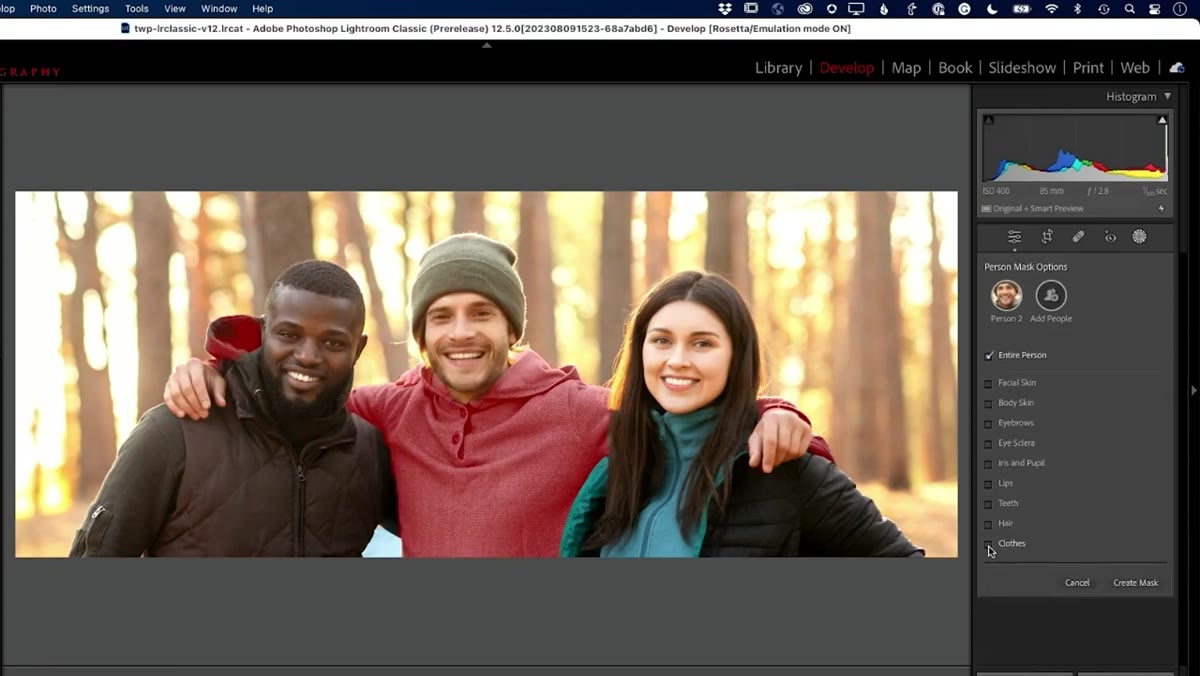 Person 2 selected, clothes mask option highlighted
Once people are detected, click on the individual you want to work on. You’ll see a breakdown of body-part masks available for that person. Select “Clothes” to generate a mask targeting only their outfit. Lightroom will create a red overlay showing what’s been selected. In the tutorial, the mask correctly identifies the subject’s top and even picks up detail around the neckline area.
Person 2 selected, clothes mask option highlighted
Once people are detected, click on the individual you want to work on. You’ll see a breakdown of body-part masks available for that person. Select “Clothes” to generate a mask targeting only their outfit. Lightroom will create a red overlay showing what’s been selected. In the tutorial, the mask correctly identifies the subject’s top and even picks up detail around the neckline area.
The mask won’t always be perfect on the first pass, and Terry is upfront about that. In this example, the subject’s hood gets picked up as part of the clothes mask, which makes sense to the algorithm but not necessarily to you as the editor. That’s where the next step becomes essential.
Step 3: Use Subtract to Remove Unwanted Areas from the Mask
 Subtract brush being applied to hood area
With your clothes mask active, click “Subtract” in the Masks panel and choose “Brush” as your subtraction tool. Paint over any area you don’t want included in the mask. In the tutorial, Terry brushes over the subject’s hoodie collar and hood to remove it from the selection. The adjustment sliders you apply afterward will then skip those areas entirely.
Subtract brush being applied to hood area
With your clothes mask active, click “Subtract” in the Masks panel and choose “Brush” as your subtraction tool. Paint over any area you don’t want included in the mask. In the tutorial, Terry brushes over the subject’s hoodie collar and hood to remove it from the selection. The adjustment sliders you apply afterward will then skip those areas entirely.
Keep your brush size tight for edges and details. This isn’t destructive, so work confidently. If you over-subtract (the tutorial briefly shows a hand turning an unintended color), just switch to “Add” and brush those pixels back in. The round-trip between Add and Subtract is fast, and zooming in before final cleanup makes a real difference.
Step 4: Adjust the Clothes, Then Check for Overlapping Body Parts
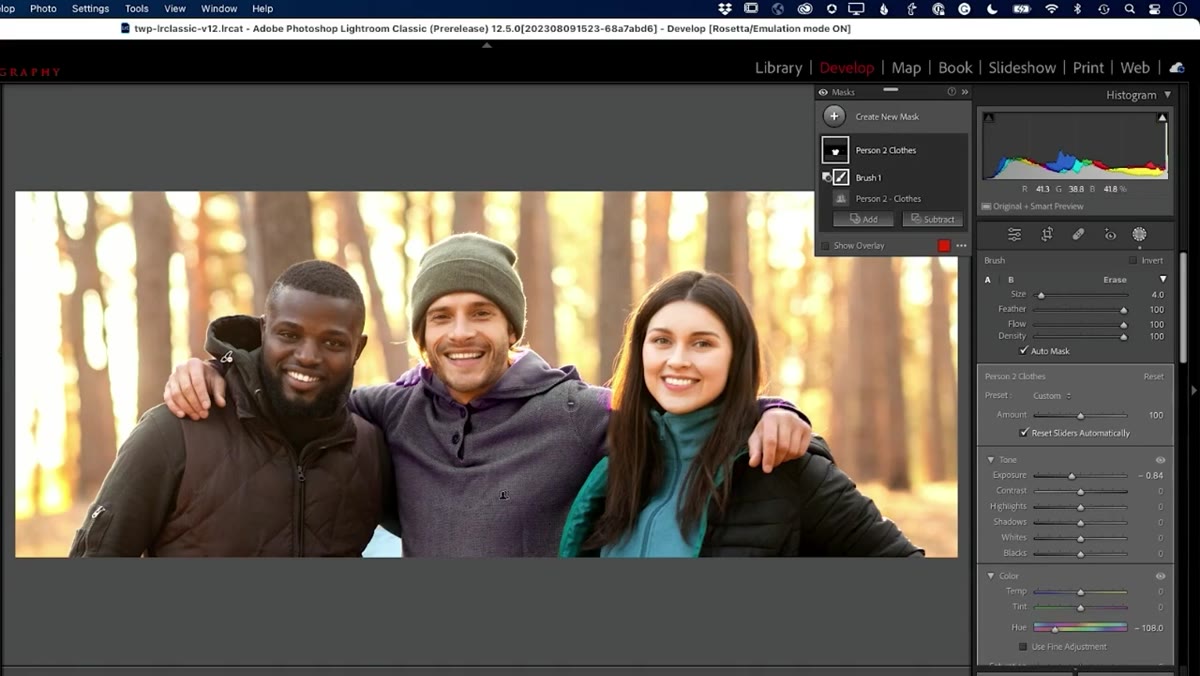 Hand of adjacent person caught inside clothes mask
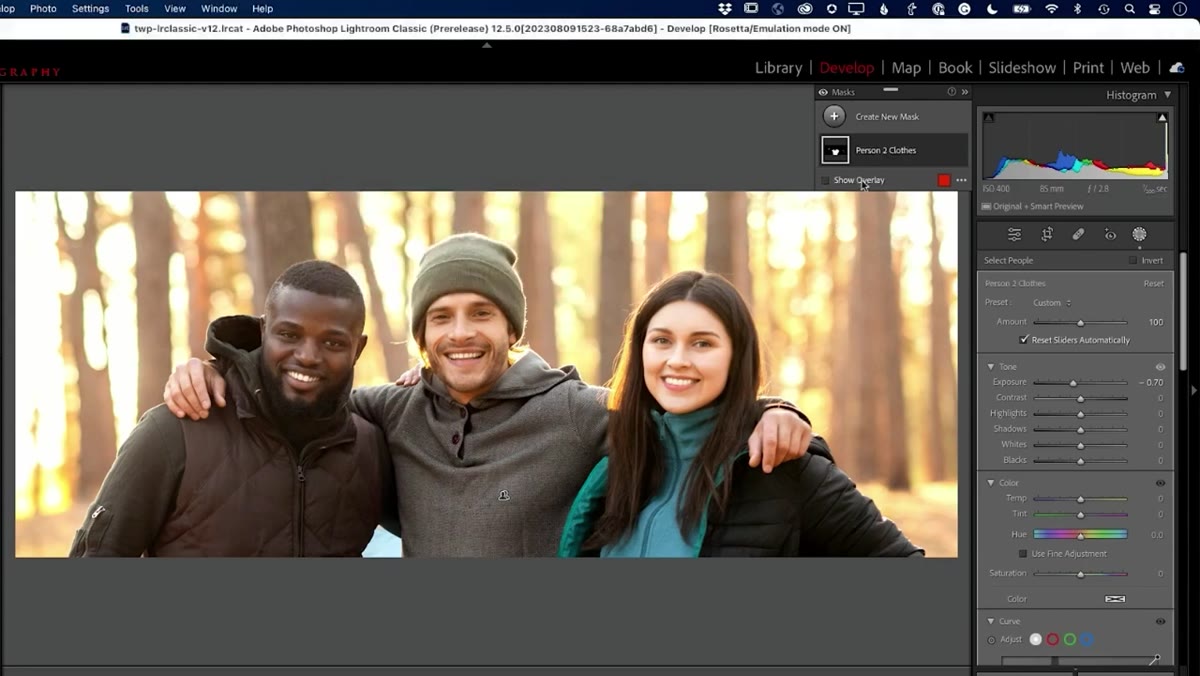
After subtracting unwanted areas, make your tonal or color adjustments to the clothes. Exposure, HSL color sliders, or even a hue shift are all on the table. In the tutorial, a color shift is applied to the middle subject’s outfit as a quick demonstration of what’s possible.
Hand of adjacent person caught inside clothes mask
After subtracting unwanted areas, make your tonal or color adjustments to the clothes. Exposure, HSL color sliders, or even a hue shift are all on the table. In the tutorial, a color shift is applied to the middle subject’s outfit as a quick demonstration of what’s possible.
Before you finalize the adjustment, zoom in on any area where subjects are physically close or overlapping. In group shots, hands, arms, and shoulders often fall across body-part boundaries. The AI makes a best guess, but it can’t always tell whose hand belongs to whom. A quick scan at 100% and a few brush strokes of subtraction will save you from delivering a retouch where someone’s fingers are the wrong color.
Step 5: Create a Separate Mask for Facial Hair
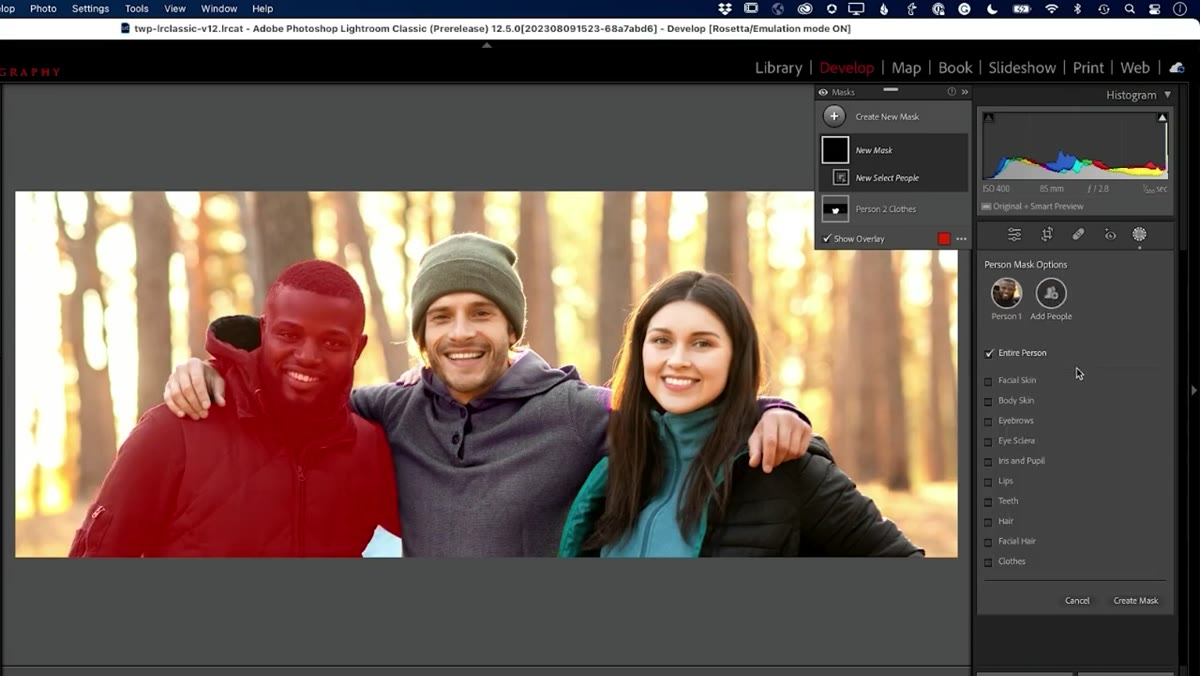 Facial hair mask selected, red overlay on beard area
Return to the People masking menu and select a different subject, or stay with the same one if they have visible facial hair. Choose “Facial Hair” from the body-part options. Lightroom will generate a mask that follows the beard, mustache, or stubble contours closely. The red overlay in the tutorial sits cleanly on the subject’s beard with minimal bleed into surrounding skin.
Facial hair mask selected, red overlay on beard area
Return to the People masking menu and select a different subject, or stay with the same one if they have visible facial hair. Choose “Facial Hair” from the body-part options. Lightroom will generate a mask that follows the beard, mustache, or stubble contours closely. The red overlay in the tutorial sits cleanly on the subject’s beard with minimal bleed into surrounding skin.
This is the kind of selection that used to require a combination of Color Range, luminosity masks, and hand-painting in Photoshop. The fact that it’s a one-click starting point in Lightroom doesn’t mean the result is always perfect, but as a base for retouching, it’s genuinely impressive.
Step 6: Use the Tone Curve Instead of Exposure for Facial Hair Adjustments
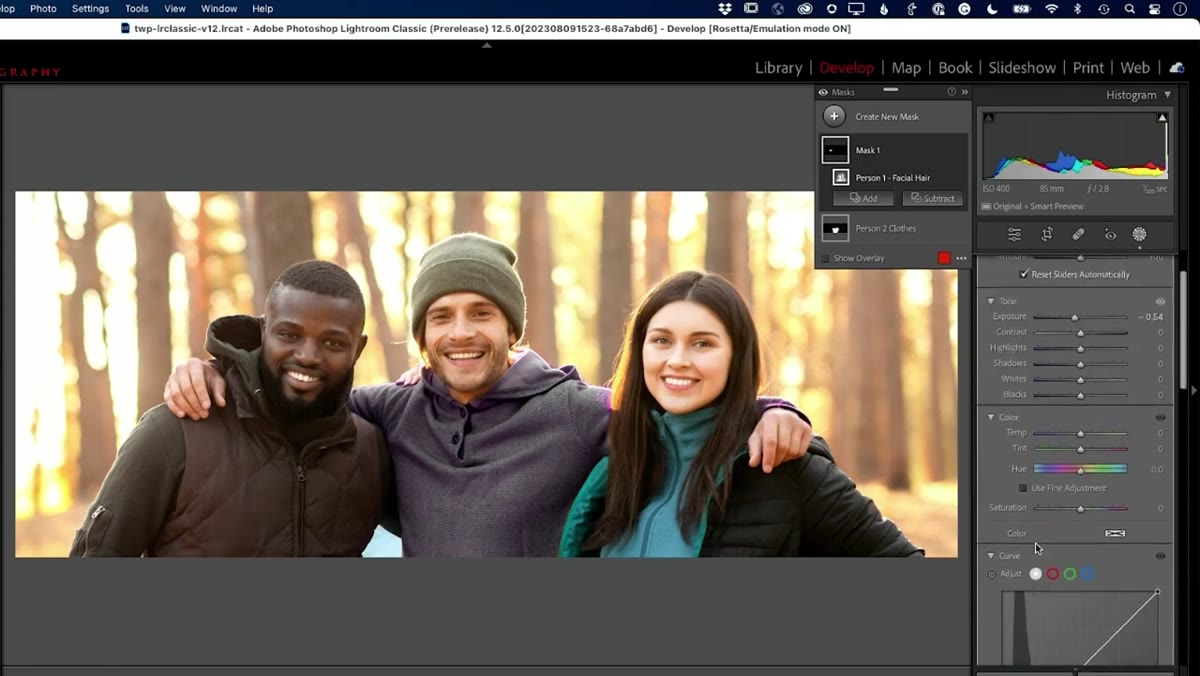 Tone Curve panel open with facial hair mask active
This is the most practically useful tip in the whole tutorial. When you want to darken or lighten facial hair, resist the instinct to reach for the Exposure slider. Terry’s recommendation, based on his own testing, is to use the Tone Curve instead. Open the Tone Curve panel under your active facial hair mask and drag to adjust. The results are cleaner, with less risk of blowing out skin tones or flattening the texture of the hair itself.
Tone Curve panel open with facial hair mask active
This is the most practically useful tip in the whole tutorial. When you want to darken or lighten facial hair, resist the instinct to reach for the Exposure slider. Terry’s recommendation, based on his own testing, is to use the Tone Curve instead. Open the Tone Curve panel under your active facial hair mask and drag to adjust. The results are cleaner, with less risk of blowing out skin tones or flattening the texture of the hair itself.
A small S-curve to deepen shadows and pull down the midtones will give you that denser, darker beard look without making the affected area look like a flat paint fill. For lightening, lift the midtones gently. The Tone Curve gives you enough control to stay inside the natural tonal range of the hair rather than fighting against it.
A Note on Using This as Pre-Comp Prep
I work in Photoshop for everything that ends up in a final composite. But I’ve started using Lightroom’s AI masking as a first-pass review tool before I even open the file in Photoshop. If a source photo is going into a movie poster layout, I’ll run the People masking in Lightroom to see how cleanly the AI can isolate individual elements. It tells me something about the image quality and the separation between subjects, which informs how much cleanup I’ll need to do on the Photoshop side.
If the Lightroom mask is messy, that’s a signal. Maybe the lighting on the subject is too flat, maybe there’s not enough contrast at the edges of the clothing. I’d rather know that before I spend two hours building a comp around a source image that was never going to cooperate.
The single most transferable idea from this tutorial is the Tone Curve recommendation for facial hair. It’s a small thing, but the difference between using Exposure and using Curves on a beard retouch is visible at delivery size. Terry’s been doing this long enough to know which shortcuts create problems, and that one piece of advice alone justifies the watch.
Watch the full tutorial on YouTube
Comments (1)
I've watched a dozen tutorials on this and yours is the clearest by far.
Leave a Comment