Every composite I’ve ever shipped, whether it’s a movie poster with three light sources that don’t exist in nature, or an album cover where the artist is standing in a place they’ve never been, starts with the same unglamorous foundation: a clean cutout held together by a layer mask. I still sketch the whole thing on paper before I open Photoshop, and even in that rough pencil drawing, the implied edges of a mask are already there. Getting that part wrong doesn’t just look bad. It unravels everything built on top of it.
That’s why I keep coming back to fundamentals tutorials when I want to recalibrate. In this Aaron Nace (PHLEARN) tutorial, Watch the full tutorial on YouTube, the sixth video in his 30 Days of Photoshop series, Aaron walks through building a three-layer composite from scratch using layer masks. The project is straightforward: a subject, a mountain background, and a cloud layer. But the principles he demonstrates are exactly what I wish someone had drilled into me when I was starting out. The order of operations matters. The logic behind the mask matters. Get those right and the rest is just execution.
What follows is a step-by-step breakdown of the technique so you can follow along without pausing and rewinding every thirty seconds.
Step 1: Gather Your Assets and Set Up Your Layer Stack
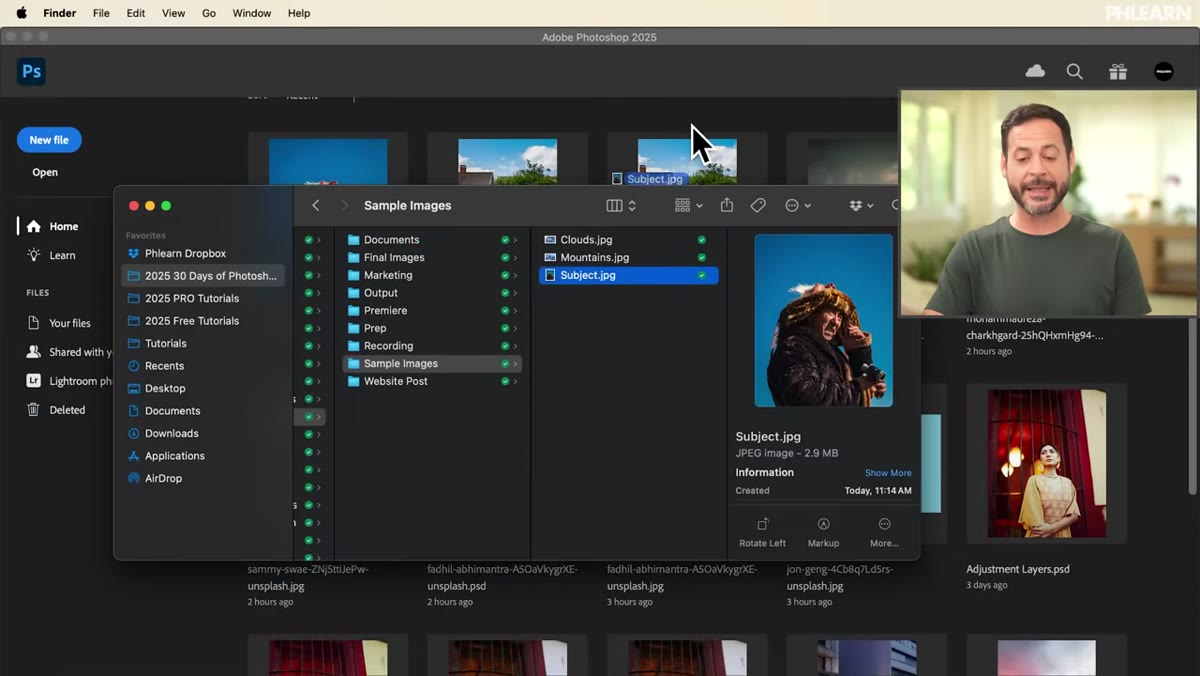 Three source files being dragged into Photoshop
Open all three source files by clicking and dragging them into Photoshop one at a time: your subject, your mountain background, and your cloud image. Once they’re in, you’ll need to convert the default background layer into a regular layer. Double-click the background layer in the Layers panel to unlock it. This removes the lock icon and lets you reorder it freely in the stack.
Three source files being dragged into Photoshop
Open all three source files by clicking and dragging them into Photoshop one at a time: your subject, your mountain background, and your cloud image. Once they’re in, you’ll need to convert the default background layer into a regular layer. Double-click the background layer in the Layers panel to unlock it. This removes the lock icon and lets you reorder it freely in the stack.
From there, drag your subject layer to the top of the stack. You want it sitting above both the mountains and the clouds, because the mask you’re about to build will reveal those layers through the subject’s background. Think of the layer order as a physical stack of papers. The top sheet controls what you see first.
Step 2: Use “Select Subject” to Create Your Initial Selection
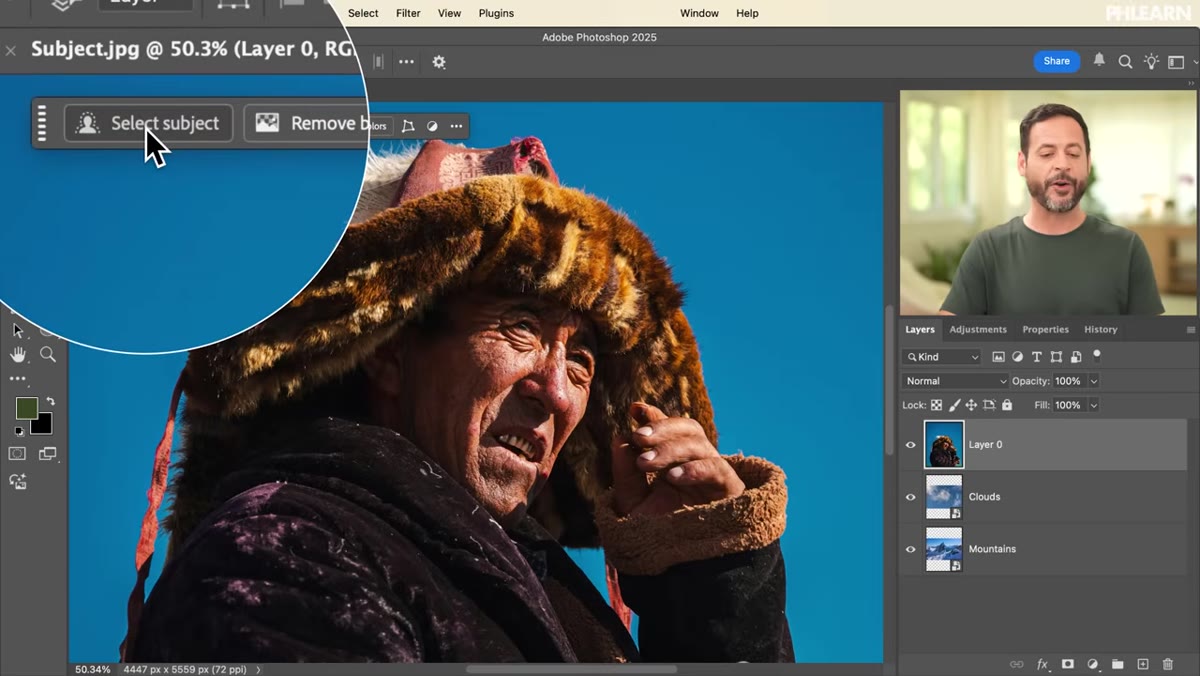 Select Subject button highlighted in the contextual taskbar
Click on your subject layer to make it active. At the bottom of your screen, the contextual taskbar should display a “Select Subject” button. Click it and let Photoshop’s AI-driven selection engine do the initial work. If you don’t see the contextual taskbar, go to Window and enable it from the menu.
Select Subject button highlighted in the contextual taskbar
Click on your subject layer to make it active. At the bottom of your screen, the contextual taskbar should display a “Select Subject” button. Click it and let Photoshop’s AI-driven selection engine do the initial work. If you don’t see the contextual taskbar, go to Window and enable it from the menu.
Aaron makes a point here that I want to underline because it’s the single most important habit in compositing: always make your selection first, then load it into a mask. Never paint a mask from scratch on a blank white rectangle if you can start with a selection. The selection gives you a clean, informed starting edge. A blank mask gives you nothing to work from.
Step 3: Load the Selection as a Layer Mask
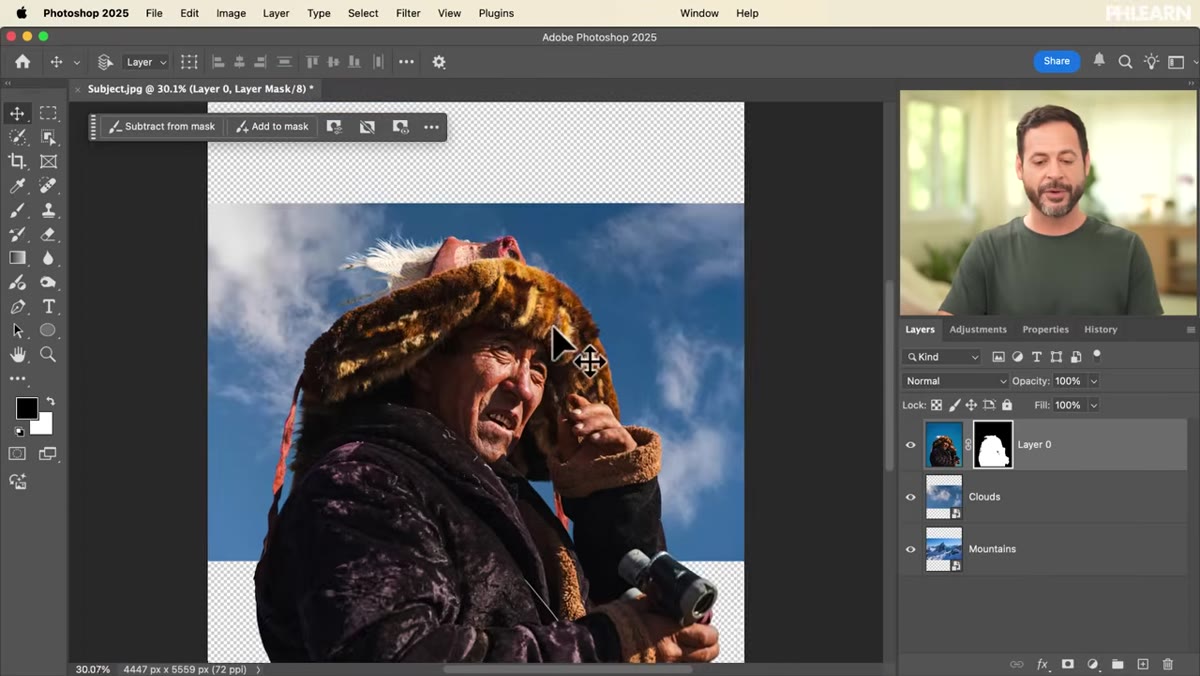 Layer mask thumbnail appearing next to subject layer
With the selection still active (you’ll see the marching ants around your subject), look for the layer mask icon in the contextual taskbar. It looks like a rectangle with a circle cut out of it. Click it. Photoshop will instantly convert your selection into a mask attached directly to your subject layer.
Layer mask thumbnail appearing next to subject layer
With the selection still active (you’ll see the marching ants around your subject), look for the layer mask icon in the contextual taskbar. It looks like a rectangle with a circle cut out of it. Click it. Photoshop will instantly convert your selection into a mask attached directly to your subject layer.
You’ll now see through the areas of the subject’s background. The mountains and clouds beneath it become visible. The white areas of the mask thumbnail represent what’s visible. The black areas represent what’s hidden. That’s the whole logic of layer masks: white reveals, black conceals. Everything else is just deciding where the boundary falls.
Step 4: Position and Scale Your Background Layers
 Mountains layer being repositioned at the bottom of the stack
Move your mountains layer to the bottom of the stack so it acts as the base plate of the composite. Then select it and hit Control+T (Command+T on Mac) to enter Free Transform. Scale the mountain image up slightly to fill the frame the way you want it. Hit Enter to commit.
Mountains layer being repositioned at the bottom of the stack
Move your mountains layer to the bottom of the stack so it acts as the base plate of the composite. Then select it and hit Control+T (Command+T on Mac) to enter Free Transform. Scale the mountain image up slightly to fill the frame the way you want it. Hit Enter to commit.
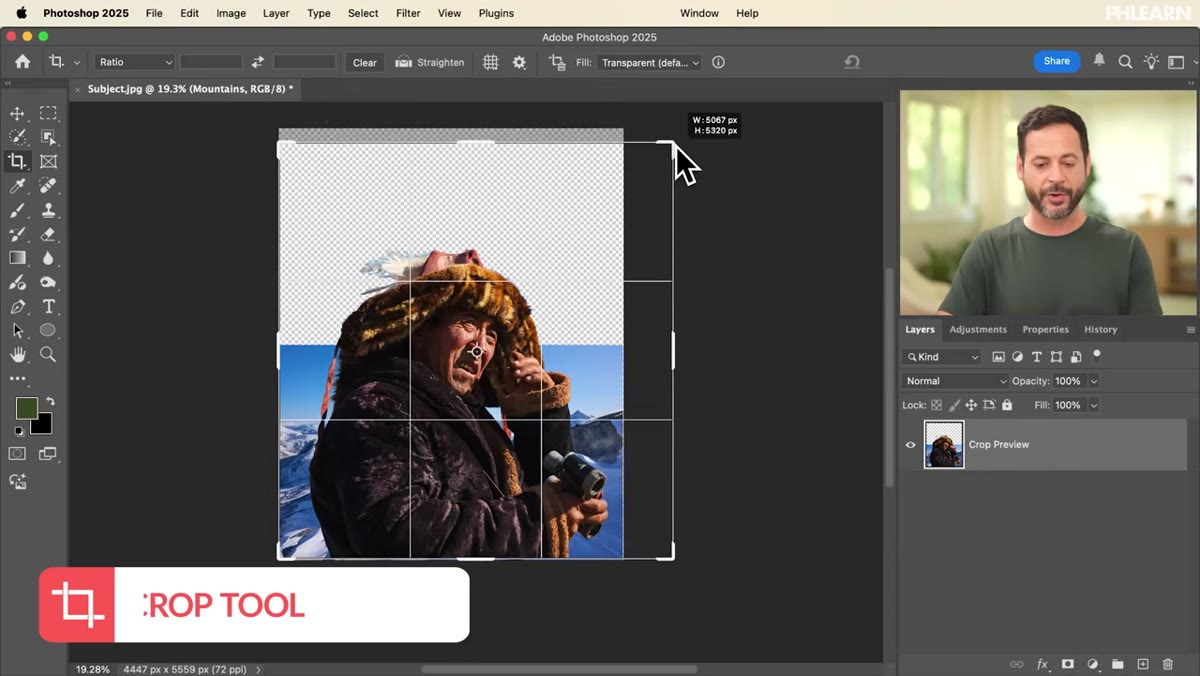
This is also the moment to think about your crop. Hit C for the Crop tool and pull the canvas edges outward if you need more breathing room around the composition. Aaron treats this as a live layout decision, not an afterthought. Building the composite with the right canvas size from the beginning saves you from painful adjustments later.
Step 5: Extend the Background with Generative Fill
 Marquee selection drawn above mountain horizon line
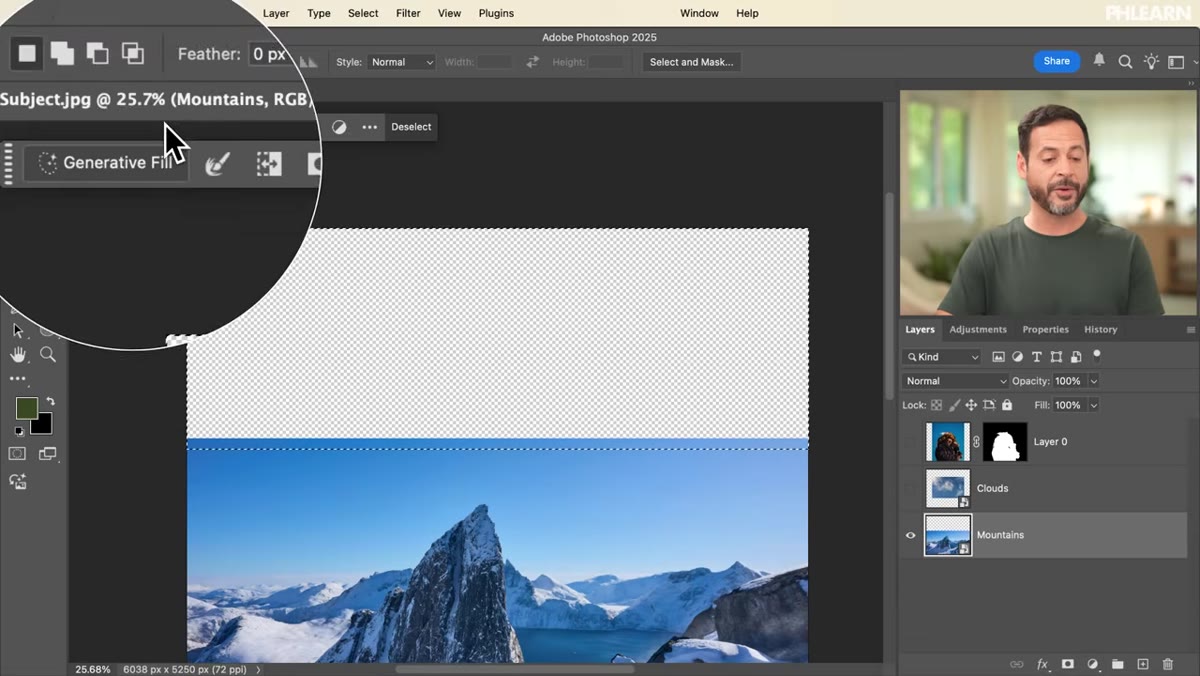
Here’s a practical trick that comes up constantly in real work. If your background image doesn’t quite cover the canvas, especially at the top where you need sky, you don’t have to find a new background. Select the Rectangular Marquee tool (M), draw a selection over the area that needs extending, and then click “Generative Fill” in the contextual taskbar. Leave the prompt blank and click Generate.
Marquee selection drawn above mountain horizon line
Here’s a practical trick that comes up constantly in real work. If your background image doesn’t quite cover the canvas, especially at the top where you need sky, you don’t have to find a new background. Select the Rectangular Marquee tool (M), draw a selection over the area that needs extending, and then click “Generative Fill” in the contextual taskbar. Leave the prompt blank and click Generate.
Photoshop will synthesize new sky content that matches the existing image. Once you’ve picked the best variation, merge the generated layer down with the mountain layer using Control+E (Command+E). You now have a single, clean background layer. This approach is particularly useful when you’ve cropped or repositioned a landscape and the original edges don’t reach the canvas boundaries.
Step 6: Mask the Cloud Layer to the Sky Region
 Select Sky option being activated on the background layer
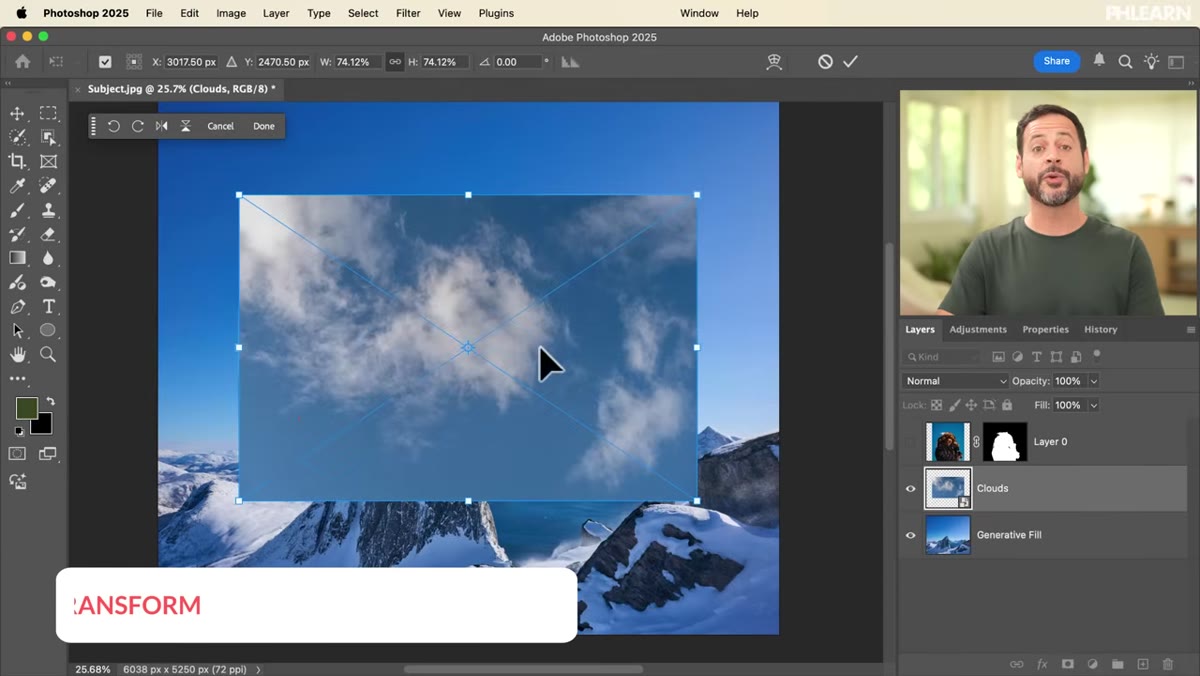
Bring your cloud layer into position by scaling it up with Free Transform until it fills the upper portion of the frame. Now you need to mask it so the clouds only appear in the sky area, not overlapping the mountains or the subject. The method here mirrors Step 2 and Step 3 exactly, which is the point.
Select Sky option being activated on the background layer
Bring your cloud layer into position by scaling it up with Free Transform until it fills the upper portion of the frame. Now you need to mask it so the clouds only appear in the sky area, not overlapping the mountains or the subject. The method here mirrors Step 2 and Step 3 exactly, which is the point.
Click on the layer that contains your mountain background. Go to Select, then choose “Select Sky.” Photoshop will isolate the sky region automatically. With that selection active, click back onto your cloud layer, then add a layer mask from the contextual taskbar. The clouds will now only render where the sky exists in the underlying image. Consistent process: select first, mask second.
What I’d Add From My Own Experience
The one thing this tutorial doesn’t have time to address is mask refinement. The AI selection tools are genuinely impressive, but on complex edges, particularly hair, fur, or any subject against a busy background, the initial mask will have problems. After loading any selection as a mask, I always immediately go to Properties and click “Select and Mask” to check the edges at 100% zoom. Look for haloing, missing strands, and hard edges that should be soft. Spending five minutes here saves thirty minutes of color-matching headaches later. A mask that looks fine at a glance will often betray you the moment you change the background color or add a backlight.
The single most transferable idea in this tutorial is Aaron’s rule: make your selection first, then load it into a mask. It sounds simple, but it reflects a discipline that separates composites that hold up under scrutiny from ones that fall apart at the edges. That edge is where all the craft lives.
Watch the full tutorial on YouTube and follow along with the free downloadable assets Aaron provides. Work through it once, then immediately apply it to your own images. The technique only sticks when your hands have done it.
Comments (4)
This should be required reading for anyone starting out.
Great article! I actually covered something related on my site — the landscape angle is really complementary to this.
Shared this with my photography group. Everyone loved it.
Bookmarked. Coming back to this one for sure.
Leave a Comment