Before I open Photoshop on any new project, I sketch the composite on paper. Every layer, every element, every edge that needs to be cut. I’ve been doing this long enough to know that the disasters almost never happen because someone picked the wrong blend mode or used the wrong brush size. They happen because the person sitting at the keyboard didn’t have a clear mental model of how layers actually work. The image is already broken before it starts.
That’s why, even after years of working on movie posters and album art, I still return to foundational tutorials when I need to recalibrate my thinking. In this Aaron Nace (PHLEARN) tutorial on layers and masks, Watch the full tutorial on YouTube, Nace builds that mental model from scratch in a way that’s genuinely useful whether you’re on day one or day three hundred. What follows is my breakdown of what he covers and how I think about it in practice.
The core insight Nace keeps returning to is that layers are not just an organizational tool. They are a compositing philosophy. Once you understand that every layer is its own independent plane that you can move, hide, blend, and mask without touching anything else, you stop being afraid of making mistakes. That freedom is what the non-destructive workflow is actually about.
Step 1: Understand What a Layer Is Before You Touch One
 Stack of paper analogy explained with citrus image open
Nace opens with an analogy that I’ve used myself when teaching: think of each layer as a physical piece of paper in a stack. A fully opaque layer covers everything beneath it. A layer with transparency lets what’s below show through. When you’re looking at the final image, you see all those sheets at once, as if they were fused together. But they’re not. Each one is still separate, still editable.
Stack of paper analogy explained with citrus image open
Nace opens with an analogy that I’ve used myself when teaching: think of each layer as a physical piece of paper in a stack. A fully opaque layer covers everything beneath it. A layer with transparency lets what’s below show through. When you’re looking at the final image, you see all those sheets at once, as if they were fused together. But they’re not. Each one is still separate, still editable.
In Photoshop, you’ll find your layers listed in the Layers panel. If it isn’t visible, go to Window and select Layers. The order matters. A layer sitting higher in the stack appears in front of the layers below it. Change the order, change the image. This is the single most disorienting thing for beginners to grasp, and the single most powerful thing for compositors to exploit.
Step 2: Know the Background Layer and When to Unlock It
 Background layer with lock icon visible in Layers panel
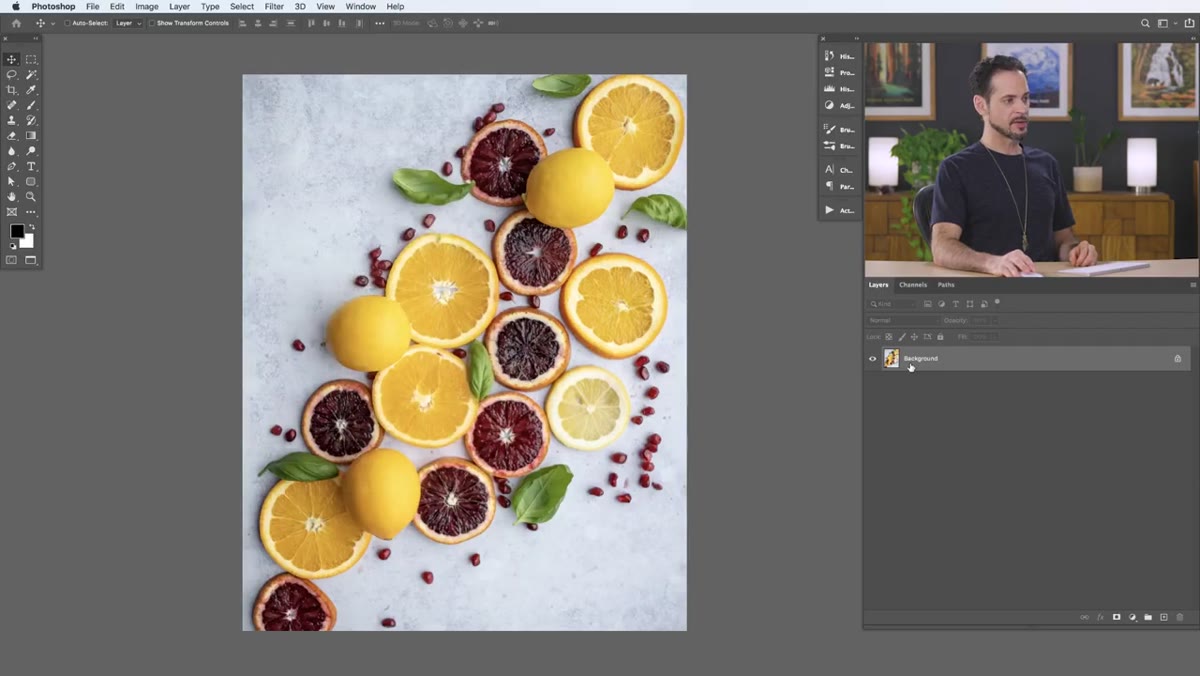
The bottom layer in any file opened from a flat image will be called Background and will have a padlock icon next to it. That lock prevents you from moving it or applying certain transformations. Nace demonstrates that if you try to move a locked background layer, Photoshop stops you.
Background layer with lock icon visible in Layers panel
The bottom layer in any file opened from a flat image will be called Background and will have a padlock icon next to it. That lock prevents you from moving it or applying certain transformations. Nace demonstrates that if you try to move a locked background layer, Photoshop stops you.
If you need to move or transform that base layer, right-click it and select “Convert to Smart Object” or simply double-click the layer thumbnail to convert it to a regular layer. For most compositing work, I leave the background locked unless I specifically need to reposition it. Treating it as a fixed reference point keeps the rest of your stack stable.
Step 3: Create a New Layer and Keep Your Edits Separate
 New layer created above background in Layers panel
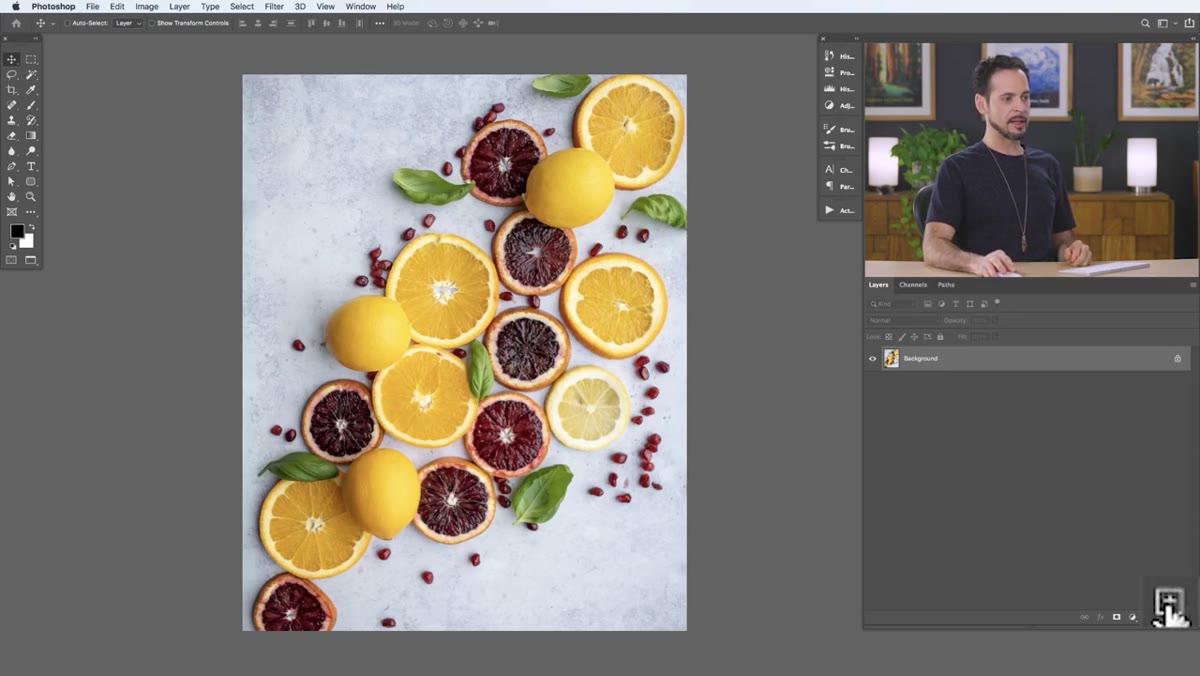
Click the plus icon at the bottom of the Layers panel to create a new, empty layer. This is where the paper-stack metaphor becomes practical. Any paint, any shape, any adjustment you make on this new layer stays completely separate from the background. You can delete it, move it, change its opacity, or blend it differently without touching a single pixel of the original image.
New layer created above background in Layers panel
Click the plus icon at the bottom of the Layers panel to create a new, empty layer. This is where the paper-stack metaphor becomes practical. Any paint, any shape, any adjustment you make on this new layer stays completely separate from the background. You can delete it, move it, change its opacity, or blend it differently without touching a single pixel of the original image.
Nace makes a point that I think gets lost in beginner tutorials: an empty layer has no effect on your image at all. You can move it with the Move tool and nothing happens because there’s nothing there yet. That sounds obvious, but it matters. It means you should always check which layer is selected before you start working. Working on the wrong layer is one of the fastest ways to create a mess that takes ten minutes to untangle.
Step 4: Paint on Your New Layer with the Brush Tool
 Brush tool active, bright green color selected in foreground
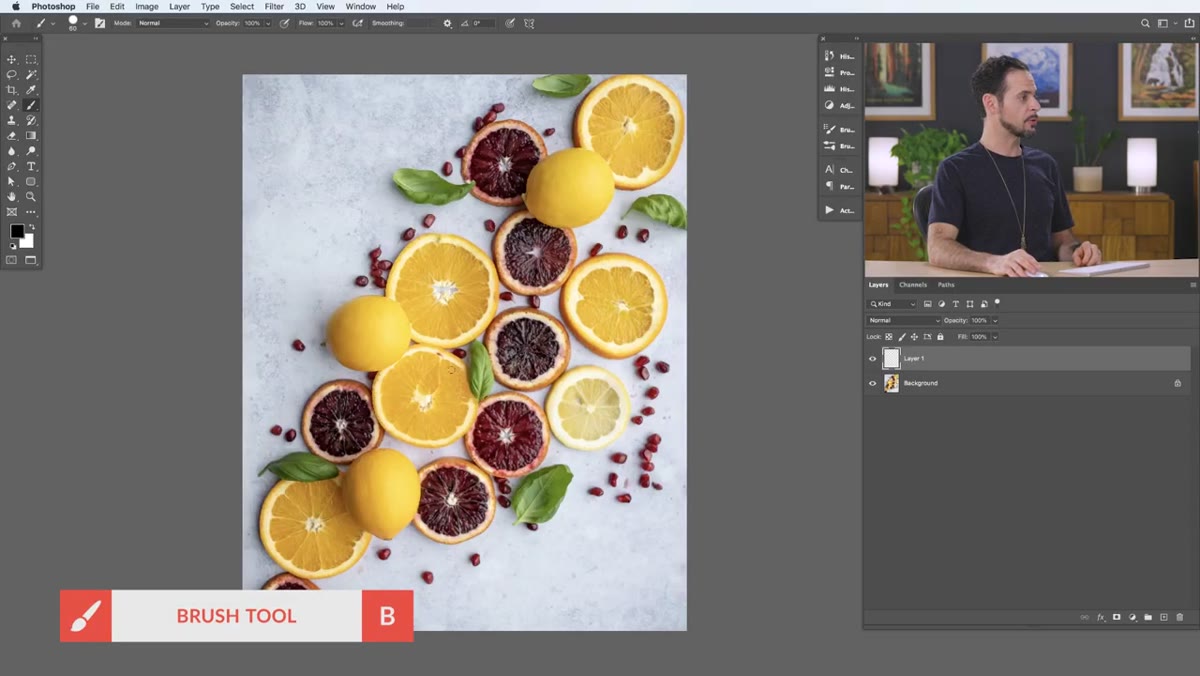
Select the Brush tool by pressing B. Choose your foreground color by clicking the foreground color swatch in the toolbar and picking your value from the color picker. Nace demonstrates this by painting green over a lemon to make it read as a lime. The effect is rough by design. The point isn’t precision here, it’s showing that the paint lives on its own layer, not embedded into the photo beneath.
Brush tool active, bright green color selected in foreground
Select the Brush tool by pressing B. Choose your foreground color by clicking the foreground color swatch in the toolbar and picking your value from the color picker. Nace demonstrates this by painting green over a lemon to make it read as a lime. The effect is rough by design. The point isn’t precision here, it’s showing that the paint lives on its own layer, not embedded into the photo beneath.
Once you’ve painted something, switch to the Move tool and drag the layer around. You’ll see the painted area move independently of the background image. This is the moment when layers stop being abstract. You have two separate things in one document, and you control each of them independently.
Step 5: Use a Layer Mask to Control Visibility Non-Destructively
 Layer mask concept introduced, hiding and showing layer content
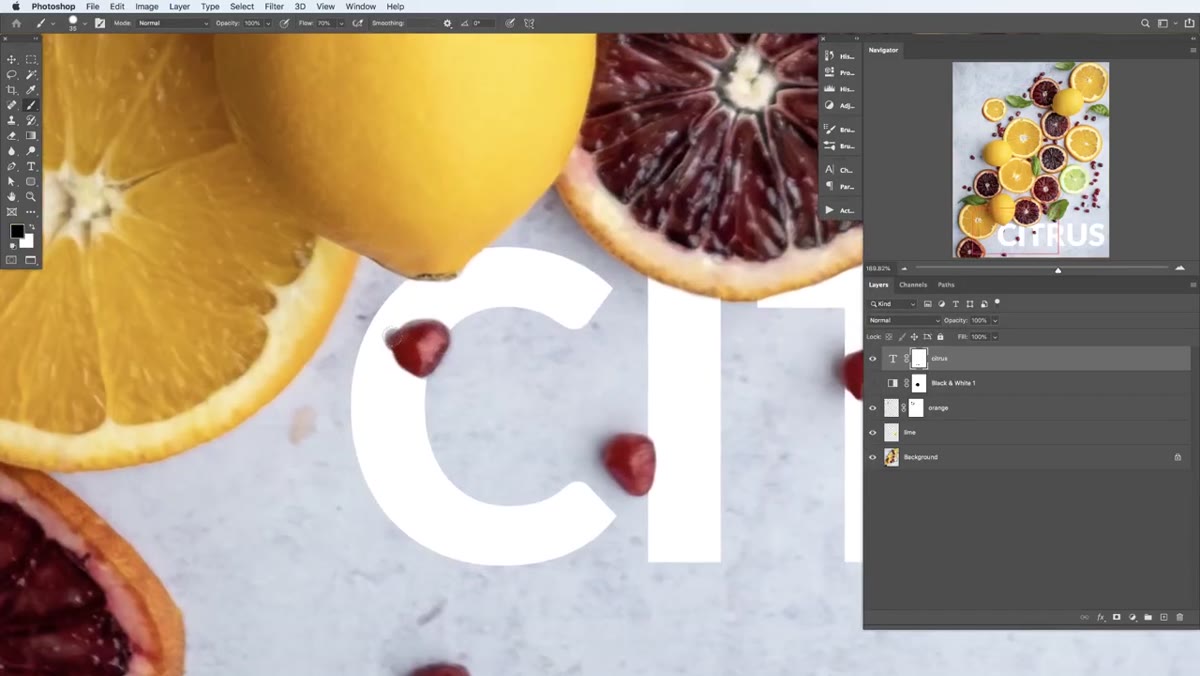
A layer mask is a grayscale map attached to a layer that tells Photoshop what to show and what to hide. White areas on the mask reveal the layer content. Black areas hide it. Gray creates partial transparency. Critically, the mask never touches the actual pixels underneath. You can paint black over an area to hide it, then paint white to bring it back. At any stage, no matter how far into the project you are.
Layer mask concept introduced, hiding and showing layer content
A layer mask is a grayscale map attached to a layer that tells Photoshop what to show and what to hide. White areas on the mask reveal the layer content. Black areas hide it. Gray creates partial transparency. Critically, the mask never touches the actual pixels underneath. You can paint black over an area to hide it, then paint white to bring it back. At any stage, no matter how far into the project you are.
This is the tool I use on every single composite I build. Cutting objects out of backgrounds, blending sky replacements, softening the edge where two exposures meet, all of it comes down to painting on masks. Nace frames this as the ideal way to cut subjects out of backgrounds, and he’s right. Erasing pixels is permanent. Masking them is a conversation you can keep revisiting.
A Note from My Own Practice
The thing about layers and masks that took me the longest to internalize wasn’t technical. It was psychological. When you know that nothing is permanent, you start making bolder choices. You try a blend mode you’re not sure about. You mask an edge loosely and refine it later. You move a layer to a different position in the stack just to see what happens.
Early in my career I was so afraid of ruining a file that I worked slowly and cautiously on everything, usually directly on the background layer, usually in ways I couldn’t undo. The shadow going the wrong direction on my first published composite, something only I ever noticed, happened because I was correcting directly on a flattened file and second-guessing every move. A proper layer structure would have let me catch it before it mattered. Layers and masks aren’t just a technical feature. They’re the thing that lets you work with confidence.
The single most important takeaway from this tutorial is this: never work destructively when a mask can do the same job. The ability to come back and fix any decision, at any point, is the difference between a workflow that scales and one that traps you. Nace teaches this clearly and practically, and if you’re still painting directly on your photos or erasing instead of masking, this is the video to start with.
Watch the full tutorial on YouTube
Comments
Leave a Comment