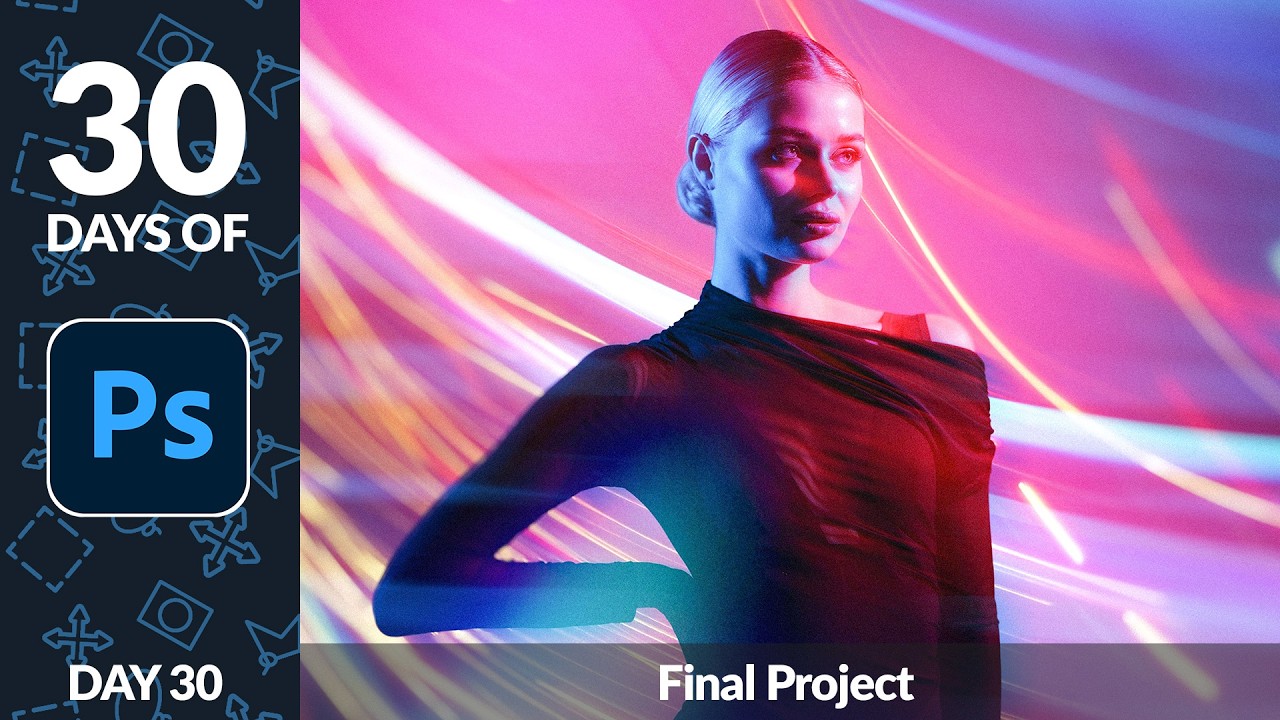
Every composite I’ve built professionally starts with the same question: where is the light coming from, and does the subject believe it? Movie posters, album covers, book jackets — the ones that fall apart are almost always failing on light. The color grading can be perfect, the cut can be clean, but if the light hitting the subject doesn’t match the world around them, something in the viewer’s brain quietly rejects the whole image. I’ve spent more hours than I care to admit painting in secondary light sources by hand, building them stroke by stroke. So when I watched Aaron Nace’s final project tutorial from his 30 Days of Photoshop series, I felt that specific satisfaction of seeing a faster, smarter path to something I’d been doing the hard way.
Watch the full tutorial on YouTube
In this Aaron Nace (PHLEARN) tutorial, the goal is to take a portrait shot with interesting color in it already - magenta and blue tones - and push it further using real light-streak photographs blended directly onto the subject. No painting required. The technique hinges on understanding what screen mode actually does to pixels, and then using smart objects to keep everything non-destructive and adjustable. It’s a workflow I’m folding into my own practice, and I want to walk you through exactly how it works.
Step 1: Open Your Base Subject Image
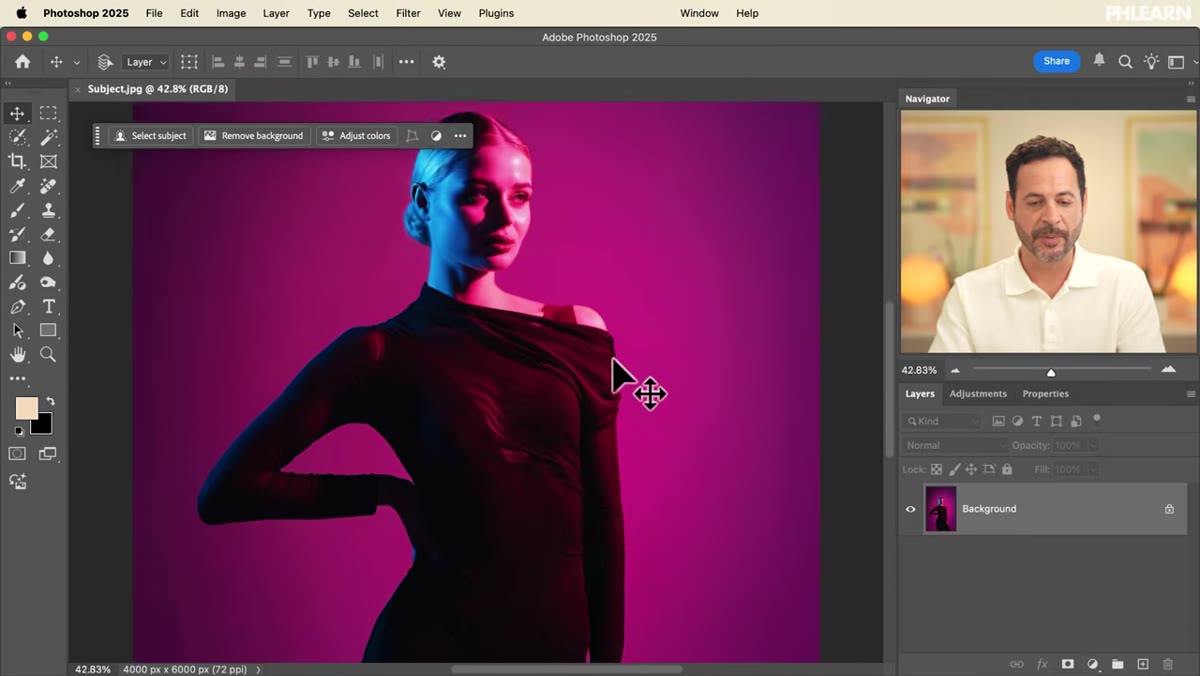 Base portrait image open in Photoshop workspace
Start by opening your primary subject photograph in Photoshop. In the tutorial, this is a portrait with strong magenta and blue tones already present in the original shot. The existing color story matters because you’re going to be layering light on top of it, not replacing it. You want a starting image that already has some directional quality or tonal interest. A flat, evenly lit portrait will work, but one with existing color drama gives the blend modes more to react to.
Base portrait image open in Photoshop workspace
Start by opening your primary subject photograph in Photoshop. In the tutorial, this is a portrait with strong magenta and blue tones already present in the original shot. The existing color story matters because you’re going to be layering light on top of it, not replacing it. You want a starting image that already has some directional quality or tonal interest. A flat, evenly lit portrait will work, but one with existing color drama gives the blend modes more to react to.
Step 2: Import Light Streak Photos as Smart Objects
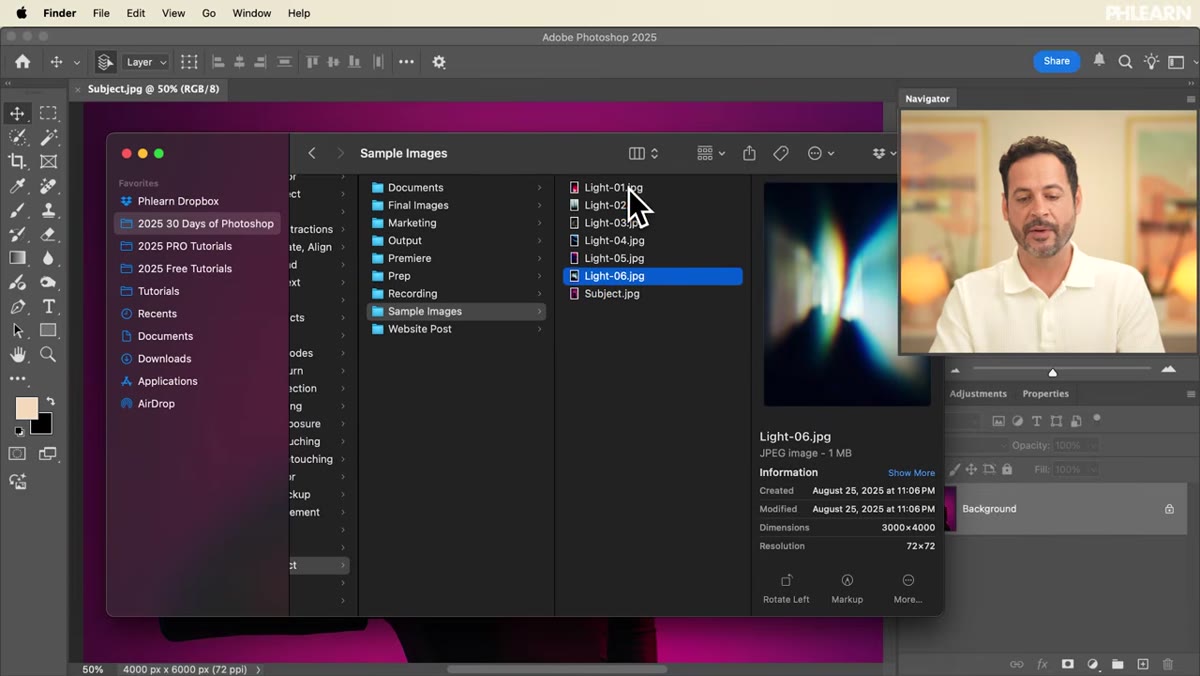 Multiple light streak files being dragged into Photoshop
With your subject open, drag your light-streak image files directly into Photoshop from your file browser. When you drag multiple files in at once, Photoshop brings them in as smart objects, stacked as individual layers. This is not just convenient. It is load-bearing for the rest of the technique. Smart objects preserve the original image data and allow you to apply adjustments that remain fully editable after the fact. Accept the placement of each with the checkmark or by hitting Enter, and you’ll have a stack of light layers sitting above your subject. Free sample images for this project are available on phlearn.com.
Multiple light streak files being dragged into Photoshop
With your subject open, drag your light-streak image files directly into Photoshop from your file browser. When you drag multiple files in at once, Photoshop brings them in as smart objects, stacked as individual layers. This is not just convenient. It is load-bearing for the rest of the technique. Smart objects preserve the original image data and allow you to apply adjustments that remain fully editable after the fact. Accept the placement of each with the checkmark or by hitting Enter, and you’ll have a stack of light layers sitting above your subject. Free sample images for this project are available on phlearn.com.
Step 3: Set the Light Layer Blend Mode to Screen
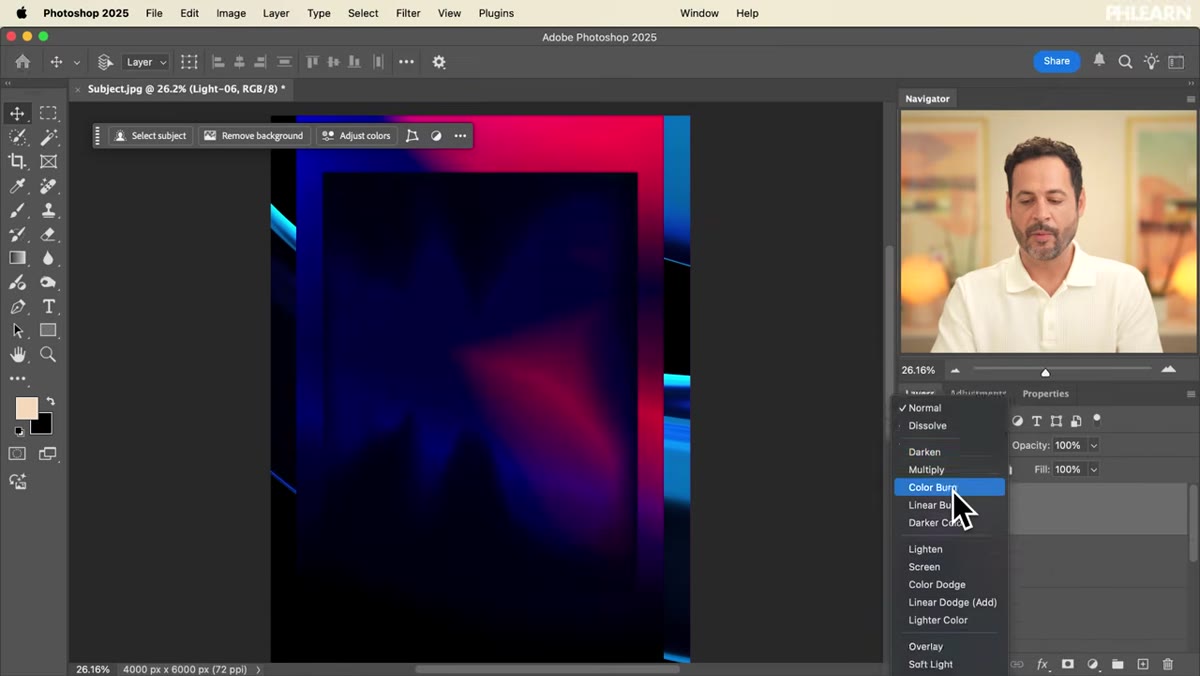 Blend mode dropdown showing Screen selected on light layer
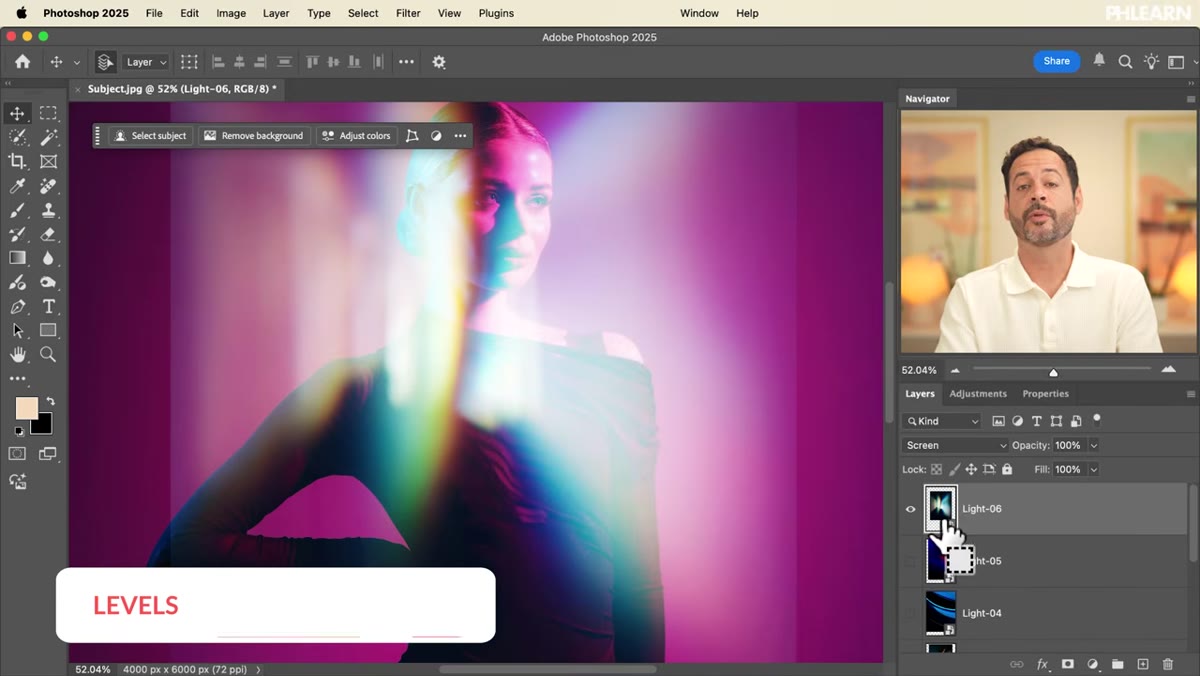
This is the core move. Select one of your light-streak layers, make the others invisible for now, and change the blend mode from Normal to Screen. Screen mode works by making lighter pixels visible and darker pixels invisible. Because your light-streak photos are bright elements on dark backgrounds, this is exactly what you need. The light itself shows through. The black background disappears. What you’re left with looks like a genuine light source wrapping around or passing through your scene. It takes about two seconds to apply and it looks like you spent an afternoon on it.
Blend mode dropdown showing Screen selected on light layer
This is the core move. Select one of your light-streak layers, make the others invisible for now, and change the blend mode from Normal to Screen. Screen mode works by making lighter pixels visible and darker pixels invisible. Because your light-streak photos are bright elements on dark backgrounds, this is exactly what you need. The light itself shows through. The black background disappears. What you’re left with looks like a genuine light source wrapping around or passing through your scene. It takes about two seconds to apply and it looks like you spent an afternoon on it.
Step 4: Darken the Edges Using a Smart Levels Adjustment
 Levels dialog open on smart object with input shadows slider moved right
Screen mode will sometimes show a faint edge or a slight gray border around the light-streak image, especially where the original background wasn’t fully black. To fix this without flattening or permanently altering your layer, use Ctrl+L (Windows) or Cmd+L (Mac) while the smart object is selected. This opens a Levels adjustment applied directly to that smart object as a smart filter. Pull the left input shadow slider to the right until the edge artifacts disappear. Because this is a smart filter on a smart object, you can double-click the Levels entry in the Layers panel at any time and re-adjust. Nothing is baked in. That flexibility is what separates a professional workflow from a fast one.
Levels dialog open on smart object with input shadows slider moved right
Screen mode will sometimes show a faint edge or a slight gray border around the light-streak image, especially where the original background wasn’t fully black. To fix this without flattening or permanently altering your layer, use Ctrl+L (Windows) or Cmd+L (Mac) while the smart object is selected. This opens a Levels adjustment applied directly to that smart object as a smart filter. Pull the left input shadow slider to the right until the edge artifacts disappear. Because this is a smart filter on a smart object, you can double-click the Levels entry in the Layers panel at any time and re-adjust. Nothing is baked in. That flexibility is what separates a professional workflow from a fast one.
Step 5: Use Select Subject to Generate a Subject Mask
 Select Subject active with marching ants selection around portrait subject
Click on your base subject layer, then run Select Subject (found under the Select menu). Photoshop 2025 now uses cloud-based processing for this, and the results on a clean portrait are genuinely impressive. The selection will form around your subject even if other layers are currently visible. Photoshop reads the selection from the active layer only. Once the selection is active, you’ll have marching ants outlining your subject.
Select Subject active with marching ants selection around portrait subject
Click on your base subject layer, then run Select Subject (found under the Select menu). Photoshop 2025 now uses cloud-based processing for this, and the results on a clean portrait are genuinely impressive. The selection will form around your subject even if other layers are currently visible. Photoshop reads the selection from the active layer only. Once the selection is active, you’ll have marching ants outlining your subject.
Step 6: Apply the Selection as a Layer Mask on the Light Layer
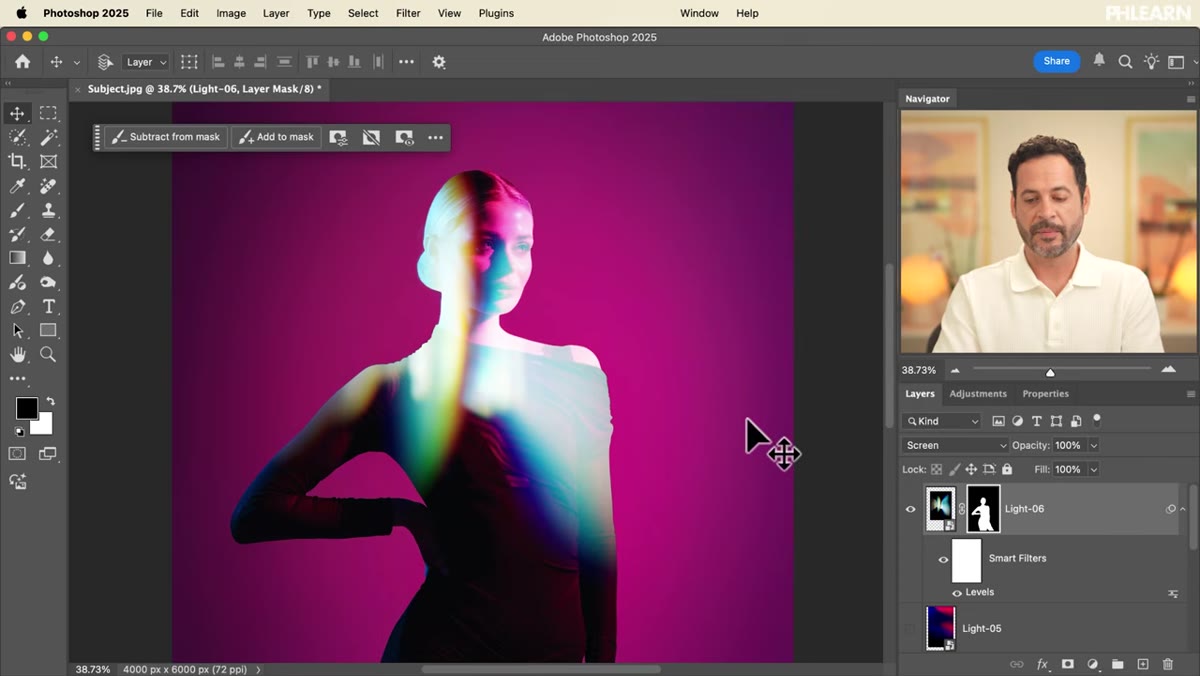 Layer mask applied to light streak layer showing masked result
With the subject selection still active, click back onto your light-streak layer and hit the Add Layer Mask button at the bottom of the Layers panel. This restricts the light-streak effect to appear only where your subject exists in the frame. The light now wraps around the person rather than blasting across the entire canvas. It reads as light on skin, not light floating over a photo. Understanding the relationship between the layer and its mask is worth pausing on here: by default, the layer and mask are linked, meaning if you move the layer, the mask moves with it. Nace mentions this chain-link relationship in the tutorial, and it matters when you’re repositioning elements later.
Layer mask applied to light streak layer showing masked result
With the subject selection still active, click back onto your light-streak layer and hit the Add Layer Mask button at the bottom of the Layers panel. This restricts the light-streak effect to appear only where your subject exists in the frame. The light now wraps around the person rather than blasting across the entire canvas. It reads as light on skin, not light floating over a photo. Understanding the relationship between the layer and its mask is worth pausing on here: by default, the layer and mask are linked, meaning if you move the layer, the mask moves with it. Nace mentions this chain-link relationship in the tutorial, and it matters when you’re repositioning elements later.
Step 7: Repeat the Process for Each Light Layer
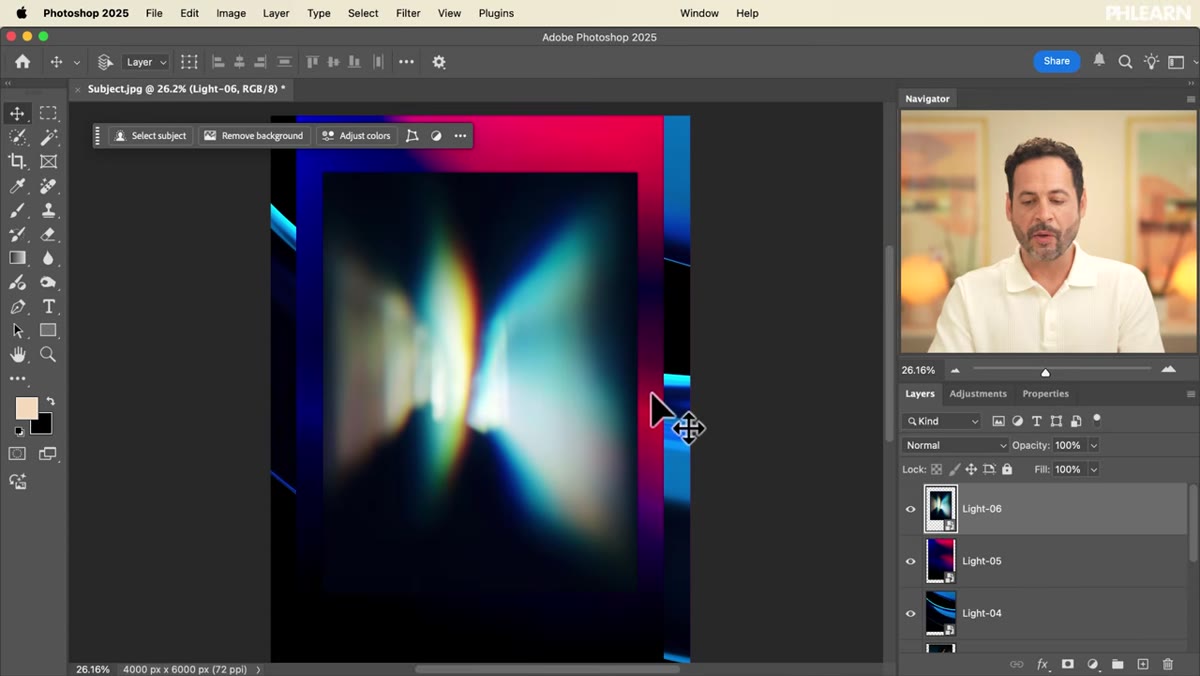 Layers panel showing multiple light streak layers stacked above subject
The same workflow applies to every additional light layer in your stack. Turn them on one at a time. Set each to Screen. Apply Levels as a smart filter to clean up any edge fringing. Decide whether each element should be masked to the subject or allowed to extend across the full image. Some streaks might work better bleeding off the edges of the frame. Others might feel more intentional sitting tightly on the figure. Making each layer a smart object means you can revisit any of those Levels adjustments at any stage of the build.
Layers panel showing multiple light streak layers stacked above subject
The same workflow applies to every additional light layer in your stack. Turn them on one at a time. Set each to Screen. Apply Levels as a smart filter to clean up any edge fringing. Decide whether each element should be masked to the subject or allowed to extend across the full image. Some streaks might work better bleeding off the edges of the frame. Others might feel more intentional sitting tightly on the figure. Making each layer a smart object means you can revisit any of those Levels adjustments at any stage of the build.
What I’d Add From My Own Experience
The screen mode technique Nace demonstrates here is something I now use as a first pass whenever I’m integrating practical light sources into a composite. But I’d push it one step further: after blending your light layers, add a Hue/Saturation adjustment clipped to each light smart object. Light from different sources rarely reads as pure white in real photographs. It shifts slightly warm or cool depending on the source. Nudging the hue of each streak a few degrees can make blended light feel like it actually originated in the same environment as your subject, rather than being layered on top. It’s a small move that closes the gap between “nice effect” and “this looks real.”
That shadow-direction mistake on my first published composite - the one only I ever noticed - came from not thinking carefully enough about how light actually behaves in the scene I was building. Techniques like this, which start with real photographic light sources rather than synthetic brushwork, give you physics for free. The camera already captured how the light falls. Screen mode just lets you borrow it.
The single thing to take away from this tutorial is that Screen blend mode treats black as transparent. Once that clicks, an entire library of light-streak, bokeh, lens flare, and light-leak photographs becomes a toolkit for building atmosphere without painting a single pixel. Watch the full tutorial on YouTube to see Aaron walk through the complete composite from start to finish.
Comments
Leave a Comment