
I sketch every composite before I open Photoshop. It’s a habit I picked up early, partly from studying Ansel Adams, who famously drew diagrams of exactly which zones he would burn darker or dodge lighter before he ever set foot in the darkroom. The man was treating visualization as a technical discipline, not an afterthought. That principle, knowing what you want the image to feel like before you start pushing sliders, is something I think about on every project, whether I’m painting light onto a movie poster or trying to get a sky to sit convincingly over a landscape plate.
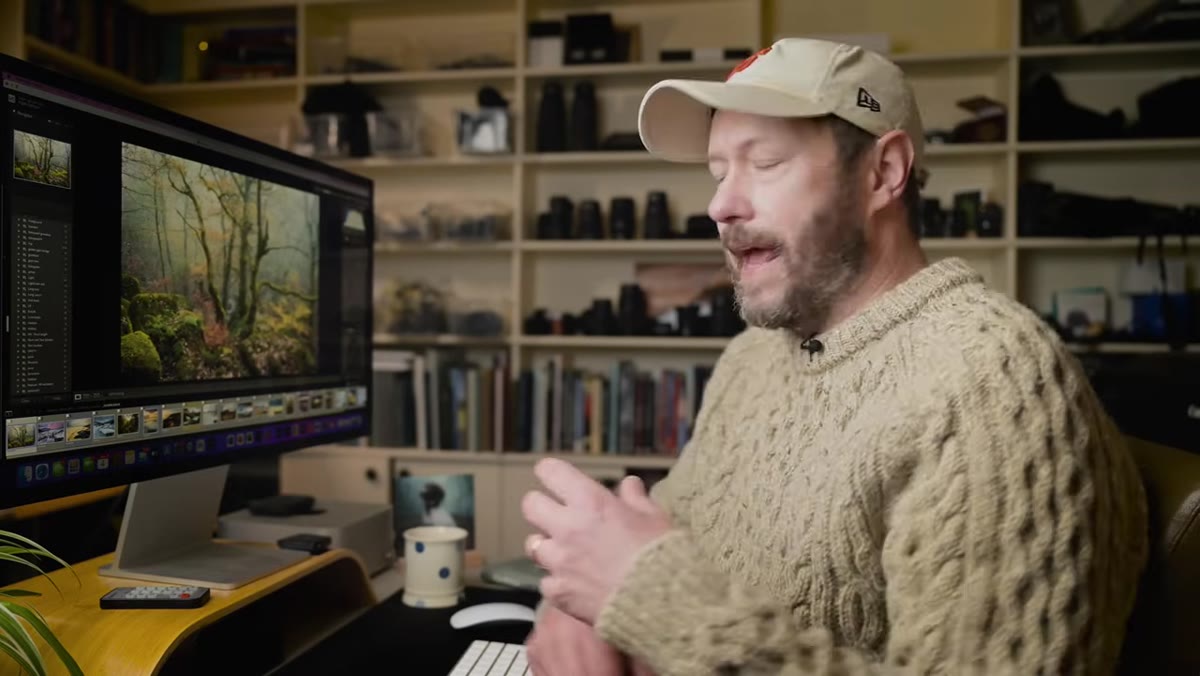
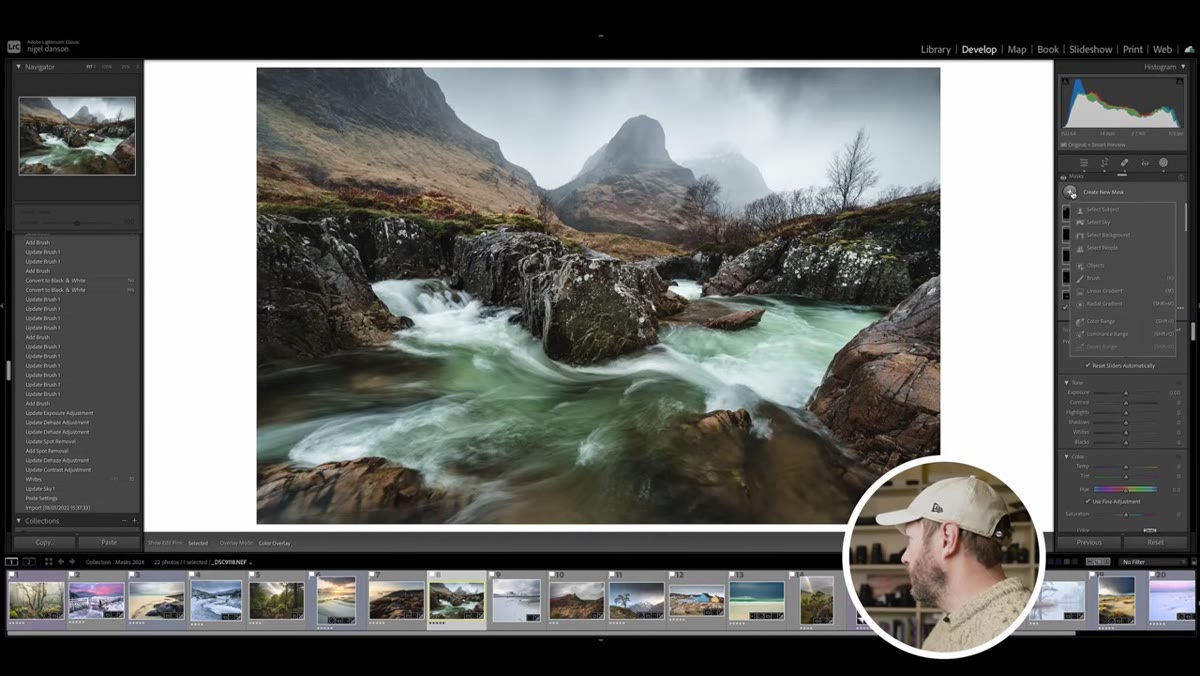
That’s why this Nigel Danson tutorial landed for me. Watch the full tutorial on YouTube. Danson works as a landscape photographer, but the way he talks about masks is the way a compositor talks about light control. He’s not adjusting the whole image. He’s making surgical decisions about specific tonal regions, specific atmospheric zones, specific emotional targets. That’s exactly the mindset I use when I’m building composites from multiple sources and need every element to feel like it was lit by the same sun.
What follows is a step-by-step breakdown of the five masking approaches Danson walks through, rewritten for practical use. If you’re doing any photo manipulation work, even outside of landscape photography, these techniques will give you finer control than global adjustments ever will.
Step 1: Build a Luminance Range Mask to Target Highlights
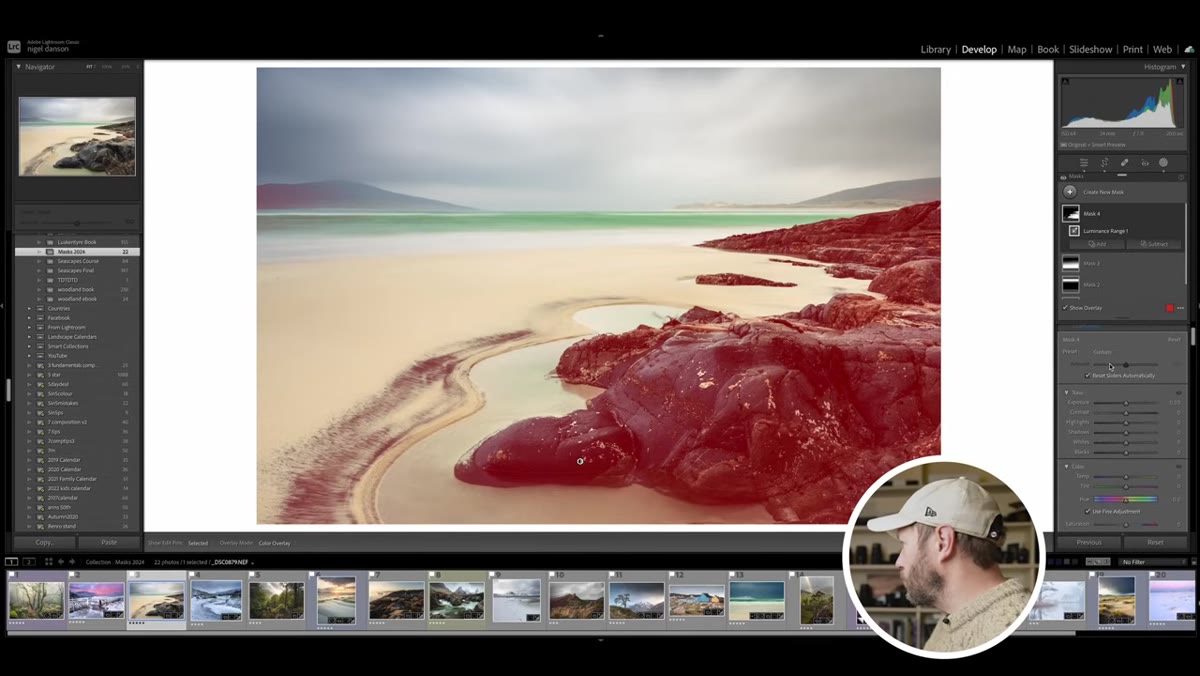
 Lightroom masking panel open, luminance range selected
Open the Masking panel in Lightroom’s Develop module. Click the masking icon and choose “Luminance Range” from the dropdown. Click directly on a bright area of your image to sample that tonal region as a starting point. Lightroom will generate an initial mask covering pixels within that luminance range.
Lightroom masking panel open, luminance range selected
Open the Masking panel in Lightroom’s Develop module. Click the masking icon and choose “Luminance Range” from the dropdown. Click directly on a bright area of your image to sample that tonal region as a starting point. Lightroom will generate an initial mask covering pixels within that luminance range.
You’ll see four slider handles along the luminance bar. The outer two define where the mask starts and stops. The inner two control how gradually the mask fades at each edge. Danson’s key move here is dragging those inner handles wide apart, which creates a soft, gradual transition rather than a hard cutoff. A hard luminance edge looks painted on. A soft one looks like light.
Step 2: Use the Luminance Mask to Warm Highlight Regions Selectively
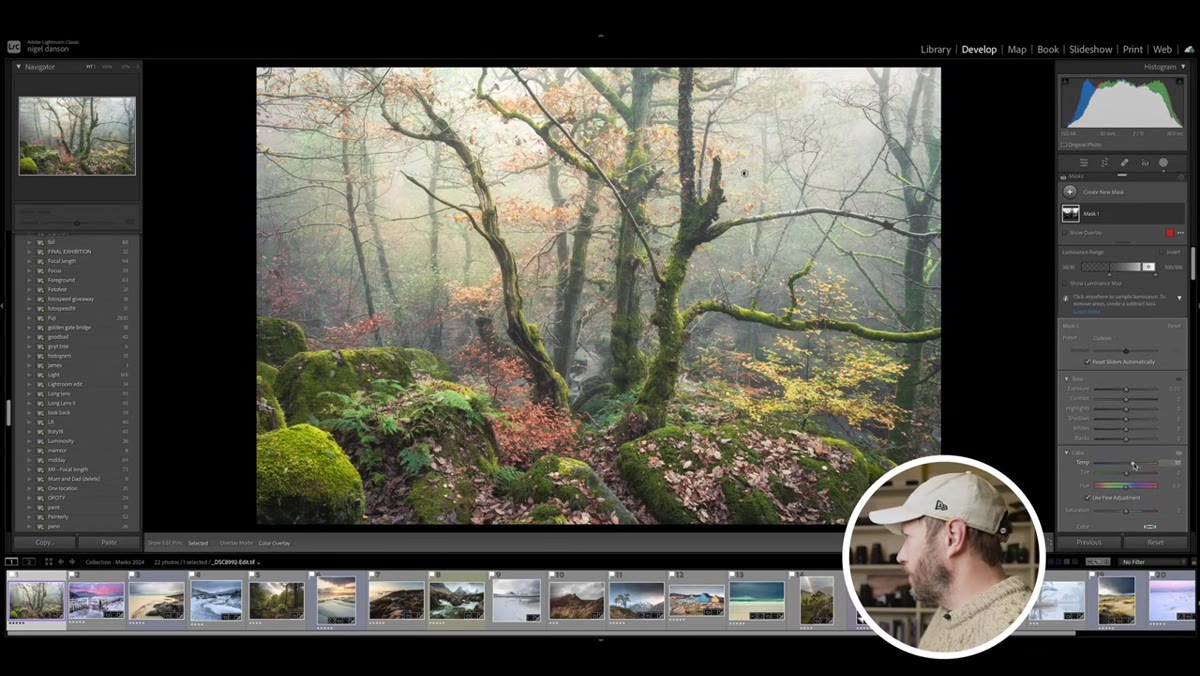 Temperature slider being adjusted with luminance mask active
Once your luminance mask is covering the highlights you want, go to the Color section of the Basic panel and nudge the Temperature slider toward warm. Danson keeps this subtle, just enough to reflect what the actual light felt like on location. He’s not manufacturing a sunset, he’s reinforcing a memory.
Temperature slider being adjusted with luminance mask active
Once your luminance mask is covering the highlights you want, go to the Color section of the Basic panel and nudge the Temperature slider toward warm. Danson keeps this subtle, just enough to reflect what the actual light felt like on location. He’s not manufacturing a sunset, he’s reinforcing a memory.
For compositing work, this step is particularly useful when you’re matching a subject to a background. If your background plate has warm late-afternoon light hitting the upper tonal range, a luminance mask lets you apply that same warmth selectively to the highlights of your subject layer, without touching the shadows where the warm cast wouldn’t reach.
Step 3: Apply a Luminance Mask to Snow or High-Key Whites
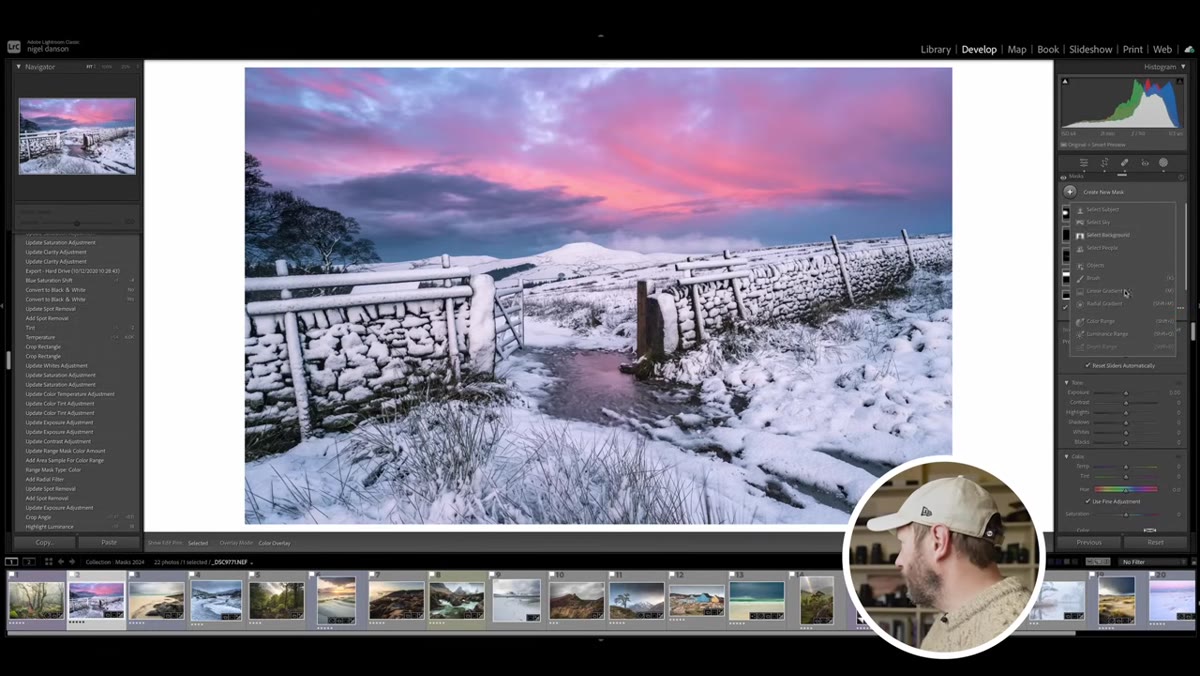 Snow scene with luminance mask isolating bright snow tones
Danson’s second luminance mask application deals with a specific problem: dirty-looking snow. The challenge is that boosting overall whites lifts every light tone in the image, including midtone areas you don’t want blown out. A luminance mask solves this by restricting the adjustment to only the brightest pixels.
Snow scene with luminance mask isolating bright snow tones
Danson’s second luminance mask application deals with a specific problem: dirty-looking snow. The challenge is that boosting overall whites lifts every light tone in the image, including midtone areas you don’t want blown out. A luminance mask solves this by restricting the adjustment to only the brightest pixels.
Set a luminance range targeting the upper end of the tonal scale. Then raise the Whites slider. The effect lifts only the snow’s brightest regions while leaving the shadow detail and midtone transitions untouched. When working with high-key product photography or bright background plates, this same approach keeps you from nuking detail in areas that should stay textured while still getting the luminosity you need in the key zones.
Step 4: Create a Subject or Object Mask Using AI Selection
 Lightroom AI mask selecting main subject in landscape
Lightroom’s AI masking tools can identify subjects, skies, and objects within a scene. Danson uses these to isolate specific elements for targeted adjustment. In a landscape, this might mean selecting a mountain range separately from the sky above it, so each can be treated with completely different tonal logic.
Lightroom AI mask selecting main subject in landscape
Lightroom’s AI masking tools can identify subjects, skies, and objects within a scene. Danson uses these to isolate specific elements for targeted adjustment. In a landscape, this might mean selecting a mountain range separately from the sky above it, so each can be treated with completely different tonal logic.
The practical value here is control over where your eye goes. Darkening a background element slightly while keeping your subject’s brightness intact is a basic compositional move, but doing it with a clean mask rather than a gradient means the adjustment follows the actual shape of the scene. For composite artists, this is the Lightroom equivalent of masking a layer in Photoshop. The AI selection won’t always be perfect, especially at complex edges, but as a starting point before refinement, it saves real time.
Step 5: Combine Masks Using Intersection Logic
 Mask intersection panel showing combined sky and luminance conditions
This is the step that separates methodical masking from intuitive slider-pushing. Danson demonstrates how to combine two masks using intersection, meaning the final mask only covers pixels that satisfy both conditions simultaneously. His example: a sky mask intersected with a luminance range targeting midtones, so the adjustment affects only the medium-bright sky tones and not the overexposed white areas near the sun.
Mask intersection panel showing combined sky and luminance conditions
This is the step that separates methodical masking from intuitive slider-pushing. Danson demonstrates how to combine two masks using intersection, meaning the final mask only covers pixels that satisfy both conditions simultaneously. His example: a sky mask intersected with a luminance range targeting midtones, so the adjustment affects only the medium-bright sky tones and not the overexposed white areas near the sun.
In Lightroom, after creating your first mask, use the “Intersect Mask With” option to layer a second condition on top of it. The combined mask is often more precise than either mask alone. I use this in compositing when I need to match a sky to a background plate at only a specific atmospheric depth. A luminance-intersected gradient can pull off transitions that would take significantly longer to paint by hand.
How I Take This Further in Composite Work
The technique I find most transferable from Danson’s approach is the visualization step, deciding what you want emotionally before you reach for a tool. My own extension of this is sketching the light direction on my scene thumbnail before I build any masks. I mark which areas need to feel heavier, which need to breathe, where I want the viewer’s eye to settle. Then I build masks that match that sketch.
For anyone doing sky replacements or multi-element composites, luminance range masks are the cleanest way to handle transition zones where a new sky meets existing terrain. Instead of manually painting a blend, you let the luminance of the scene define where one element ends and another begins. The land was always lit a certain way. Make your mask respect that, and the composite feels like it was shot rather than built.
The single most important idea in this tutorial is something Danson borrows from Ansel Adams without making a big deal of it: masking is emotional work, not technical busywork. You’re not correcting the image. You’re translating what you felt into what the viewer sees. That intention changes every decision you make with a slider.
Watch the full tutorial on YouTube to see all five masks demonstrated in real time with Danson’s actual images. The visual feedback on the luminance range sliders in particular is worth watching live.
Comments
Leave a Comment