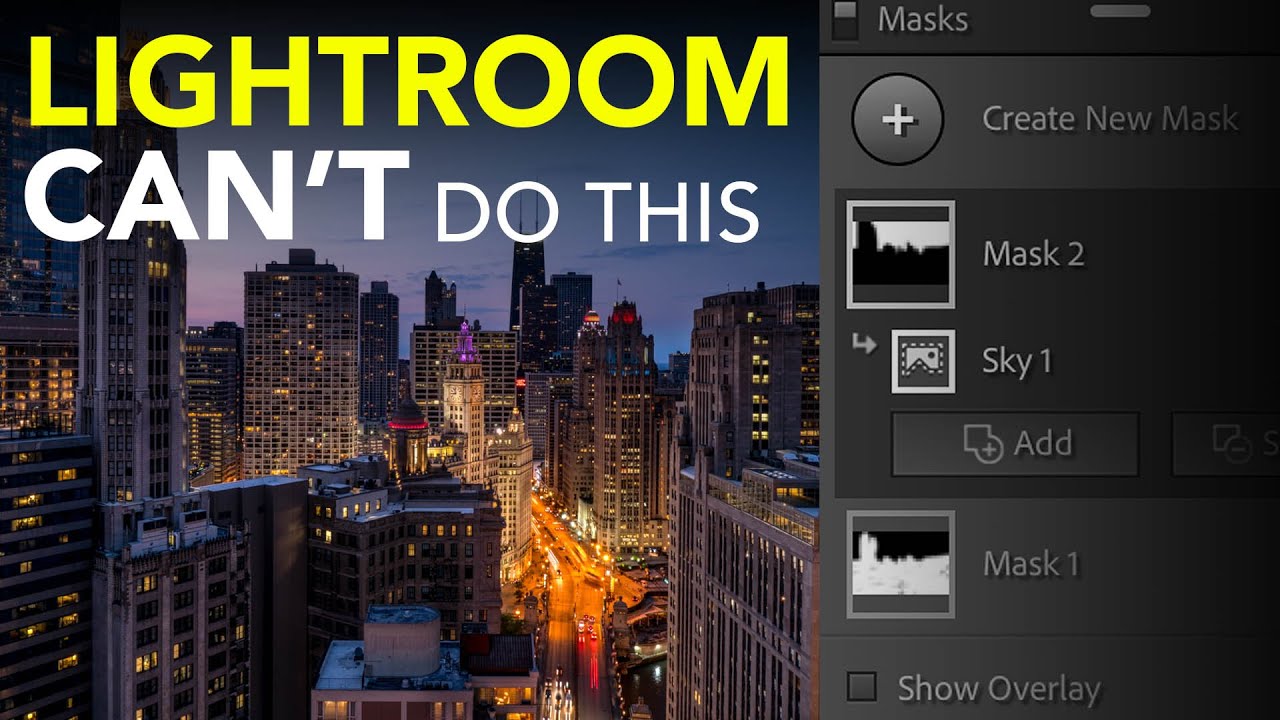
I sketch every composite on paper before I open Photoshop. By the time I sit down at the machine, I already know what every mask needs to do. That habit has saved me more times than I can count, because the moment you hit a software limitation mid-session is the worst possible moment to discover it exists. Lately, the limitation costing people the most time is inside Lightroom’s masking system, which got a massive overhaul not long ago and is genuinely impressive, but carries some walls that aren’t obvious until you’ve already built something complex inside them.
In this Matt Kloskowski tutorial, Watch the full tutorial on YouTube, Matt walks through three specific things the new Lightroom masking tools cannot do. What I appreciate about the way he frames it is that he’s not here to complain. Two of the three limitations come with usable workarounds, and he shows you exactly how far those workarounds take you before they stop being reliable. That honesty is worth more than a tutorial that pretends every tool does everything.
For anyone doing serious prep work in Lightroom before handing off to Photoshop, or for photographers who do most of their retouching inside Lightroom entirely, these are the three places where the system will quietly fight you. Here’s what to know before you lose an hour to it.
Step 1: Use Select Subject to Build a Complex Mask
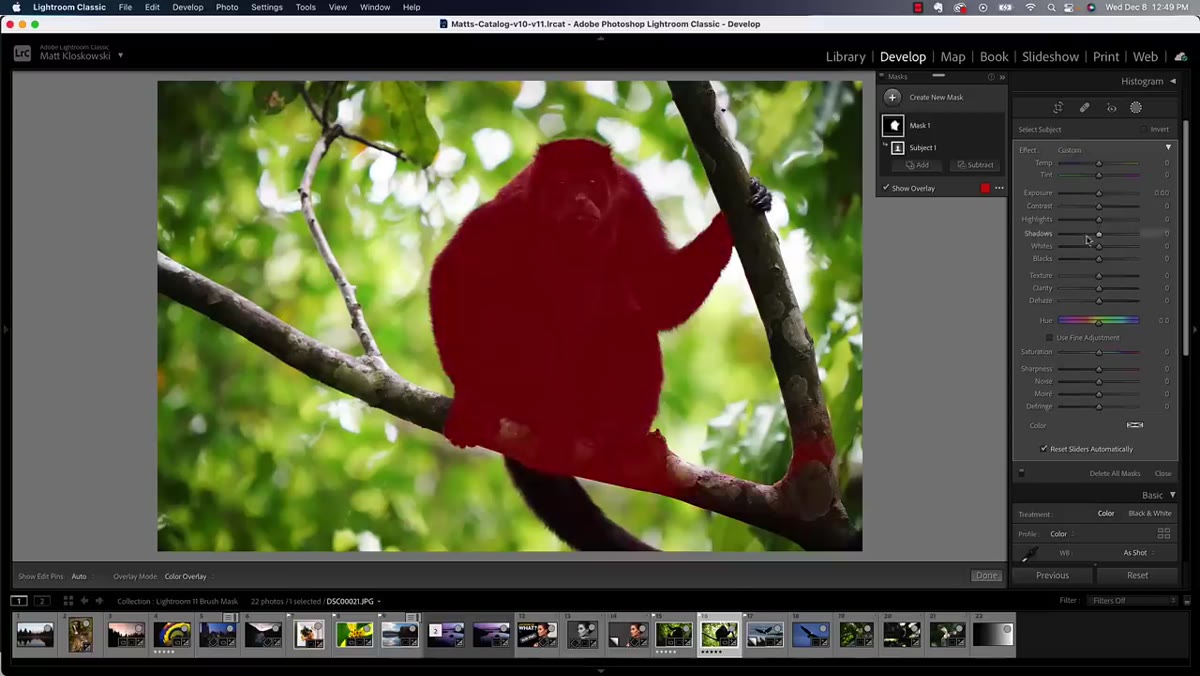 Select Subject mask applied to animal subject
Start with the Masking panel and choose Select Subject. Lightroom will analyze the image and lay down an initial selection. From there, hit the letter O to toggle the red overlay so you can actually see what was selected and what wasn’t. In most images, this first pass will be close but not clean. Matt’s example shows a subject with a tail that the AI missed entirely, and some soft areas around the edges that got included when they shouldn’t have.
Select Subject mask applied to animal subject
Start with the Masking panel and choose Select Subject. Lightroom will analyze the image and lay down an initial selection. From there, hit the letter O to toggle the red overlay so you can actually see what was selected and what wasn’t. In most images, this first pass will be close but not clean. Matt’s example shows a subject with a tail that the AI missed entirely, and some soft areas around the edges that got included when they shouldn’t have.
This is normal behavior. The point of Select Subject is to get you 80 percent of the way there, not to hand you a finished mask. The real work starts when you refine it, which is the next step.
Step 2: Refine the Mask Using Subtract and Add
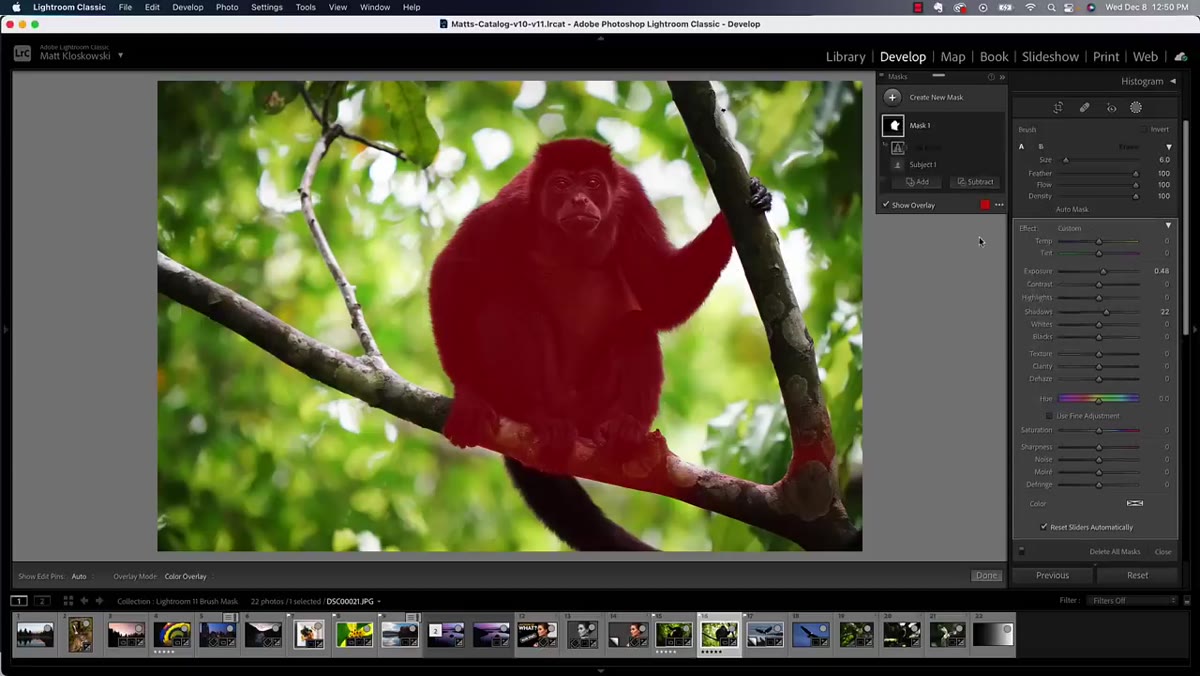 Subtract brush painting out unwanted mask areas
Once you’ve got your base selection, use the Subtract option with the Brush tool to paint out the areas that shouldn’t be included. Then switch to Add and use the Brush to bring back any areas the initial selection missed. The bracket keys adjust brush size quickly, which matters when you’re moving between detailed edges and larger open areas. Matt works through this fast, but the principle is straightforward: you’re building a mask made of layers inside layers, with the Select Subject result as your foundation and your manual brushwork sitting on top as sub-layers.
Subtract brush painting out unwanted mask areas
Once you’ve got your base selection, use the Subtract option with the Brush tool to paint out the areas that shouldn’t be included. Then switch to Add and use the Brush to bring back any areas the initial selection missed. The bracket keys adjust brush size quickly, which matters when you’re moving between detailed edges and larger open areas. Matt works through this fast, but the principle is straightforward: you’re building a mask made of layers inside layers, with the Select Subject result as your foundation and your manual brushwork sitting on top as sub-layers.
By the end of this refinement pass, you might have three or more sub-layers inside a single mask. That structure is where the first major limitation reveals itself.
Step 3: Understand Why You Can’t Invert the Top-Level Mask
 Mask panel showing top-level mask with multiple sub-layers
Here’s the wall. You’ve done the work to select your subject. Now you want to flip that selection to target the background instead, maybe to darken it or shift its color temperature. The natural instinct is to invert the whole mask at the top level. Lightroom won’t let you do that. Inverting only works on individual sub-layers, not on the parent mask that contains them all.
Mask panel showing top-level mask with multiple sub-layers
Here’s the wall. You’ve done the work to select your subject. Now you want to flip that selection to target the background instead, maybe to darken it or shift its color temperature. The natural instinct is to invert the whole mask at the top level. Lightroom won’t let you do that. Inverting only works on individual sub-layers, not on the parent mask that contains them all.
This isn’t a bug. It’s a structural decision Adobe made in how the masking system is built, and Matt is careful to say they’re aware of it and presumably working toward a fix. But right now, if you try to invert a mask that has multiple sub-layers inside it, you have to go into each sub-layer individually and invert them one by one. Depending on how many refinements you made, that can get messy fast, and the result may not behave the way a clean top-level invert would.
Step 4: Use the Duplicate Workaround for Background Selections
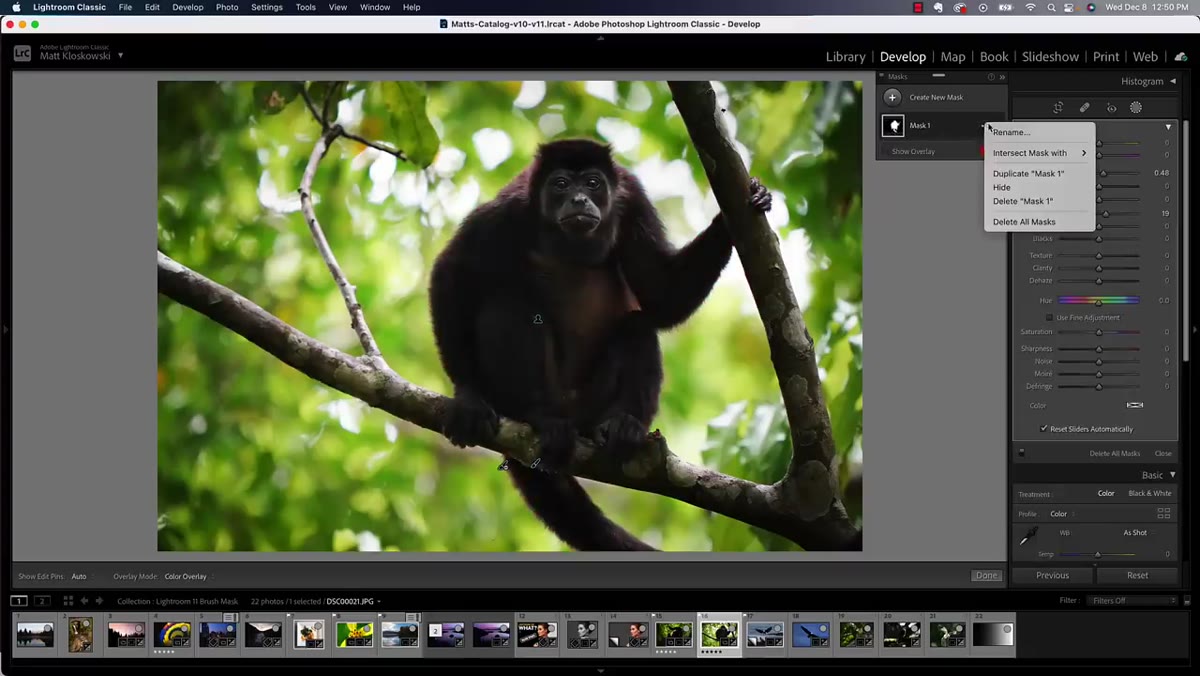
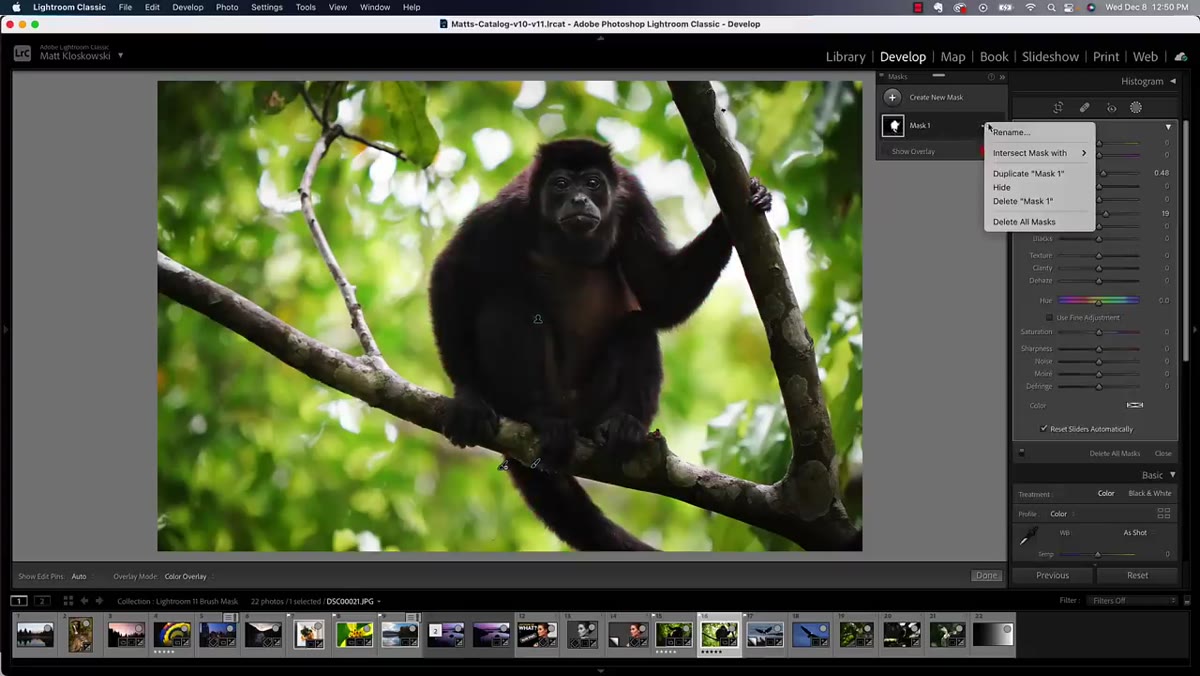 Duplicate mask option in the pop-out menu
The closest workaround Matt offers is to duplicate the mask before you start inverting. Click the small pop-out menu on the top-level mask and choose Duplicate. That gives you an identical copy of everything you built, including all the sub-layers. From there, you can go into the duplicate and invert each sub-layer to target the background, while keeping the original mask untouched for the subject edits.
Duplicate mask option in the pop-out menu
The closest workaround Matt offers is to duplicate the mask before you start inverting. Click the small pop-out menu on the top-level mask and choose Duplicate. That gives you an identical copy of everything you built, including all the sub-layers. From there, you can go into the duplicate and invert each sub-layer to target the background, while keeping the original mask untouched for the subject edits.
It works, but it only works cleanly when the sub-layer logic lines up correctly after inverting. With more complex masks, the inverted sub-layers can interact in unexpected ways. Matt is honest about this: sometimes it holds, sometimes it produces results that aren’t quite right. The workaround is worth trying, but go in with your eyes open.
Step 5: Recognize the Photoshop Transfer Limitation
 Lightroom masking panel with no direct Photoshop export path shown
The second limitation is one that catches composite artists specifically. Lightroom’s masking tools can build a surprisingly clean subject selection, and the natural question is whether you can take that mask directly into Photoshop to use as a layer mask or selection. The short answer is no, not directly. The mask data lives inside Lightroom’s adjustment system and doesn’t export as an actual pixel mask or channel that Photoshop can read on arrival.
Lightroom masking panel with no direct Photoshop export path shown
The second limitation is one that catches composite artists specifically. Lightroom’s masking tools can build a surprisingly clean subject selection, and the natural question is whether you can take that mask directly into Photoshop to use as a layer mask or selection. The short answer is no, not directly. The mask data lives inside Lightroom’s adjustment system and doesn’t export as an actual pixel mask or channel that Photoshop can read on arrival.
The practical consequence is that if you send your image to Photoshop via the standard Edit In workflow, you lose the mask as a usable selection. You’d need to rebuild it inside Photoshop, or use a workaround to approximate the same selection before the handoff. This is significant for anyone who does initial selects in Lightroom and then moves into compositing territory, because the time you spent on that mask doesn’t travel with you.
What I’d Add From the Compositing Side
The top-level invert limitation is the one that affects my workflow most directly, and not just in Lightroom. The deeper lesson here is about building masks in layers you can actually manage. When I’m working in Photoshop, I keep my subject and background masks on separate layers from the beginning, even when it feels redundant early on. It means I never end up in the position of needing to invert a mask that has contradictory sub-layers stacked inside it.
If you’re using Lightroom for initial corrections before compositing, treat it as a one-direction tool for now. Make your subject adjustments, make your background adjustments as separate masks, and don’t count on being able to flip between them cleanly after the fact. The tools are genuinely good. They just reward planning more than experimentation.
The single most important thing to take from this is that Lightroom’s masking system is built around a layered sub-mask architecture that is powerful in one direction and brittle in another. Knowing where the brittleness lives means you can plan around it instead of discovering it at the wrong moment. Matt’s tutorial covers all three limitations clearly and without wasted time.
Watch the full tutorial on YouTube to see each limitation demonstrated directly in the interface, including the duplicate workaround in action.
Comments (4)
I tried this on a client project yesterday and the results were way better than expected.
I tried this on a client project yesterday and the results were way better than expected.
Great article! I actually covered something related on my site — the lighting angle is really complementary to this.
Shared this with my photography group. Everyone loved it.
Leave a Comment