Every composite artist eventually runs into the same wall. You’ve got a sky replacement or a light adjustment that looks technically correct but feels wrong. The edges are too hard. The blend is too mechanical. The selection you made with the Quick Selection tool or the lasso did exactly what you asked it to do, and somehow that’s the problem. Light doesn’t have hard edges. It bleeds, it wraps, it fades in gradations that no marching-ant selection can honestly represent.
I spent six months studying how light behaves on water for a single album cover project, and I can tell you that most of my early selection work was the thing standing between me and a convincing image. When I finally understood luminosity masks, it wasn’t just a new tool. It was a different way of thinking about what a selection actually is.
In this Matt Kloskowski tutorial, Watch the full tutorial on YouTube, he breaks down the concept from scratch using a deliberately simple document before moving to a real photo. That pedagogical choice matters. It strips away all the noise and shows you the underlying logic. Here’s the full walkthrough.
Step 1: Understand What a Luminosity Mask Actually Is
 Simple white-to-black gradient document open in Photoshop
Before touching a single tool, get this idea locked in: a luminosity mask is a selection built from the brightness values already present in your image. Instead of you drawing a selection boundary, Photoshop reads the luminance data in the photo and uses that as the selection itself. Bright areas become highly selected. Dark areas become minimally selected. Everything in between is partially selected in proportion to how bright it is.
Simple white-to-black gradient document open in Photoshop
Before touching a single tool, get this idea locked in: a luminosity mask is a selection built from the brightness values already present in your image. Instead of you drawing a selection boundary, Photoshop reads the luminance data in the photo and uses that as the selection itself. Bright areas become highly selected. Dark areas become minimally selected. Everything in between is partially selected in proportion to how bright it is.
This is the key shift in thinking. Most selections are binary. A pixel is either in or out. A luminosity mask makes every pixel a matter of degree, which is exactly how light actually behaves in the real world.
Step 2: Open the Channels Panel
 Channels panel visible with RGB channel highlighted
Navigate to your Channels panel. If you don’t see it, go to Window and select Channels from the menu. You’ll see your RGB composite channel at the top, followed by the individual Red, Green, and Blue channels below it.
Channels panel visible with RGB channel highlighted
Navigate to your Channels panel. If you don’t see it, go to Window and select Channels from the menu. You’ll see your RGB composite channel at the top, followed by the individual Red, Green, and Blue channels below it.
The RGB channel is what you want for a basic luminosity mask. It represents the combined luminance of all three color channels, which gives you the overall brightness map of the image. This is the data you’re about to convert into a selection.
Step 3: Load the Luminosity Selection with a Single Shortcut
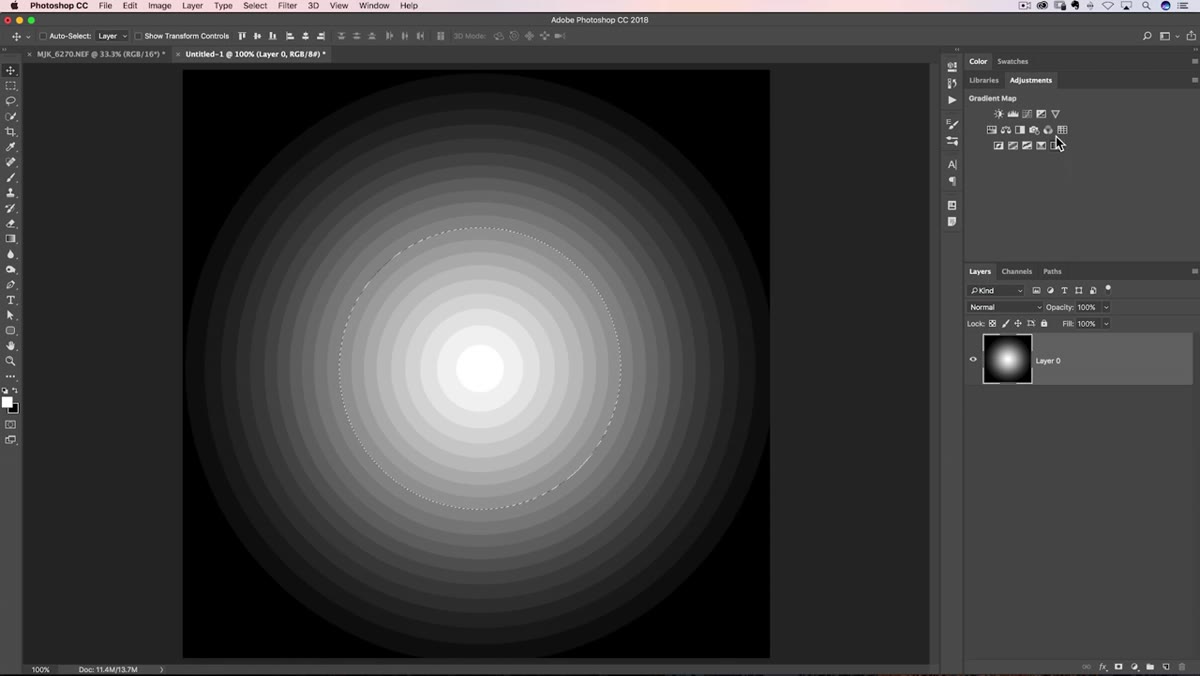
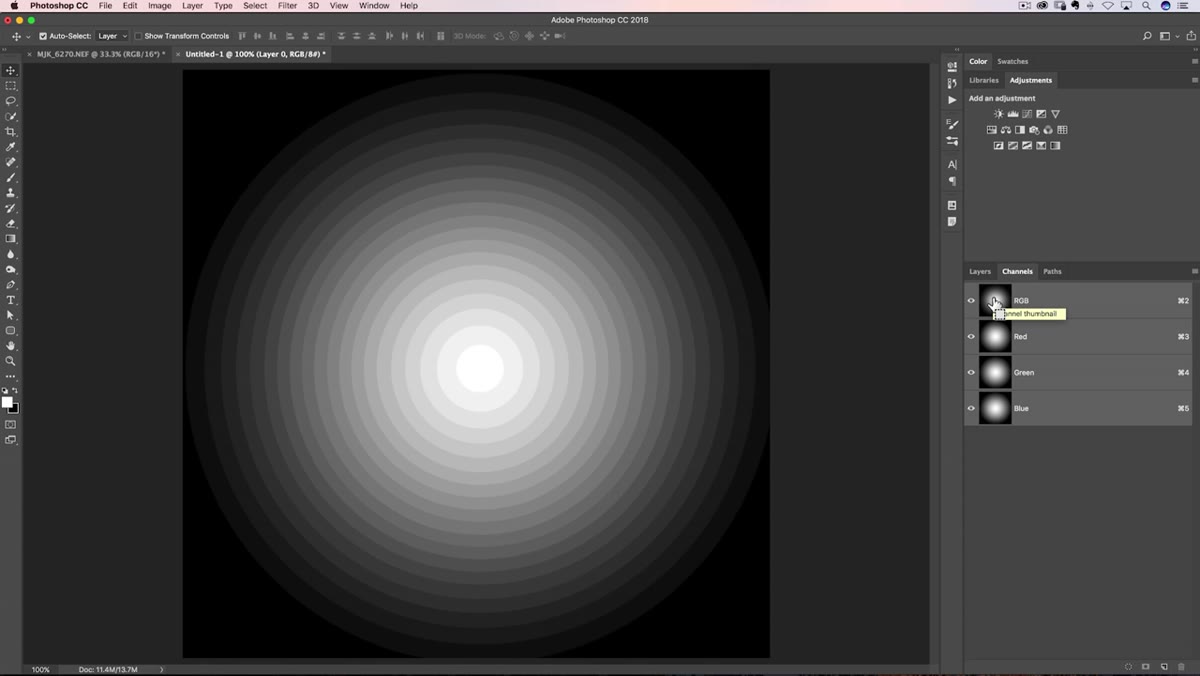 Marching ants selection appearing on the gradient document
Here’s where the magic happens. Hold Command on Mac or Control on PC, then click directly on the RGB channel thumbnail. Photoshop will immediately generate a selection based on the brightness values across the entire image.
Marching ants selection appearing on the gradient document
Here’s where the magic happens. Hold Command on Mac or Control on PC, then click directly on the RGB channel thumbnail. Photoshop will immediately generate a selection based on the brightness values across the entire image.
You’ll see the familiar marching ants appear, and at first glance the selection might look unremarkable, maybe just a rough oval or circular shape. Don’t be fooled by that. The marching ants are a visual shorthand. Photoshop can only display a selection boundary at the 50% threshold, but the actual selection contains far more information. Every pixel’s degree of selection corresponds to how bright it is. The display is simplified. The data is not.
Step 4: Add a Curves Adjustment Layer to the Active Selection
 Curves adjustment layer added with mask visible in Layers panel
With your luminosity selection still active, go to your Layers panel and add a Curves adjustment layer. Photoshop will automatically use your active selection as the mask for that adjustment layer.
Curves adjustment layer added with mask visible in Layers panel
With your luminosity selection still active, go to your Layers panel and add a Curves adjustment layer. Photoshop will automatically use your active selection as the mask for that adjustment layer.
Click on the mask thumbnail in the Layers panel to view it directly by Option-clicking (Mac) or Alt-clicking (PC). On a simple white-to-black gradient document like the one Kloskowski uses in the tutorial, the mask will look identical to the source image. That’s actually the point. The mask is a direct translation of the luminosity values you selected. On a complex photograph, this mask will look more like a detailed grayscale rendering of the tonal structure of the scene.
Step 5: Adjust the Curve to Target Highlights
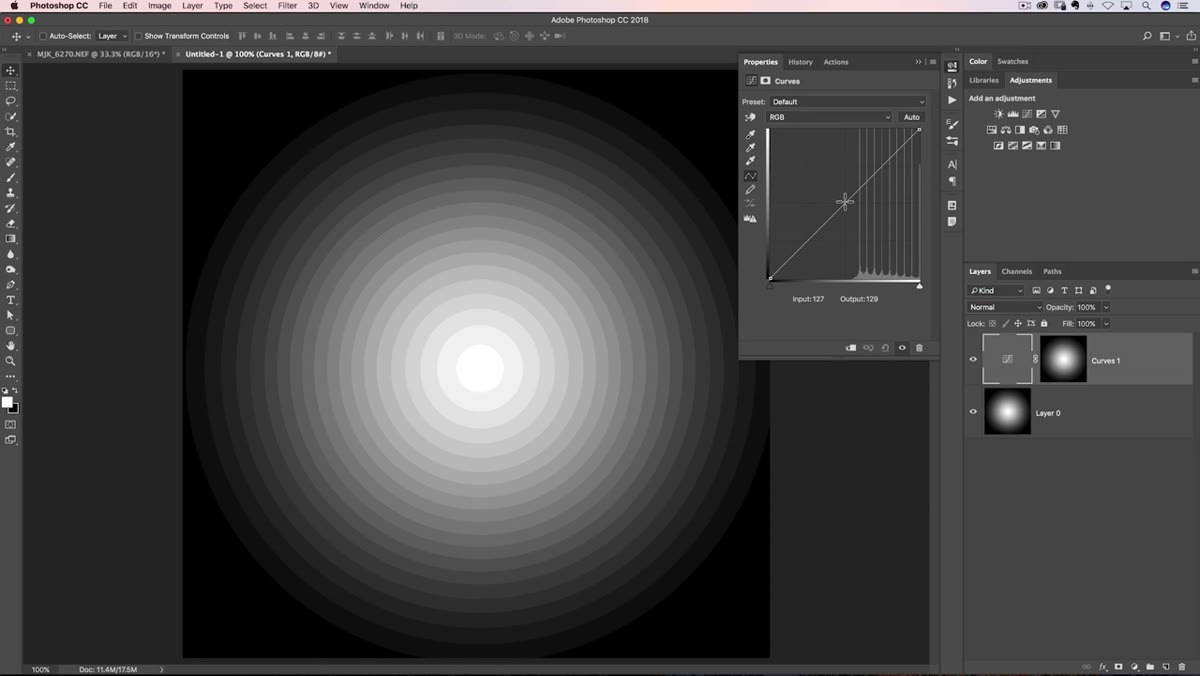 Curves adjustment pulling highlights down while shadows remain unaffected
Double-click the Curves adjustment layer to open it. Now make a downward pull on the upper portion of the curve. You’re pulling back on the highlights.
Curves adjustment pulling highlights down while shadows remain unaffected
Double-click the Curves adjustment layer to open it. Now make a downward pull on the upper portion of the curve. You’re pulling back on the highlights.
Here’s what makes this different from a global curves adjustment: because your mask is tied to the luminosity of the image, the darkest areas are barely affected at all. The brightest areas take the full weight of the adjustment. Mid-tones fall somewhere in between, naturally and proportionally. The result feels organic because it mirrors the way light actually works. You’re not clamping a hard selection around the sky and dragging it down as a flat region. You’re sculpting the light using the light’s own structure as your guide. Kloskowski draws a direct comparison to pulling back the Highlights slider in Lightroom or Camera Raw, and that’s a useful mental model for understanding the intent.
A Note From My Own Work: Luminosity Masks in Compositing, Not Just Photography
Kloskowski’s tutorial is primarily aimed at landscape photographers, and everything he demonstrates is directly applicable there. But in compositing work, luminosity masks solve a different and equally stubborn problem: integrating light sources across elements that were shot separately.
When I’m placing a subject into a scene with a strong directional light, I often use a luminosity mask derived from the background plate to build the basis of a dodge-and-burn layer on the subject. The mask tells me where the light is actually landing in the scene, and I use that as a guide rather than painting adjustments freehand. It doesn’t replace careful painting, but it gives you an honest starting point that’s grounded in the actual light data rather than your guess about where the light should fall. The composites that have fooled people, the ones where nobody questioned whether the pieces belonged together, almost always had luminosity-informed blending underneath them.
The single most important idea to take away from this technique is that selections can carry tonal information, not just boundaries. Once you stop thinking about selections as on-or-off decisions and start using the image’s own luminance data as your selection map, your adjustments and blends will start to feel less like edits and more like extensions of what was already there.
Watch the full tutorial on YouTube to see Kloskowski walk through the technique in real time, including how it translates from the simplified gradient document to an actual landscape photograph.
Comments
Leave a Comment