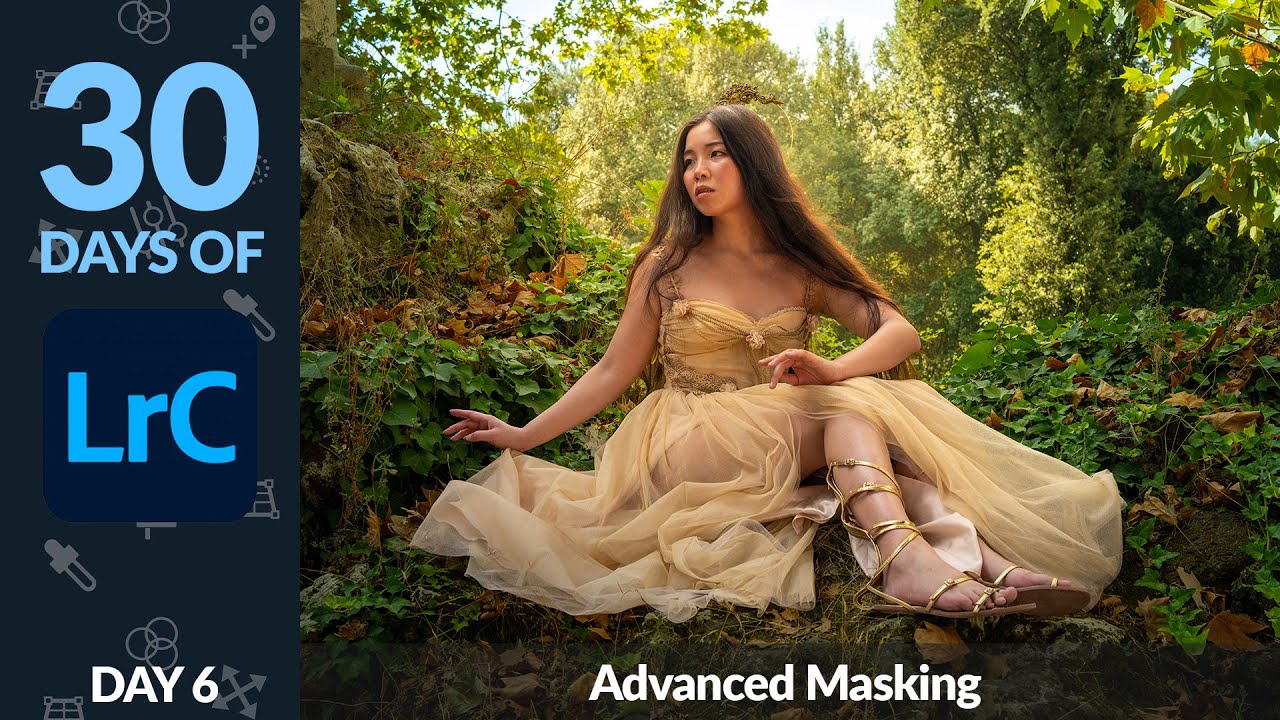
There’s a specific kind of frustration that comes from knowing exactly what you want an image to feel like and not being able to get the tools to cooperate. For me, it usually shows up during the early stages of a composite, when I’m trying to isolate and adjust different zones of a photo before it ever touches Photoshop. The background needs one mood, the subject another, and the sky something else entirely. For years I handled this by jumping between applications, stacking adjustments in ways that made the file heavier and the workflow slower than it needed to be.
What I’ve come to realize is that Lightroom’s masking system, when you actually push it past the basics, can do a serious amount of that zone-based work before a single layer gets created. In this Aaron Nace (PHLEARN) tutorial, part of his 30 Days of Lightroom series, he works through a forest portrait and demonstrates how to stack, combine, and subtract masks to build edits with a level of precision most people don’t associate with Lightroom. Watch the full tutorial on YouTube if you want to follow along with the actual image file, which he makes available for download.
The technique he’s teaching here isn’t just a Lightroom trick. It’s a way of thinking about images in zones, which is exactly how I approach every composite I sketch out before opening Photoshop. Once you internalize this workflow, you start seeing your photos as a collection of independent regions, each one editable on its own terms.
Step 1: Start with Auto, Then Assess What the Image Needs
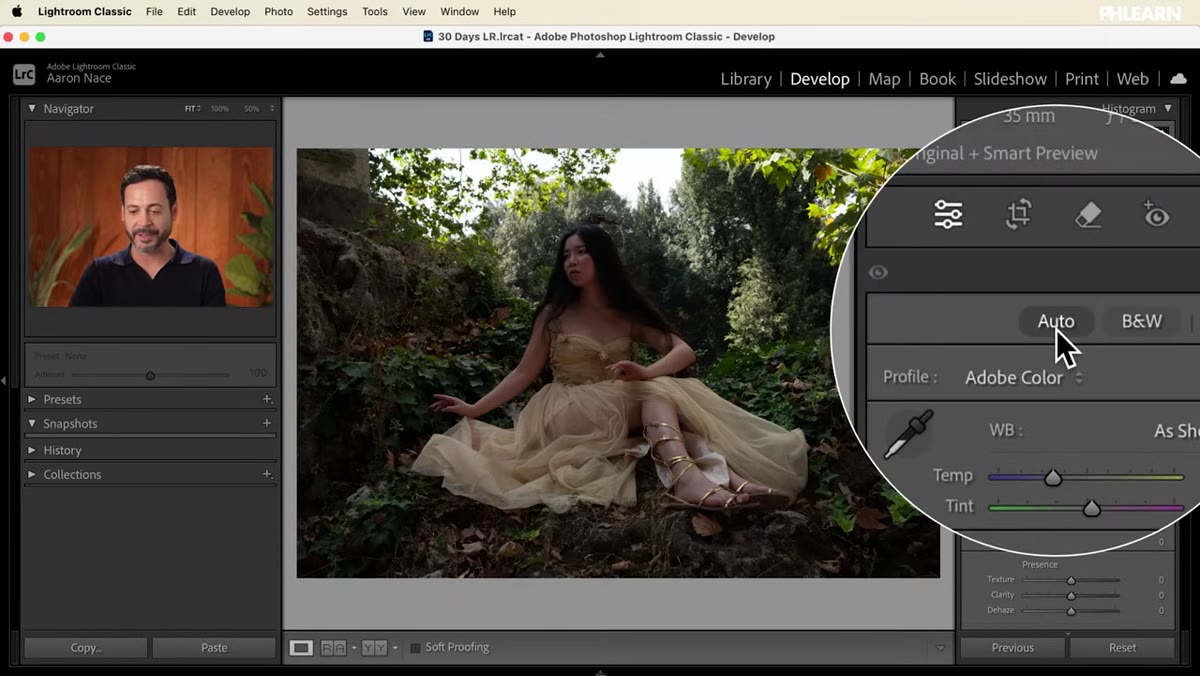 Auto button clicked in Basic panel, image brightening
Before any mask gets created, Nace starts in the Basic panel and clicks the Auto button. This isn’t laziness. Auto gives you a calibrated starting point based on the tonal content of the image, and it’s a fast way to see what you’re actually working with before you start making decisions. From there, you can see which zones of the image are already close and which ones need dedicated attention. In this case, the image looks solid overall but the subject needs to be lifted separately from the environment around her.
Auto button clicked in Basic panel, image brightening
Before any mask gets created, Nace starts in the Basic panel and clicks the Auto button. This isn’t laziness. Auto gives you a calibrated starting point based on the tonal content of the image, and it’s a fast way to see what you’re actually working with before you start making decisions. From there, you can see which zones of the image are already close and which ones need dedicated attention. In this case, the image looks solid overall but the subject needs to be lifted separately from the environment around her.
Step 2: Create a Background Mask and Push the Environment
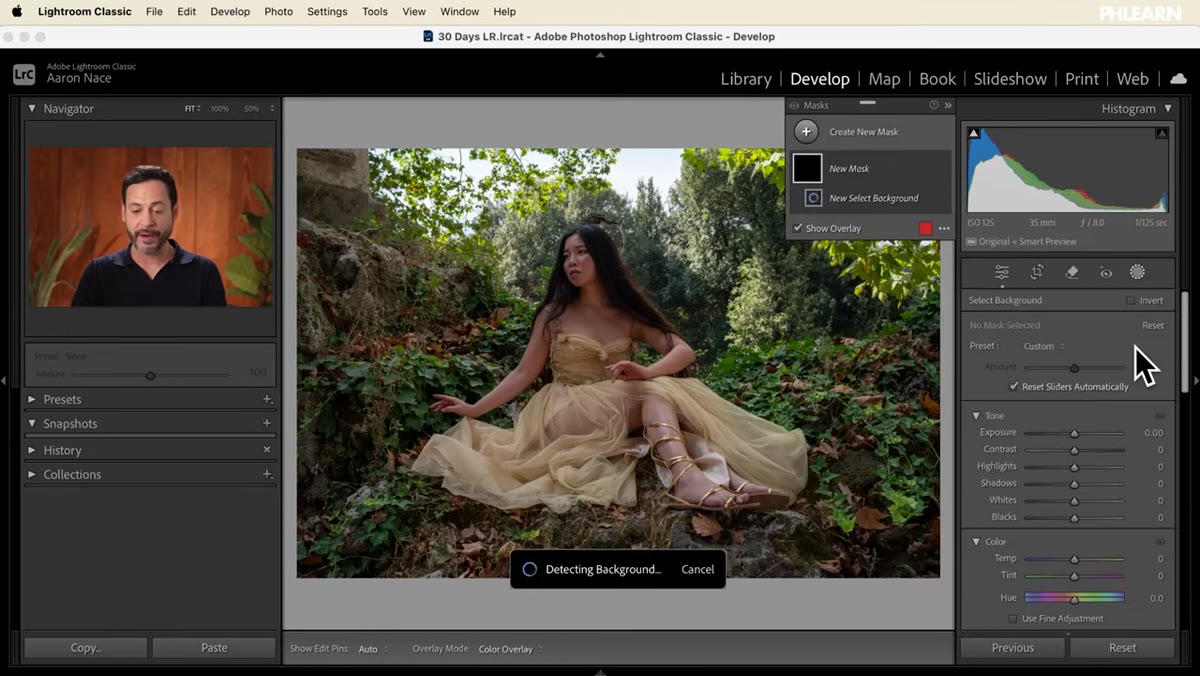 Background mask selected, masking panel open
Open the masking panel and select “Background.” Lightroom will generate a selection of everything in the frame that isn’t your subject. From here, Nace adjusts the tint toward green and raises saturation to intensify the forest tones. These are targeted moves, the kind that would blow out or muddy the subject if applied globally. The background mask keeps those adjustments contained. When you’re done, use the eyeball icon in the masking panel to toggle the mask on and off so you can evaluate the change in context.
Background mask selected, masking panel open
Open the masking panel and select “Background.” Lightroom will generate a selection of everything in the frame that isn’t your subject. From here, Nace adjusts the tint toward green and raises saturation to intensify the forest tones. These are targeted moves, the kind that would blow out or muddy the subject if applied globally. The background mask keeps those adjustments contained. When you’re done, use the eyeball icon in the masking panel to toggle the mask on and off so you can evaluate the change in context.
Step 3: Add a Sky Mask and Recover Highlight Detail
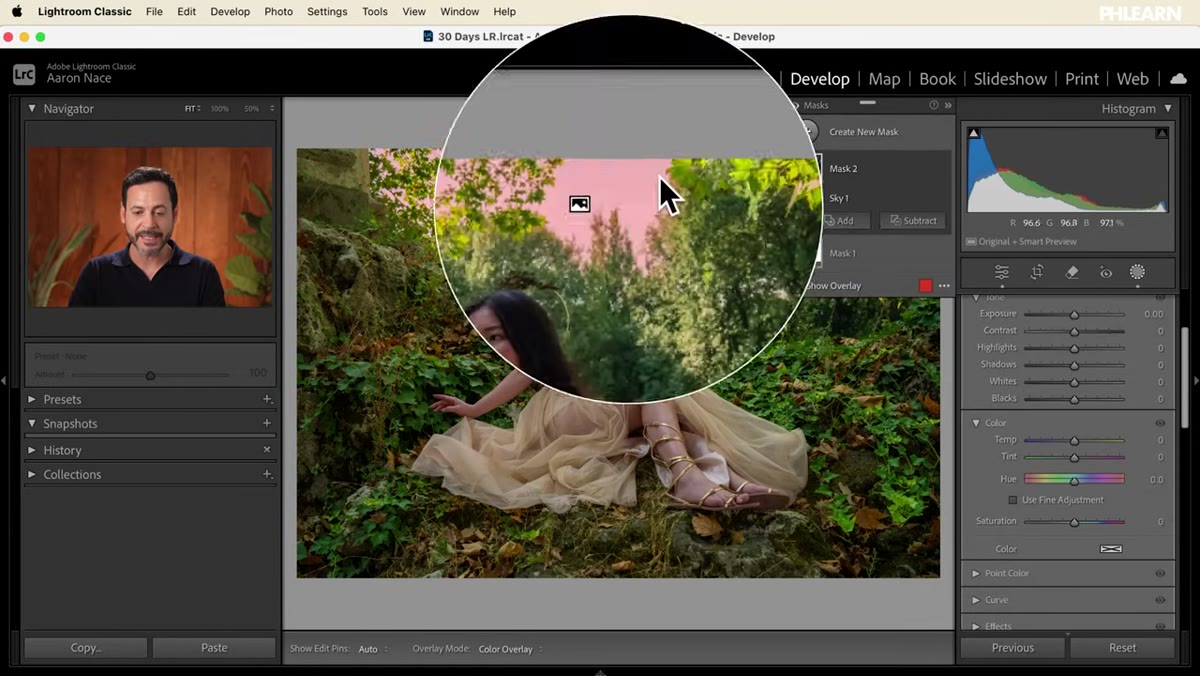 Sky mask applied, blue color temperature adjustment
With the background adjusted, create a new mask and select “Sky.” Lightroom’s sky detection is strong enough that in most outdoor shots it will isolate the sky cleanly without manual cleanup. Nace pulls the color temperature toward blue to give the sky more depth and cooler contrast against the warm forest tones. This is also where you can recover blown highlights in the clouds or sky without affecting the trees or subject below. Think of each mask as a separate development pass over a specific region of the image.
Sky mask applied, blue color temperature adjustment
With the background adjusted, create a new mask and select “Sky.” Lightroom’s sky detection is strong enough that in most outdoor shots it will isolate the sky cleanly without manual cleanup. Nace pulls the color temperature toward blue to give the sky more depth and cooler contrast against the warm forest tones. This is also where you can recover blown highlights in the clouds or sky without affecting the trees or subject below. Think of each mask as a separate development pass over a specific region of the image.
Step 4: Isolate the Subject and Adjust Exposure Independently
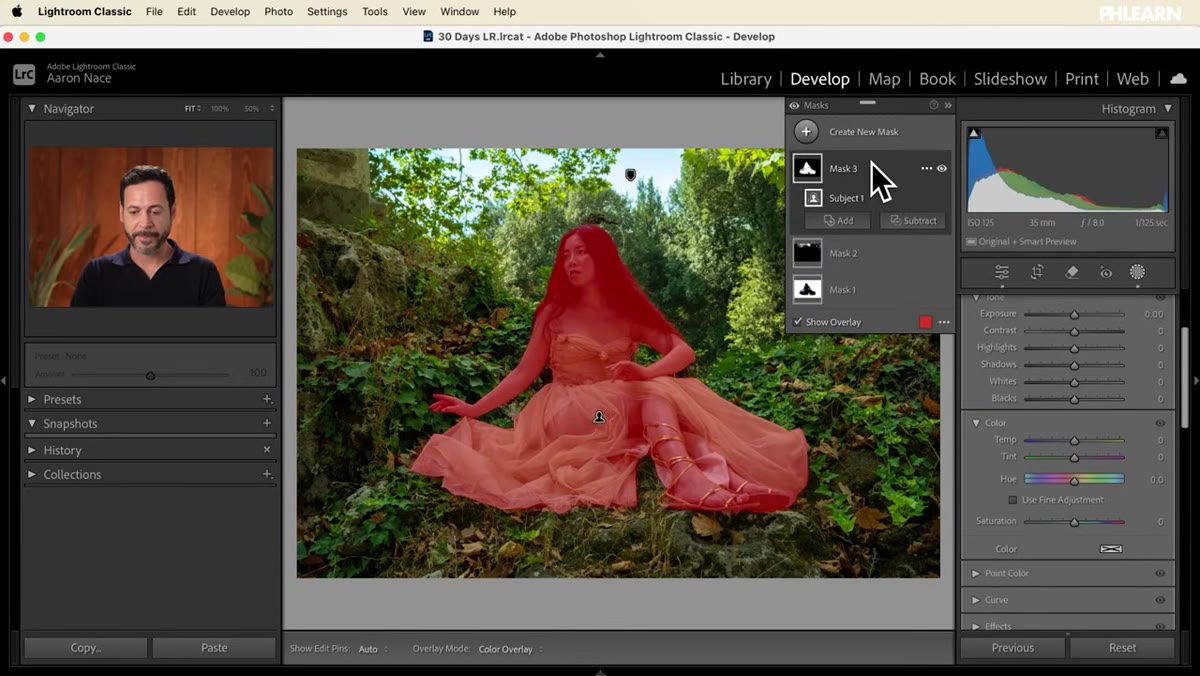 Select Subject mask created, exposure slider raised
Create another new mask and use “Select Subject.” Once the selection is active, you can raise exposure, adjust highlights, and open shadows specifically for your subject without any of those changes bleeding into the background or sky. Nace makes modest but meaningful adjustments here, just enough to separate the subject from the environment and draw the eye where it should go. The goal isn’t to create a dramatic HDR effect. It’s to give each zone of the image a tonal value that feels natural and intentional.
Select Subject mask created, exposure slider raised
Create another new mask and use “Select Subject.” Once the selection is active, you can raise exposure, adjust highlights, and open shadows specifically for your subject without any of those changes bleeding into the background or sky. Nace makes modest but meaningful adjustments here, just enough to separate the subject from the environment and draw the eye where it should go. The goal isn’t to create a dramatic HDR effect. It’s to give each zone of the image a tonal value that feels natural and intentional.
Step 5: Use a Radial Gradient to Build a Glow Effect
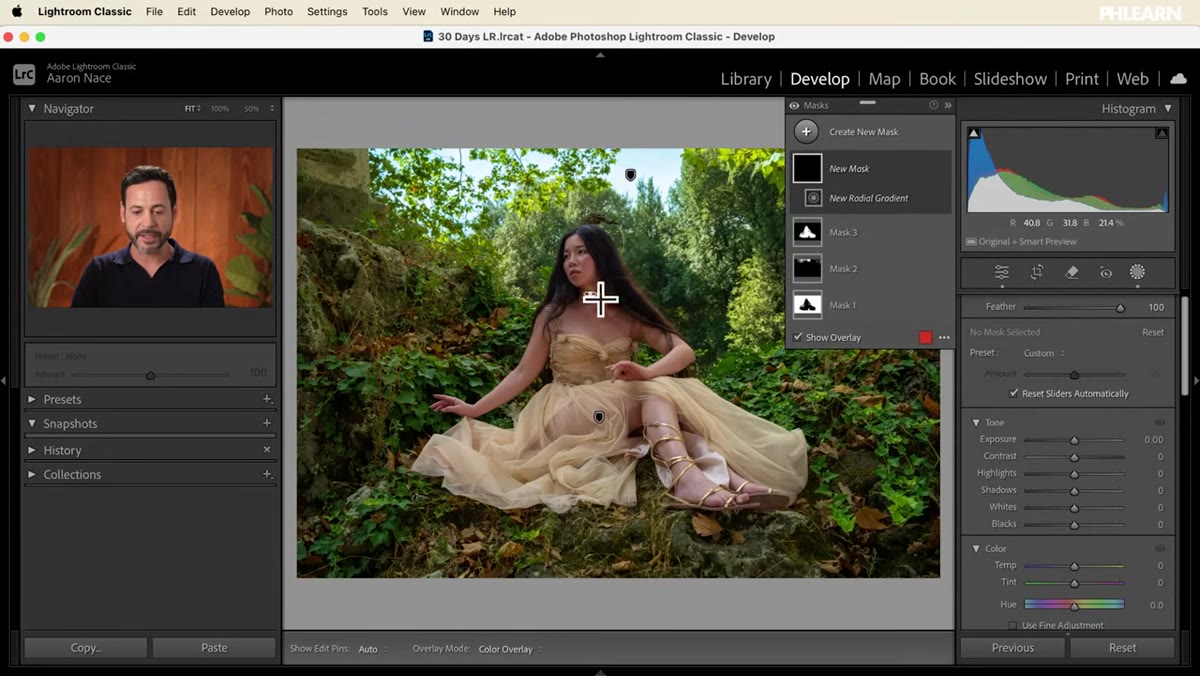 Radial gradient drawn behind subject in frame
This is where the tutorial shifts from basic masking into territory that actually earns the “advanced” label. Nace creates a new mask using a radial gradient, drawing it from behind the subject outward toward the frame edges. This gradient is going to carry a light boost, simulating the kind of ambient glow you’d expect from sunlight filtering through trees. On its own, the radial gradient will affect everything inside it, including the subject. The next step is what makes this precise.
Radial gradient drawn behind subject in frame
This is where the tutorial shifts from basic masking into territory that actually earns the “advanced” label. Nace creates a new mask using a radial gradient, drawing it from behind the subject outward toward the frame edges. This gradient is going to carry a light boost, simulating the kind of ambient glow you’d expect from sunlight filtering through trees. On its own, the radial gradient will affect everything inside it, including the subject. The next step is what makes this precise.
Step 6: Subtract the Subject from the Radial Gradient Mask
 Subtract mask option selected from mask panel
Inside the mask panel, you can subtract one mask from another. After placing the radial gradient, Nace subtracts the subject selection from it. This removes the subject from the gradient’s area of influence, so the glow effect only lives in the space behind the subject. The edge where the two masks meet becomes the boundary of the effect. This is the core concept of the entire tutorial: masks are not fixed selections, they’re building blocks you can combine and modify to reach any region of the image you need.
Subtract mask option selected from mask panel
Inside the mask panel, you can subtract one mask from another. After placing the radial gradient, Nace subtracts the subject selection from it. This removes the subject from the gradient’s area of influence, so the glow effect only lives in the space behind the subject. The edge where the two masks meet becomes the boundary of the effect. This is the core concept of the entire tutorial: masks are not fixed selections, they’re building blocks you can combine and modify to reach any region of the image you need.
What I’d Add from My Own Practice
The subtract workflow Nace demonstrates here is something I now do routinely in Lightroom before any composite work begins. But there’s an extension worth knowing: you can also intersect masks, not just add or subtract them. If you want an effect that only applies where two selections overlap, like a shadow adjustment that only lives inside a subject but only in the lower half of the frame, you can combine a subject mask with a linear gradient using intersection. Lightroom gives you that control inside the same panel.
One thing I always do after building a stack of masks like this is review each one individually by toggling the other masks off. It’s easy to create edits that look correct when viewed together but fall apart when you isolate them. I keep that habit from my compositing work, where checking individual elements in isolation is how you catch the details that will bother you six months later. Trust me on that one.
The single most important idea in this tutorial is that Lightroom’s masks are not just selection tools. They’re an editing architecture. When you start treating them as layers of intent, each one responsible for a different zone of the image, your Lightroom workflow becomes something close to a full pre-production pass before the image ever needs heavier software. That shift in thinking is worth more than any individual setting Nace adjusts.
Watch the full tutorial on YouTube to follow along with the downloadable raw file and see every mask built from scratch.
Comments (5)
I keep coming back to this article. It's that useful.
Been doing this wrong for years apparently. Thanks for the wake-up call.
Printing this out and pinning it next to my monitor. That good.
Quality content like this is rare. Keep it up.
Shared this with my photography group. Everyone loved it.
Leave a Comment