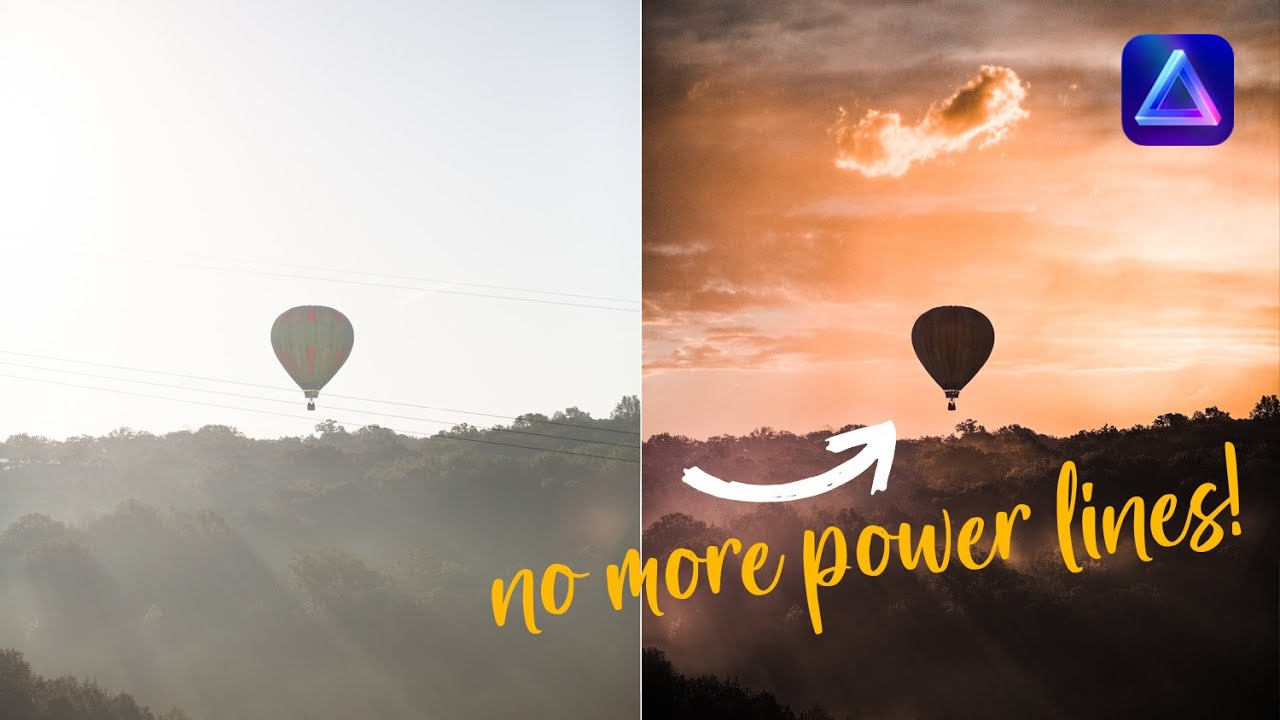
There’s a specific kind of frustration that lives in the compositing world, and it has nothing to do with selections or blend modes. It’s the moment you realize the light in your base plate is fighting everything you’re trying to build on top of it. The foreground is muddy. The background is blowing out. You’ve got a subject that was shot in flat overcast light and you’re trying to marry it to a golden-hour sky, and no amount of Curves adjustment is going to make that feel honest. I’ve been building composites long enough to know that light is the first thing that sells a scene and the first thing that breaks it. So when I saw Peter McKinnon walk through a feature called Relight AI inside Luminar Neo, I stopped what I was working on and paid attention.
Watch the full tutorial on YouTube
In this Peter McKinnon tutorial, the concept is simple but the implications are significant: what if you could recast light on a photograph after the shutter closes, with the software intelligently separating foreground from background to apply that light selectively? For photographers, that’s a correction tool. For someone doing compositing work, it’s something closer to a lighting rig you can dial in after the fact. The tutorial uses six real reader-submitted photos as test cases, which makes it unusually practical. You’re not watching a perfect studio image get polished. You’re watching underexposed landscapes and uneven portraits get rescued, which is exactly the kind of raw material I’m working with every day.
Step 1: Open Your Image in Luminar Neo and Navigate to the Creative Tab
 Luminar Neo interface showing the Creative tab panel
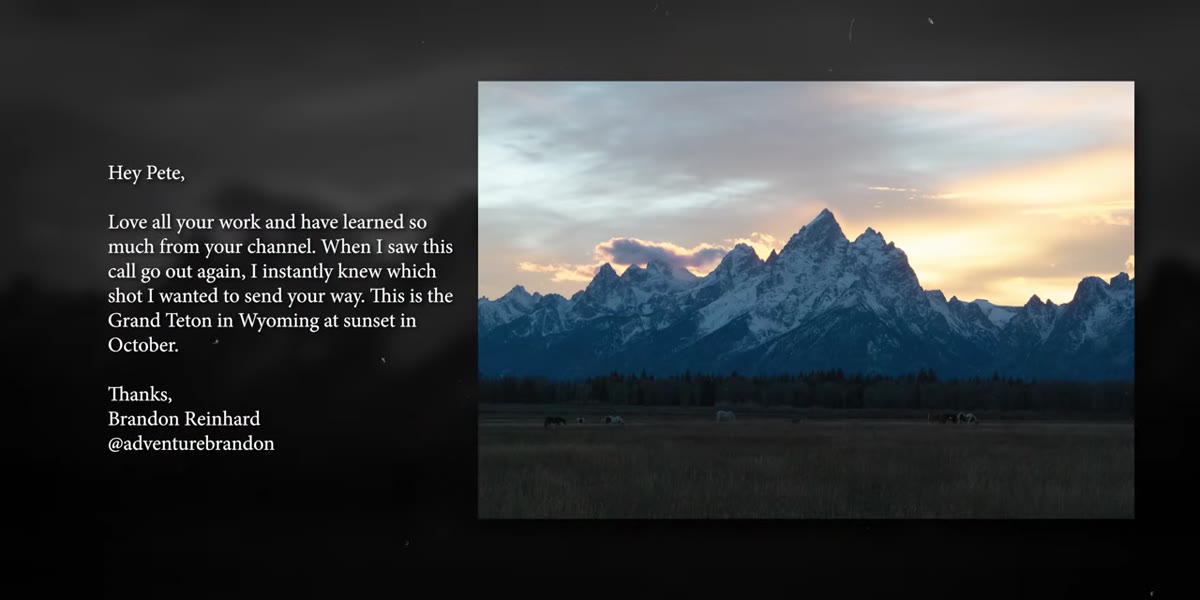
Start with an image that has a lighting problem you can actually see. McKinnon uses a landscape shot of the Grand Teton at sunset, where the foreground field is significantly darker than the sky. Once your image is open in Luminar Neo, look for the Creative tab in the editing panel on the right side. This is where the Relight AI tool lives, and it’s worth spending a moment just locating it before you touch any sliders. Knowing where you’re going before you start dragging controls is the difference between editing and fumbling.
Luminar Neo interface showing the Creative tab panel
Start with an image that has a lighting problem you can actually see. McKinnon uses a landscape shot of the Grand Teton at sunset, where the foreground field is significantly darker than the sky. Once your image is open in Luminar Neo, look for the Creative tab in the editing panel on the right side. This is where the Relight AI tool lives, and it’s worth spending a moment just locating it before you touch any sliders. Knowing where you’re going before you start dragging controls is the difference between editing and fumbling.
Step 2: Activate Relight AI and Understand the Three Core Sliders
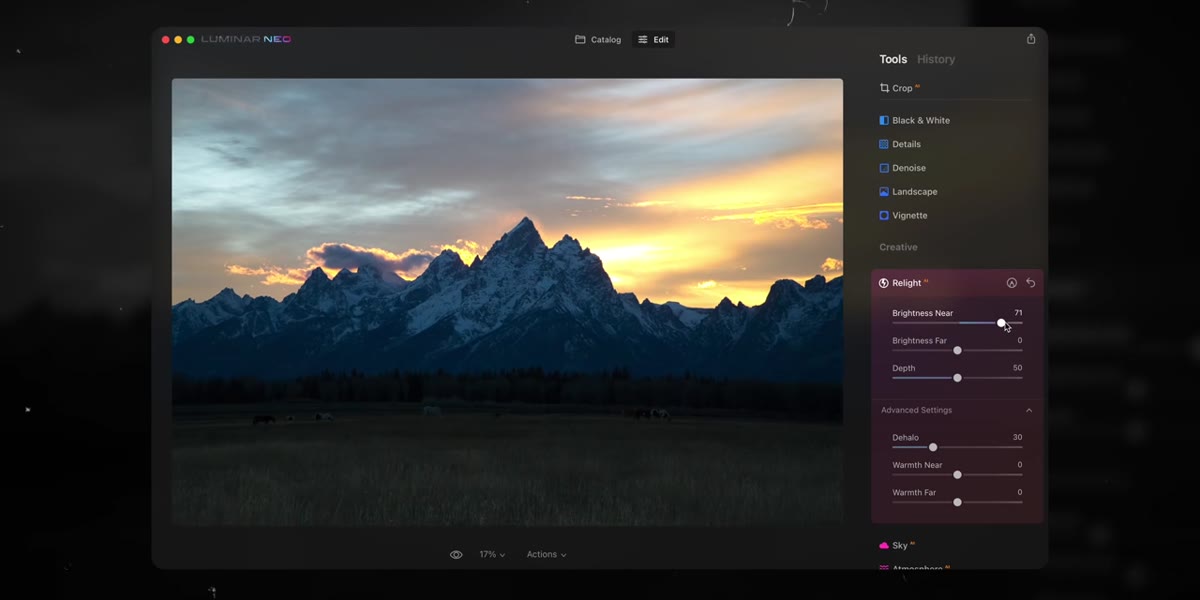
 Relight AI panel open showing Brightness Near, Brightness Far, and Depth sliders
Click on Relight AI inside the Creative tab and you’ll see three primary controls: Brightness Near, Brightness Far, and Depth. Think of Near and Far as two separate light sources, one aimed at the front of the scene and one aimed at the back. They don’t just brighten the entire image uniformly. The software is reading depth information in the photo and making intelligent guesses about what’s close to the camera and what’s receding. Depth controls how far the near light reaches into the scene before it falls off. Before you move anything, just look at your image and decide: is your problem in the foreground, the background, or both?
Relight AI panel open showing Brightness Near, Brightness Far, and Depth sliders
Click on Relight AI inside the Creative tab and you’ll see three primary controls: Brightness Near, Brightness Far, and Depth. Think of Near and Far as two separate light sources, one aimed at the front of the scene and one aimed at the back. They don’t just brighten the entire image uniformly. The software is reading depth information in the photo and making intelligent guesses about what’s close to the camera and what’s receding. Depth controls how far the near light reaches into the scene before it falls off. Before you move anything, just look at your image and decide: is your problem in the foreground, the background, or both?
Step 3: Pull Up Brightness Near to Add Light to the Foreground
 Brightness Near slider pulled up, foreground field visibly brightened
For a landscape where the foreground is underexposed, start by sliding Brightness Near upward. What you’ll see, and this is the part worth pausing on, is that the software lifts the foreground without dragging the background along with it. In McKinnon’s example, the field in front of the Tetons brightens considerably while the mountains in silhouette stay exactly where they are. This is the thing that lifting Shadows in Lightroom cannot do cleanly. Shadow recovery is global unless you mask it. Relight AI is doing the spatial reasoning for you.
Brightness Near slider pulled up, foreground field visibly brightened
For a landscape where the foreground is underexposed, start by sliding Brightness Near upward. What you’ll see, and this is the part worth pausing on, is that the software lifts the foreground without dragging the background along with it. In McKinnon’s example, the field in front of the Tetons brightens considerably while the mountains in silhouette stay exactly where they are. This is the thing that lifting Shadows in Lightroom cannot do cleanly. Shadow recovery is global unless you mask it. Relight AI is doing the spatial reasoning for you.
Step 4: Use the Depth Slider to Control How Far the Light Reaches
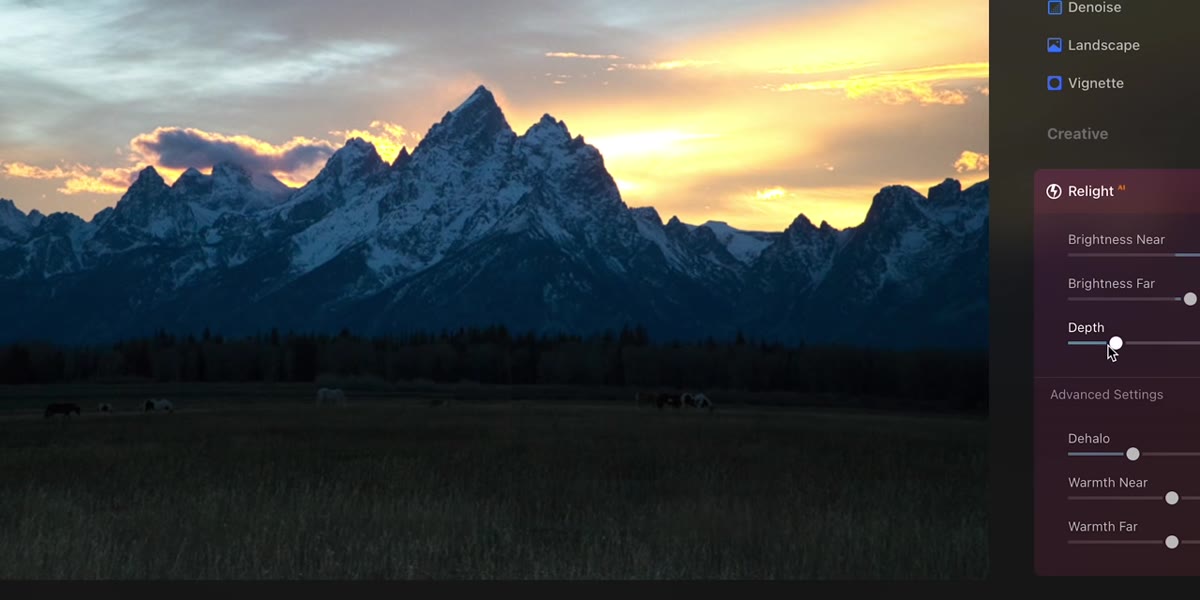 Depth slider being moved, light spreading or contracting across the foreground
Once you’ve set your Brightness Near value, the Depth slider becomes a creative decision, not just a correction. Pulling it toward zero pushes the light further across the scene, almost like a rising sun sweeping over the frame. Pulling it the other direction creates a tighter band of light, more like a shaft cutting through the foreground. McKinnon describes it as an animated effect in real time, and he’s right. This is where you stop thinking about it as a fix and start thinking about it as a lighting choice. Try moving Depth slowly and watch where the edge of the light falls.
Depth slider being moved, light spreading or contracting across the foreground
Once you’ve set your Brightness Near value, the Depth slider becomes a creative decision, not just a correction. Pulling it toward zero pushes the light further across the scene, almost like a rising sun sweeping over the frame. Pulling it the other direction creates a tighter band of light, more like a shaft cutting through the foreground. McKinnon describes it as an animated effect in real time, and he’s right. This is where you stop thinking about it as a fix and start thinking about it as a lighting choice. Try moving Depth slowly and watch where the edge of the light falls.
Step 5: Apply Relight AI to Portraits Using Brightness Near and Far Together
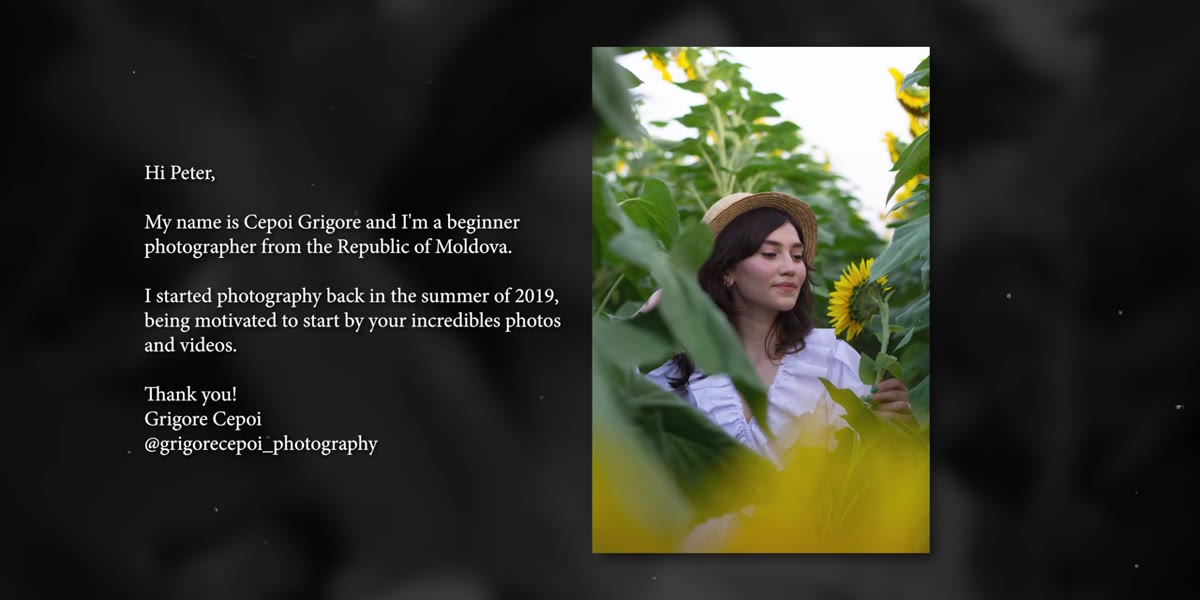 Portrait photo with Brightness Near raised, subject separated from background
The tool isn’t limited to landscapes. McKinnon demonstrates it on a portrait shot in front of sunflowers, and the approach flips slightly. Here, the goal is separation: brighten the subject in the near field, bring down the brightness in the far field. The background sunflowers actually stay relatively unaffected when Brightness Near goes up, which is a natural consequence of the depth mapping. Then pulling Brightness Far down darkens the background without touching the subject. It’s a manual vignette with spatial intelligence behind it. One useful addition to know about: there’s a De-halo option in the advanced settings. If you see a glowing edge appear around your subject after relighting, that control will clean it up.
Portrait photo with Brightness Near raised, subject separated from background
The tool isn’t limited to landscapes. McKinnon demonstrates it on a portrait shot in front of sunflowers, and the approach flips slightly. Here, the goal is separation: brighten the subject in the near field, bring down the brightness in the far field. The background sunflowers actually stay relatively unaffected when Brightness Near goes up, which is a natural consequence of the depth mapping. Then pulling Brightness Far down darkens the background without touching the subject. It’s a manual vignette with spatial intelligence behind it. One useful addition to know about: there’s a De-halo option in the advanced settings. If you see a glowing edge appear around your subject after relighting, that control will clean it up.
Step 6: Fine-Tune with Advanced Settings, Then Compare Before and After
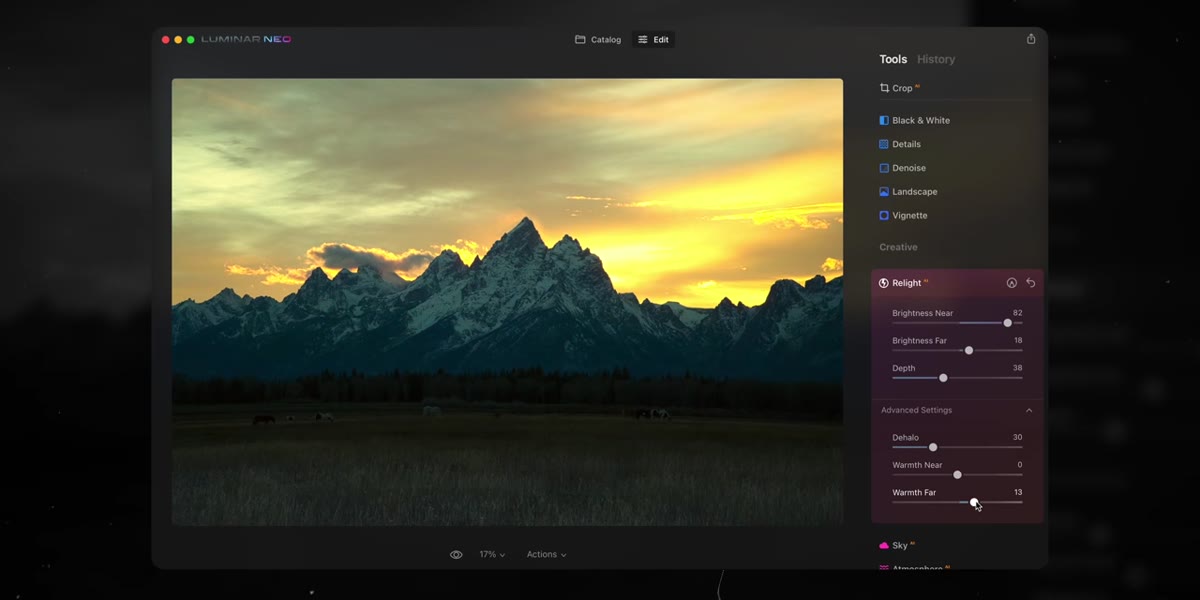 Advanced settings expanded, warmth and color controls visible below main sliders
Under the main three sliders, Luminar Neo’s Relight AI has an Advanced settings section. Here you can add warmth to the near light, which is useful if you’re trying to simulate golden-hour quality on a flat exposure. You can also pull out a slight green shift or cool it toward blue depending on the mood you’re after. These are small adjustments, but they’re the difference between light that looks added and light that looks like it was always there. Once you’ve made your changes, toggle the before and after view. McKinnon does this throughout the tutorial and it’s a good habit. Your eye adjusts to edits quickly. The toggle keeps you honest.
Advanced settings expanded, warmth and color controls visible below main sliders
Under the main three sliders, Luminar Neo’s Relight AI has an Advanced settings section. Here you can add warmth to the near light, which is useful if you’re trying to simulate golden-hour quality on a flat exposure. You can also pull out a slight green shift or cool it toward blue depending on the mood you’re after. These are small adjustments, but they’re the difference between light that looks added and light that looks like it was always there. Once you’ve made your changes, toggle the before and after view. McKinnon does this throughout the tutorial and it’s a good habit. Your eye adjusts to edits quickly. The toggle keeps you honest.
What This Means if You’re Building Composites, Not Just Correcting Photos
I want to add something the tutorial doesn’t cover, because McKinnon is coming at this as a photographer and I’m coming at it as someone who builds scenes from multiple elements. The Relight AI tool is genuinely interesting for composite work during the base plate selection and correction phase, before you even start layering elements. If I can normalize the lighting in a background plate so the foreground isn’t fighting me from the start, that saves me time masking and painting light later in Photoshop. I still do my final lighting work by hand, with luminosity masks and painted light layers. But getting the raw material closer to where it needs to be before I bring it into a composite pipeline? That’s worth the step.
One honest limitation: the tool works best when the depth information in the image is legible. A very flat, evenly lit scene with no clear foreground-background separation gives the software less to work with, and the results will be less precise. It’s not magic. It’s smart pattern recognition that depends on having a pattern to recognize.
The core takeaway here is this: selective light correction used to require time-consuming masking. Luminar Neo’s Relight AI does the spatial reasoning automatically, and the results on real-world, imperfect photos are genuinely useful. Whether you’re a photographer looking to rescue a shot or a compositor trying to prep a plate, it’s a tool worth building into your process.
Watch the full tutorial on YouTube
Comments (2)
I've watched a dozen tutorials on this and yours is the clearest by far.
Been doing this wrong for years apparently. Thanks for the wake-up call.
Leave a Comment