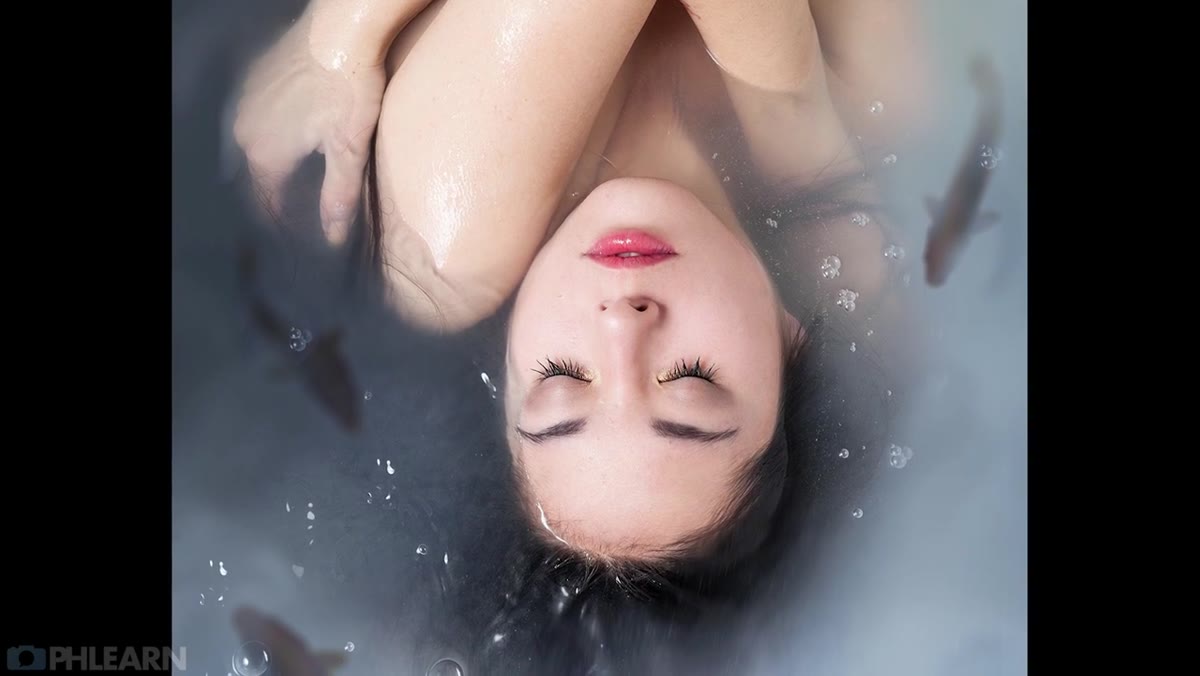
There’s a specific kind of problem that keeps showing up in compositing work: you have two images that are technically compatible, same general lighting direction, similar color temperature, reasonable resolution match, but the moment you stack them together, something reads as fake. The eye knows, even when it can’t explain why. I’ve spent years chasing that gap between “placed” and “integrated,” and underwater composites are where the gap is widest. Water scatters light, shifts color, adds depth haze and particulate, and demands that anything living inside it carry all of that information on its surface.
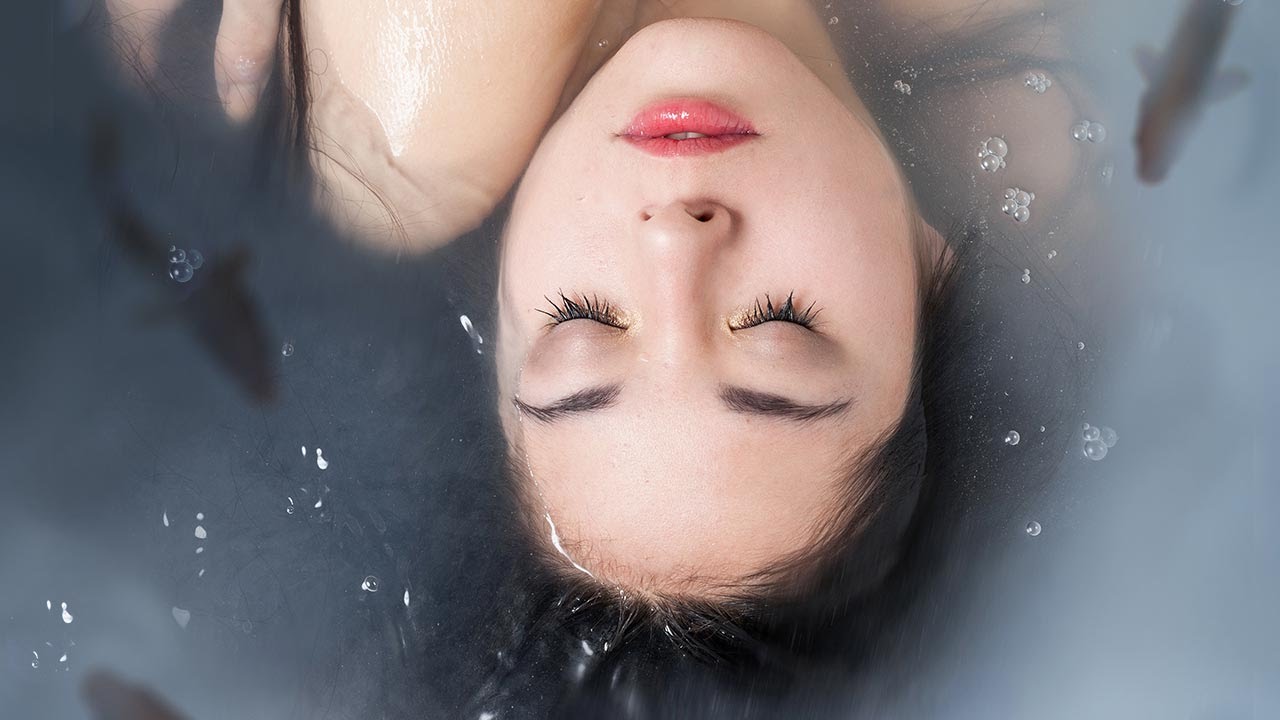
That’s exactly why this tutorial caught my attention. In this Aaron Nace (PHLEARN) tutorial, Watch the full tutorial on YouTube, he takes a submitted fan photo of a girl floating in murky water and composites fish into the scene using blending modes, selective blurring, color grading, and texture layering. It’s a compact lesson, but the principles scale directly to any environment-based composite, whether you’re placing a figure into fog, a car into rain, or a creature into fire.
Here’s the full walkthrough, reconstructed from the tutorial in the order Aaron demonstrates it.
Step 1: Import and Resize Your Elements
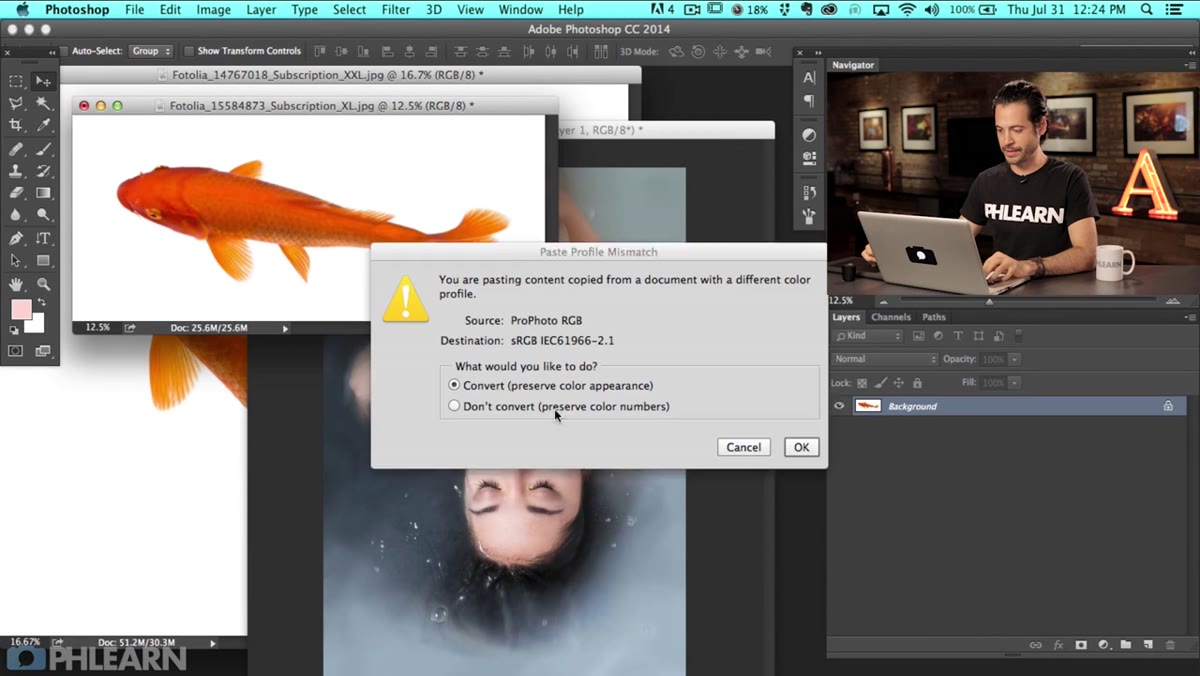 Fish layers being dragged into the background water photo
Bring your stock elements into the base image either by copying and pasting or using the Move tool to drag between open documents. Once they’re in, hit Command+T (Ctrl+T on PC) to enter Free Transform. Click the chain link icon between the Width and Height fields to constrain proportions, then scale down to a size that makes spatial sense within the scene. For underwater subjects, err smaller than feels right initially. Water compresses perceived size.
Fish layers being dragged into the background water photo
Bring your stock elements into the base image either by copying and pasting or using the Move tool to drag between open documents. Once they’re in, hit Command+T (Ctrl+T on PC) to enter Free Transform. Click the chain link icon between the Width and Height fields to constrain proportions, then scale down to a size that makes spatial sense within the scene. For underwater subjects, err smaller than feels right initially. Water compresses perceived size.
Don’t commit to final positioning yet. You’re just establishing a workable scale before you start multiplying and modifying layers.
Step 2: Duplicate and Vary the Elements to Avoid Repetition
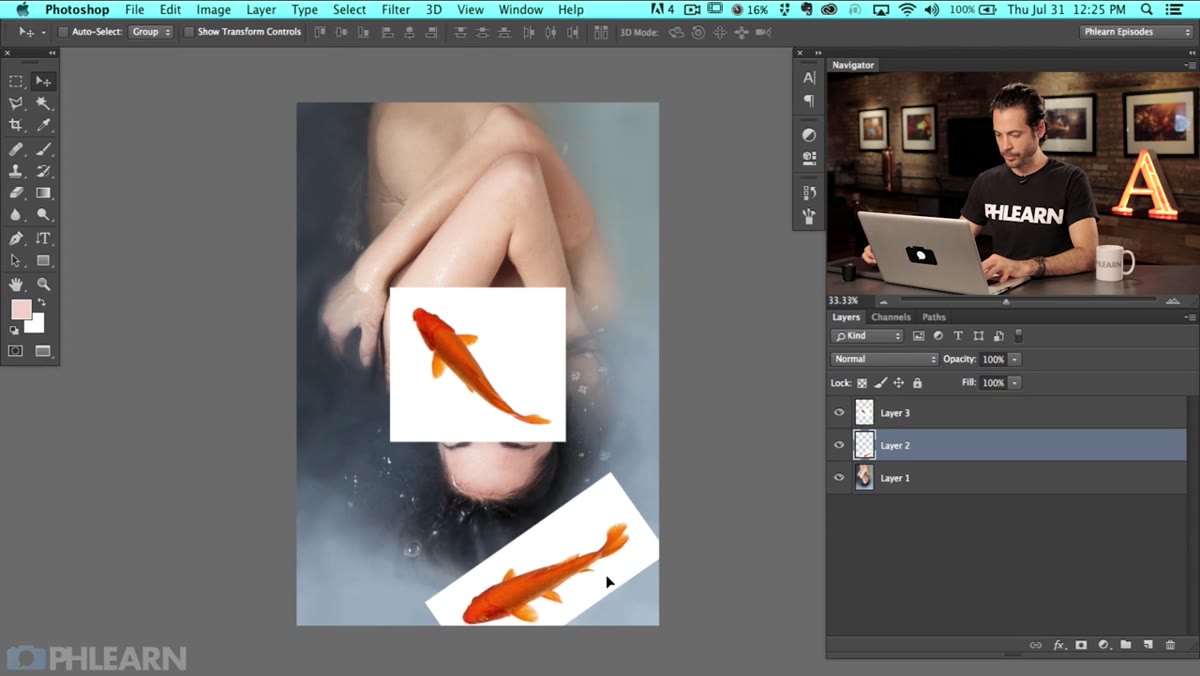 Duplicate fish layer being repositioned and warped in canvas
Hit Command+J to duplicate a layer, then use Free Transform again. Right-click inside the transform bounding box and select Flip Horizontal to immediately create a mirrored variant. From the same right-click menu, go to Warp. This lets you push and pull points on the fish’s body to change its silhouette and swimming posture. A subtle S-curve bend reads as motion; a more dramatic curve suggests the fish turning.
Duplicate fish layer being repositioned and warped in canvas
Hit Command+J to duplicate a layer, then use Free Transform again. Right-click inside the transform bounding box and select Flip Horizontal to immediately create a mirrored variant. From the same right-click menu, go to Warp. This lets you push and pull points on the fish’s body to change its silhouette and swimming posture. A subtle S-curve bend reads as motion; a more dramatic curve suggests the fish turning.
The goal is variety from a limited asset count. Using the same image four times is fine if no two instances look identical in shape, scale, or orientation. Aaron also deliberately positions at least one fish partially outside the frame edge. That choice is worth stealing. A subject cropped by the frame implies a world that continues beyond the image, which is one of the cheapest ways to make a composite feel photographically real rather than digitally arranged.
Step 3: Consider Camera Angle Consistency
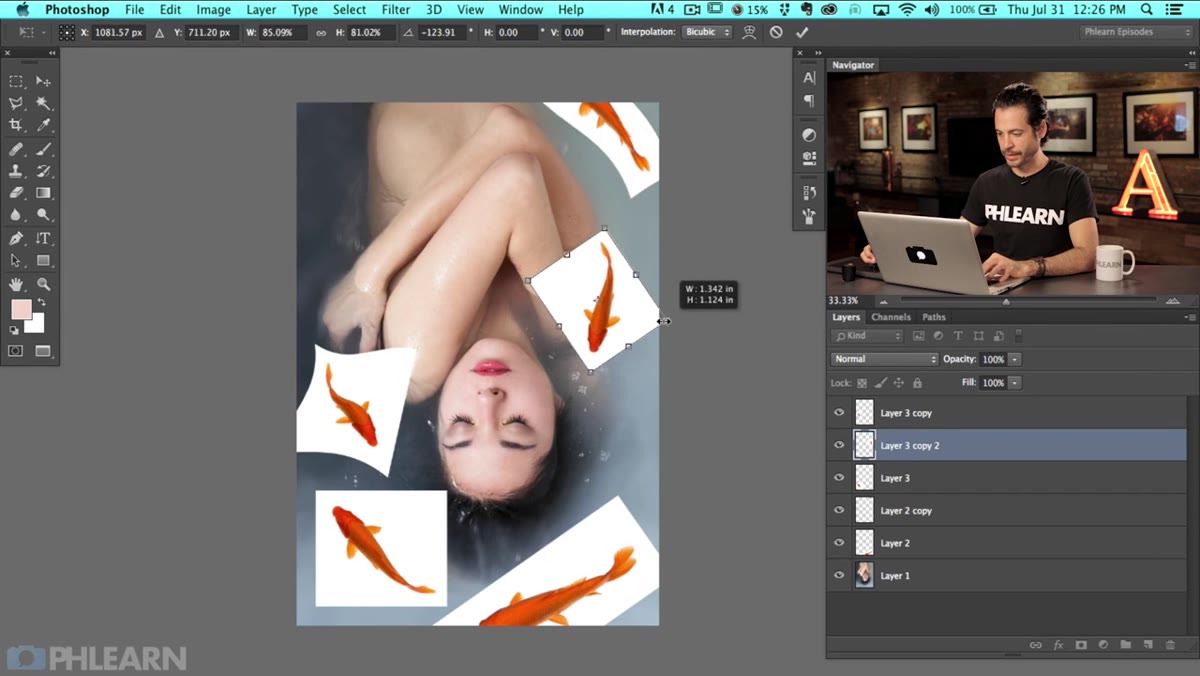 Fish layer being rotated to match overhead shooting angle
Before you go any further with blending, check your angle logic. The base photo was shot from above, looking down into the water. That means every fish in the scene needs to be oriented as if photographed from the same perspective, bodies angled slightly away from a flat side profile, fins visible from a top-down vantage point. Aaron flags this explicitly, and it’s the kind of continuity error that’s easy to miss when you’re focused on color and texture.
Fish layer being rotated to match overhead shooting angle
Before you go any further with blending, check your angle logic. The base photo was shot from above, looking down into the water. That means every fish in the scene needs to be oriented as if photographed from the same perspective, bodies angled slightly away from a flat side profile, fins visible from a top-down vantage point. Aaron flags this explicitly, and it’s the kind of continuity error that’s easy to miss when you’re focused on color and texture.
I keep a folder of reference images organized by camera angle, specifically for this reason. When you’re working fast, it’s easy to grab a stock image without confirming the POV matches. A fish shot at eye level placed into a top-down scene will never fully blend, no matter how good your color match is.
Step 4: Apply Blending Modes to Integrate the Fish Into the Water
 Blending mode dropdown being applied to fish layer in Layers panel
With your fish layers positioned and shaped, it’s time to start embedding them into the water visually. Aaron uses blending modes to let the murky water texture bleed through the fish, creating the impression that they exist within the medium rather than on top of it. Modes like Multiply darken and absorb underlying color, while Screen lifts lighter areas and reads as submersion in bright or hazy water.
Blending mode dropdown being applied to fish layer in Layers panel
With your fish layers positioned and shaped, it’s time to start embedding them into the water visually. Aaron uses blending modes to let the murky water texture bleed through the fish, creating the impression that they exist within the medium rather than on top of it. Modes like Multiply darken and absorb underlying color, while Screen lifts lighter areas and reads as submersion in bright or hazy water.
The right mode depends on your specific image tonality. Try Multiply first if your water is dark and dense. If the fish disappear too much, pull back the layer opacity or experiment with Soft Light, which blends while preserving more of the element’s original contrast. There’s no universal setting. You’re looking for the point where the fish start carrying the water’s color logic on their own surfaces.
Step 5: Add Blur to Simulate Depth
 Blur being applied to a fish layer to push it behind water surface
Fish that are deeper in the water column should be less sharp than fish near the surface. Use Filter > Blur > Gaussian Blur on individual layers, with heavier blur values on the fish you’ve sized smaller or placed lower in the composition. Even 2-3 pixels of blur on a distant element does significant work. It tells the viewer’s brain that the depth of field physics are operating correctly.
Blur being applied to a fish layer to push it behind water surface
Fish that are deeper in the water column should be less sharp than fish near the surface. Use Filter > Blur > Gaussian Blur on individual layers, with heavier blur values on the fish you’ve sized smaller or placed lower in the composition. Even 2-3 pixels of blur on a distant element does significant work. It tells the viewer’s brain that the depth of field physics are operating correctly.
Aaron also mentions using blur in combination with color shifts to push elements further back. Deeper water absorbs warmer wavelengths first, so distant fish should trend cooler and slightly less saturated than foreground fish. A Hue/Saturation adjustment clipped to a fish layer, nudging saturation down by 15-20 points, adds that distance convincingly.
Step 6: Layer Bubbles and Practical Textures Over the Fish
 Bubble and water texture layers being composited over fish elements
The final integration step is covering your composited elements with the practical textures that already exist in the scene. Bubbles, particulate, surface ripples, any element of the original water photograph that would logically pass in front of a submerged fish should be copied, masked, and placed above the fish layers in the stack. This is what “buries” the element in the image.
Bubble and water texture layers being composited over fish elements
The final integration step is covering your composited elements with the practical textures that already exist in the scene. Bubbles, particulate, surface ripples, any element of the original water photograph that would logically pass in front of a submerged fish should be copied, masked, and placed above the fish layers in the stack. This is what “buries” the element in the image.
Aaron copies bubble and texture elements directly from the original photo and layers them over the fish. This approach is more convincing than adding new particle overlays because the texture already matches the image’s noise profile, lens character, and light behavior. Same source, same physics.
What I’d Add From My Own Work
Spend six months studying how light behaves on water and you develop a specific sensitivity to caustics, those rippling light patterns that water projects onto submerged surfaces. For any underwater composite that needs to hold up under scrutiny, I add a caustic light layer above my composited elements, sourced from a real water footage still or a rendered caustic texture, set to Screen or Overlay at low opacity. It’s the detail that takes a fish from “placed in water” to “photographed in water.”
Aaron’s tutorial doesn’t cover this step, but his blending mode and texture layering approach creates the exact foundation where caustics can land convincingly. Build his stack first, then add that light layer on top.
The single most important lesson in this tutorial is the one Aaron states almost offhandedly: imperfection is realism. A fish cropped by the frame, a body warped into a non-symmetrical curve, an element that’s slightly too deep to read clearly. These aren’t mistakes. They’re the photographic accidents that make a composite feel like it was captured rather than constructed.
Watch the full tutorial on YouTube to see Aaron work through the blending and texturing in real time. The visual feedback he gives at each stage is worth more than any written description of the values.
Comments (4)
I've watched a dozen tutorials on this and yours is the clearest by far.
Just used this on a wedding shoot edit. Client was thrilled.
This saved me so much time on my last edit. Wish I'd found this sooner.
Shared this with my photography group. Everyone loved it.
Leave a Comment