There’s a specific problem I run into constantly as a composite artist: I need granular control over a sky without touching the subject, or I need to isolate a rock formation, a building, a piece of fabric, without painting a mask by hand for an hour. Photoshop’s masking tools are powerful, but I’ve started doing more and more of that heavy lifting earlier in the pipeline, right inside Adobe Camera Raw, before an image even hits a layer stack. When I came across Joel Grimes’ tutorial on ACR’s newer masking features, I paid attention. Grimes has been a commercial advertising photographer for over 40 years, and the way he talks about tools is practical and unsentimental. He’s not chasing features. He’s solving problems.
Watch the full tutorial on YouTube
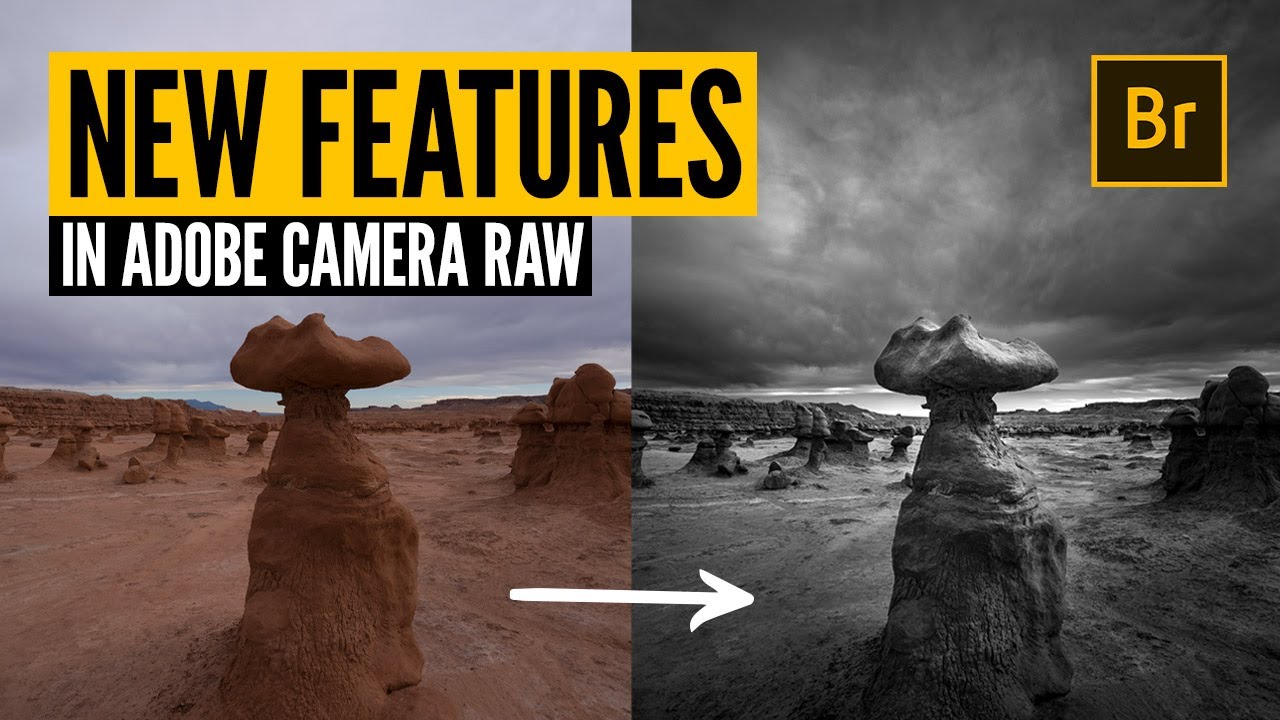
The image he works with in the video is a landscape from Goblin Valley in Utah, shot with a 17mm tilt-shift lens across three positions, which produced a massive raw capture. He converted it to a dramatic black and white final, and the striking thing is that nearly everything in that edit was done inside ACR using masks. No Photoshop curves layers. No luminosity masks built from channels. Just the masking panel in Camera Raw, used thoughtfully and in the right order. That sequence matters more than most people realize, and it’s the core lesson here.
Step 1: Open the Image in Adobe Camera Raw
 Bridge with the landscape image selected, ACR opening
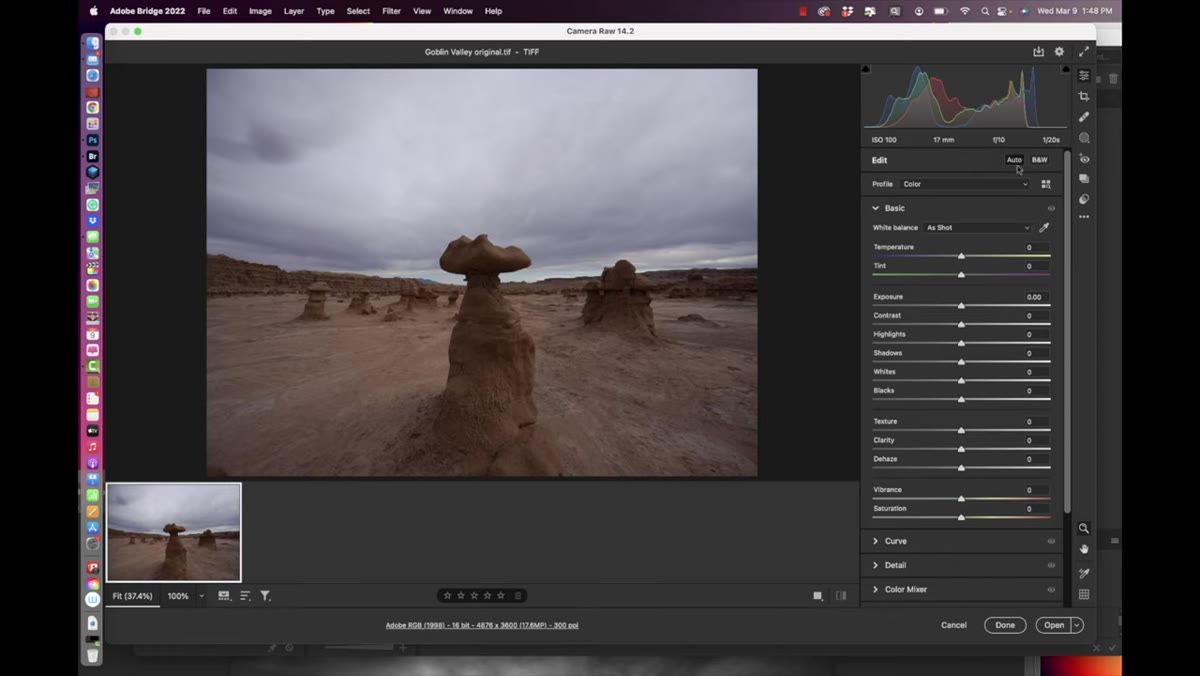
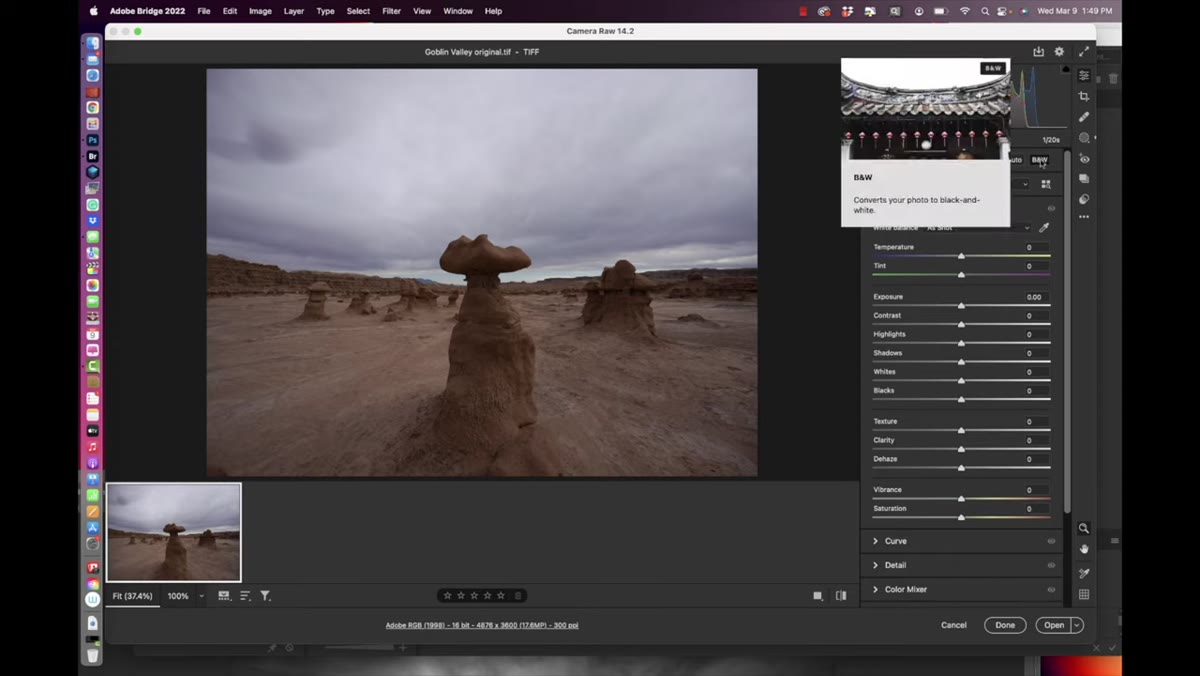
Grimes opens his image from Adobe Bridge using the keyboard shortcut Command+R (on Mac), which sends the selected file directly into the Camera Raw converter. If you’re working in Lightroom, you’re already in the same environment. Lightroom and Bridge both run on the same underlying raw processing engine, so every technique here translates directly. What you see when the file opens is the unedited capture: flat, a little dull, with no particular drama. That’s exactly where you want to start.
Bridge with the landscape image selected, ACR opening
Grimes opens his image from Adobe Bridge using the keyboard shortcut Command+R (on Mac), which sends the selected file directly into the Camera Raw converter. If you’re working in Lightroom, you’re already in the same environment. Lightroom and Bridge both run on the same underlying raw processing engine, so every technique here translates directly. What you see when the file opens is the unedited capture: flat, a little dull, with no particular drama. That’s exactly where you want to start.
Step 2: Create Your Sky Mask Before Converting to Black and White
 Masking panel open, Select Sky option highlighted
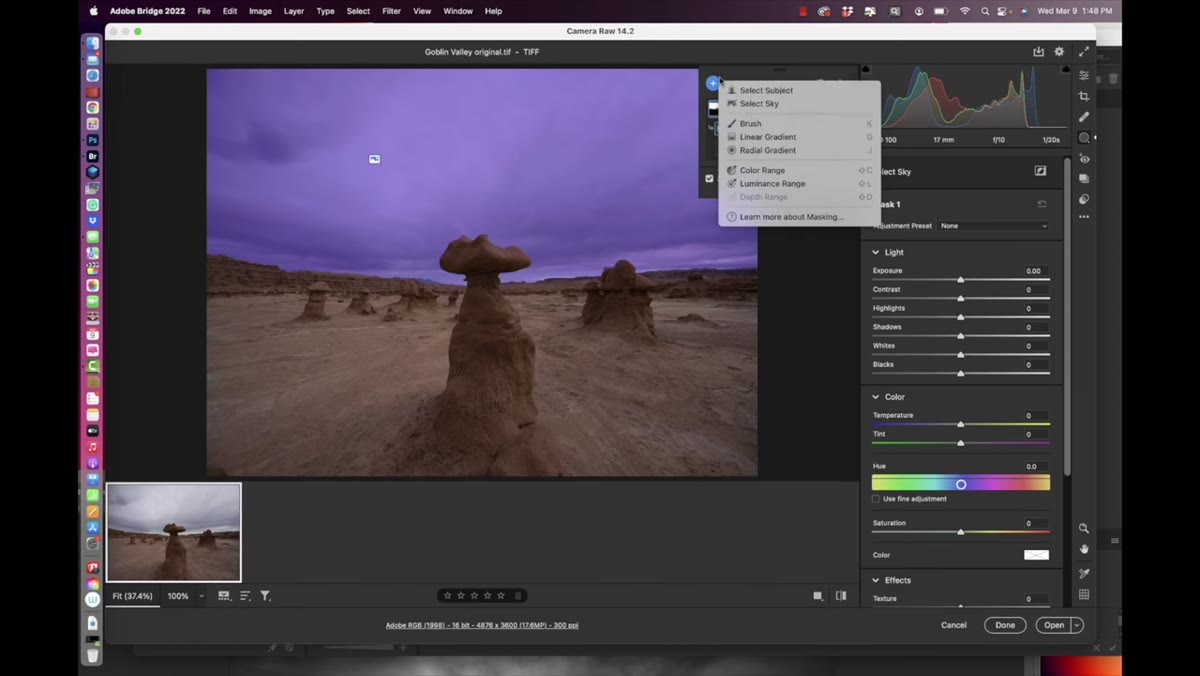
This is the step most people skip, and skipping it costs them. Navigate to the masking panel, which is the fourth or fifth icon down in the right-side toolbar. It looks like a circle with a dotted outline around it. Click it and choose “Select Sky.” ACR will analyze the image and generate an automatic mask covering the sky area.
Masking panel open, Select Sky option highlighted
This is the step most people skip, and skipping it costs them. Navigate to the masking panel, which is the fourth or fifth icon down in the right-side toolbar. It looks like a circle with a dotted outline around it. Click it and choose “Select Sky.” ACR will analyze the image and generate an automatic mask covering the sky area.
The reason Grimes does this before converting to black and white is important: the Select Sky algorithm uses color information to find where the sky is. Once you strip the color data out with a black and white conversion, that detection becomes less reliable. Building the sky mask while the color is still intact gives you a cleaner, more accurate selection. Even if you know from the start that you’re going black and white, do the sky mask first.
Step 3: Add a Color Range Mask for the Subject
 Color Range mask being created, goblin rock formation targeted
With the sky mask created and sitting in the panel, Grimes adds a second mask before he touches any sliders. He clicks “Create New Mask” and this time selects “Color Range.” Then he clicks directly on the goblin rock formations in the image to sample their color. ACR builds a mask that isolates those tones across the frame.
Color Range mask being created, goblin rock formation targeted
With the sky mask created and sitting in the panel, Grimes adds a second mask before he touches any sliders. He clicks “Create New Mask” and this time selects “Color Range.” Then he clicks directly on the goblin rock formations in the image to sample their color. ACR builds a mask that isolates those tones across the frame.
The value of having both masks ready before any global adjustments is that you’re giving yourself precise, isolated control over two very different areas of the image. You’re not going back later to try to salvage a mask after the tones have already shifted. Think of it as mise en place. Everything is prepped before the cooking starts.
Step 4: Convert to Black and White
 Black and White mode activated in the Basic panel
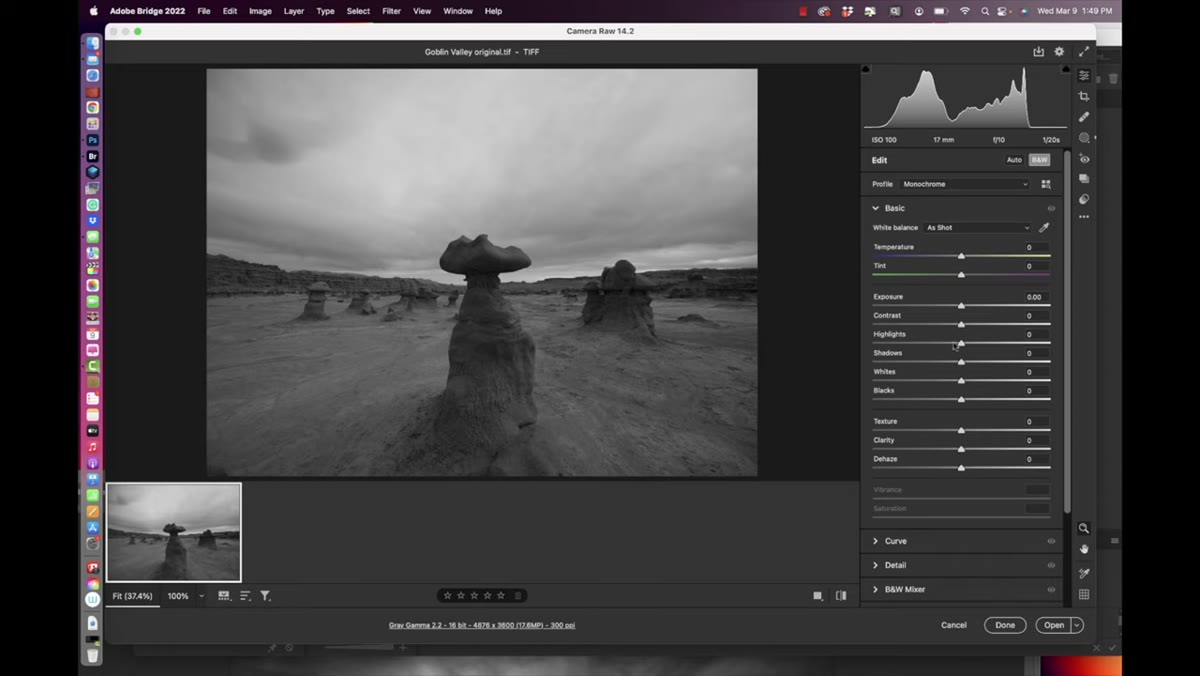
Now go back to the Basic panel using the slider icon at the top of the right toolbar. At the top of the panel you’ll find the black and white conversion option. There’s an Auto setting and a “Convert to Black and White” button. Click the conversion. The image immediately drops into monochrome, and because your masks were built from the color data, they remain intact and accurate.
Black and White mode activated in the Basic panel
Now go back to the Basic panel using the slider icon at the top of the right toolbar. At the top of the panel you’ll find the black and white conversion option. There’s an Auto setting and a “Convert to Black and White” button. Click the conversion. The image immediately drops into monochrome, and because your masks were built from the color data, they remain intact and accurate.
This is a small thing that makes a real difference. I’ve opened mask selections in ACR and watched them fall apart after a conversion because they were built too late. Grimes’ sequencing is deliberate and it works.
Step 5: Build Drama with the Global Sliders
 Basic panel sliders being adjusted for contrast and tone
Once you’re in black and white mode, start working the global sliders to establish the overall mood. Grimes pulls the exposure down slightly to darken the image as a foundation, then pushes contrast up to separate the tones. He moves highlights to the left to recover detail in the bright areas, and pulls shadows to the right to open up the darker zones without making them feel washed out.
Basic panel sliders being adjusted for contrast and tone
Once you’re in black and white mode, start working the global sliders to establish the overall mood. Grimes pulls the exposure down slightly to darken the image as a foundation, then pushes contrast up to separate the tones. He moves highlights to the left to recover detail in the bright areas, and pulls shadows to the right to open up the darker zones without making them feel washed out.
These are adjustments you’d make on any image, but in the context of this edit they’re setting a base from which the masked adjustments will depart. Think of the global edit as the ambient light in a room, and the masked edits as the spotlights. You need both.
Step 6: Use Your Masks to Apply Targeted Adjustments
 Mask selected, localized slider adjustments applied to sky region
With the base tone set globally, return to your masks and begin pushing them independently. Select the sky mask and apply its own set of slider adjustments: darken it, increase contrast, push the drama in that area specifically without affecting the rock formations below. Then select the color range mask for the goblins and adjust those tones separately.
Mask selected, localized slider adjustments applied to sky region
With the base tone set globally, return to your masks and begin pushing them independently. Select the sky mask and apply its own set of slider adjustments: darken it, increase contrast, push the drama in that area specifically without affecting the rock formations below. Then select the color range mask for the goblins and adjust those tones separately.
This is where ACR’s newer masking tools genuinely earn their place in a professional workflow. You’re doing what would have taken multiple Photoshop adjustment layers, each with a hand-painted mask, in a fraction of the time, and you’re doing it non-destructively inside the raw file.
What I’d Add From My Own Work
Grimes focuses on landscape photography here, but the same masking logic applies directly to compositing. When I’m integrating a subject into a scene, I often process the subject’s raw file in ACR first, using a subject mask to control the skin or costume tones independently of any background that’s bleeding into frame. Getting that separation at the raw stage means I’m bringing a cleaner element into Photoshop, which means less corrective work later. The Color Range mask in particular is underrated for pulling specific material types, fabric, stone, metal, and giving them their own tonal treatment before the image ever becomes a composite.
The single most important thing Grimes demonstrates is this: the order in which you create masks relative to your other edits is not arbitrary. Build your masks when the image data is richest, before conversions, before global shifts alter the tones the algorithms need to read. That sequence alone will make your ACR masks more accurate and more useful.
Watch the full tutorial on YouTube and follow along with Grimes’ practice file. The techniques move fast but the logic is clean, and once you see the masking panel used this way, it’s hard to go back to treating ACR as just a raw converter.
Comments (2)
I tried this on a client project yesterday and the results were way better than expected.
Just used this on a wedding shoot edit. Client was thrilled.
Leave a Comment