Every composite artist has a folder of near-misses. Mine has a few too many images where the subject’s hair looks like it was cut out with safety scissors. For years, getting a clean edge around flyaways, curls, and fine strands meant wrestling with channel masks, spending an hour with the smudge tool, or just quietly accepting that the hairline looked slightly wrong. If the background was dark enough, you could hide it. If it wasn’t, you were in trouble.
The problem is structural. Hair is not a clean geometric shape. It has semi-transparent edges, individual strands that catch light differently, and gaps where the background bleeds through. Any selection tool that works by drawing a border will fail you here, because there is no single border to draw. What you need is a tool that thinks about the transition zone, not the edge itself. In this KelbyOne tutorial by Scott Kelby, he walks through exactly that: the Select and Mask workspace in Photoshop CC 2015.5, which replaced the older Refine Edge tool and, frankly, made it look primitive by comparison. Watch the full tutorial on YouTube before or after reading, your choice. This breakdown is written so you can follow along without it, though.
Step 1: Make a Loose, Rough Selection First
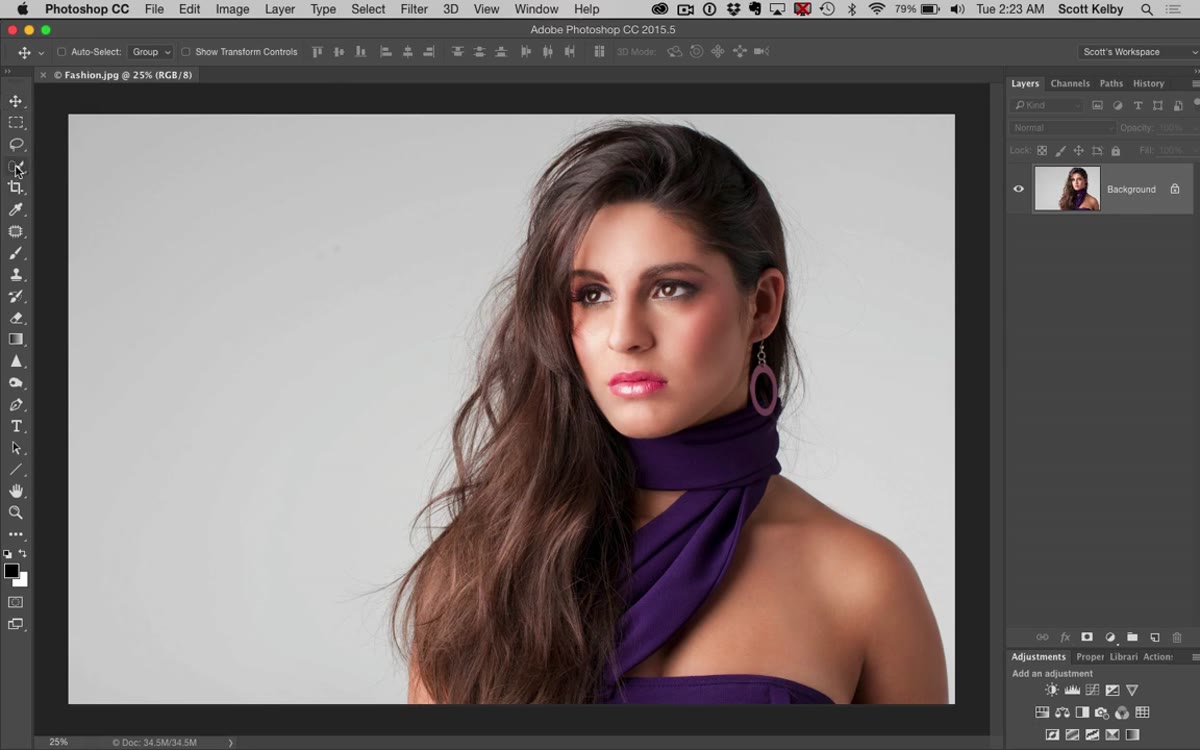 Lasso tool drawing a loose selection around subject’s hair
Kelby’s first move is deliberately imprecise, and that’s the point. He uses the Lasso tool to draw a rough selection around the subject, staying well inside the hair edges and avoiding any of the tricky transition areas entirely. If you’re using the Quick Select tool, the same principle applies: get the main body of the subject selected, but do not try to nail the hairline. Leave a buffer zone.
Lasso tool drawing a loose selection around subject’s hair
Kelby’s first move is deliberately imprecise, and that’s the point. He uses the Lasso tool to draw a rough selection around the subject, staying well inside the hair edges and avoiding any of the tricky transition areas entirely. If you’re using the Quick Select tool, the same principle applies: get the main body of the subject selected, but do not try to nail the hairline. Leave a buffer zone.
The reason this works is that Select and Mask is going to handle the edges. You are just telling Photoshop what the subject is, not where the subject ends. Think of it like a rough sketch before you go in with a fine pen. If you spend twenty minutes perfecting your initial selection, you are doing work that the next step will redo for you. Shift-click to add any areas you missed, but stay away from the transitional zones where hair meets background.
Step 2: Open the Select and Mask Workspace
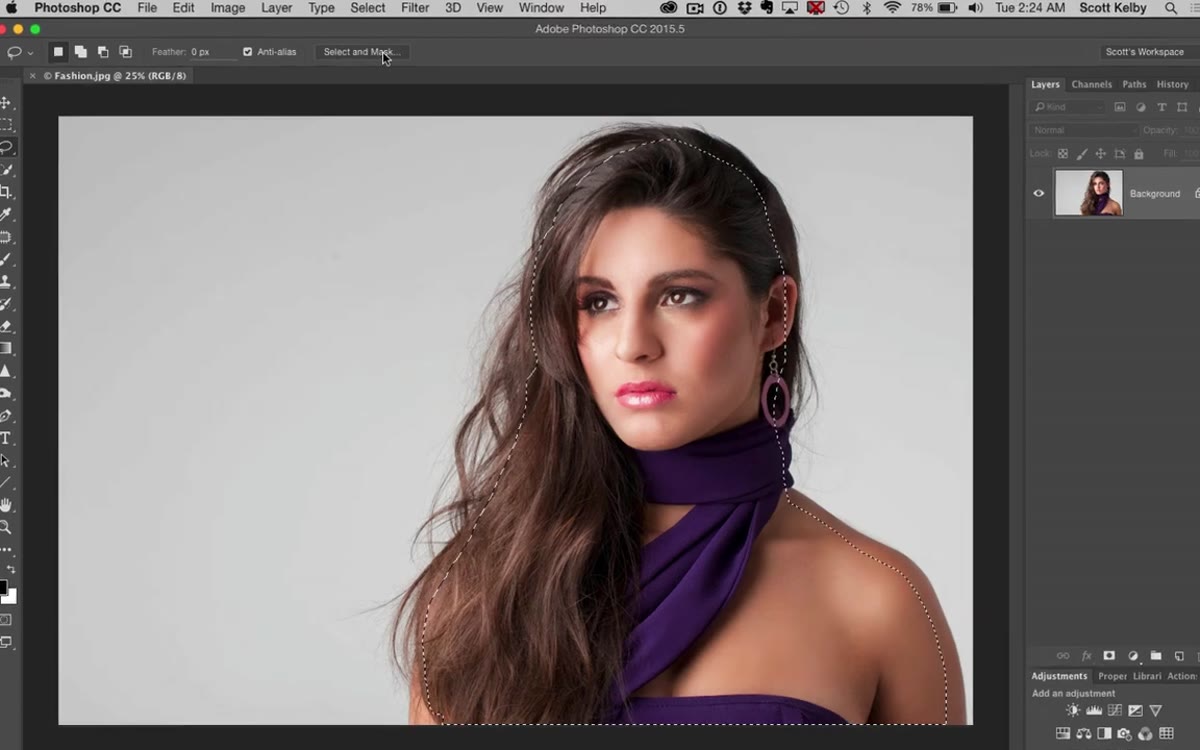 Select and Mask button highlighted in the options bar
With your rough selection active, look at the options bar at the top of the screen. You’ll see a button labeled “Select and Mask.” Click it. This opens a dedicated workspace that replaces the old Refine Edge dialog. Everything happens here from this point forward.
Select and Mask button highlighted in the options bar
With your rough selection active, look at the options bar at the top of the screen. You’ll see a button labeled “Select and Mask.” Click it. This opens a dedicated workspace that replaces the old Refine Edge dialog. Everything happens here from this point forward.
The workspace is GPU-accelerated, which matters practically, not just technically. Older machines that stuttered through Refine Edge will feel a noticeable difference. The interface gives you a panel of view modes on the left, a properties panel on the right, and your image front and center. Don’t click OK yet. You have real work to do in here first.
Step 3: Use Onion Skin View to Assess Your Selection
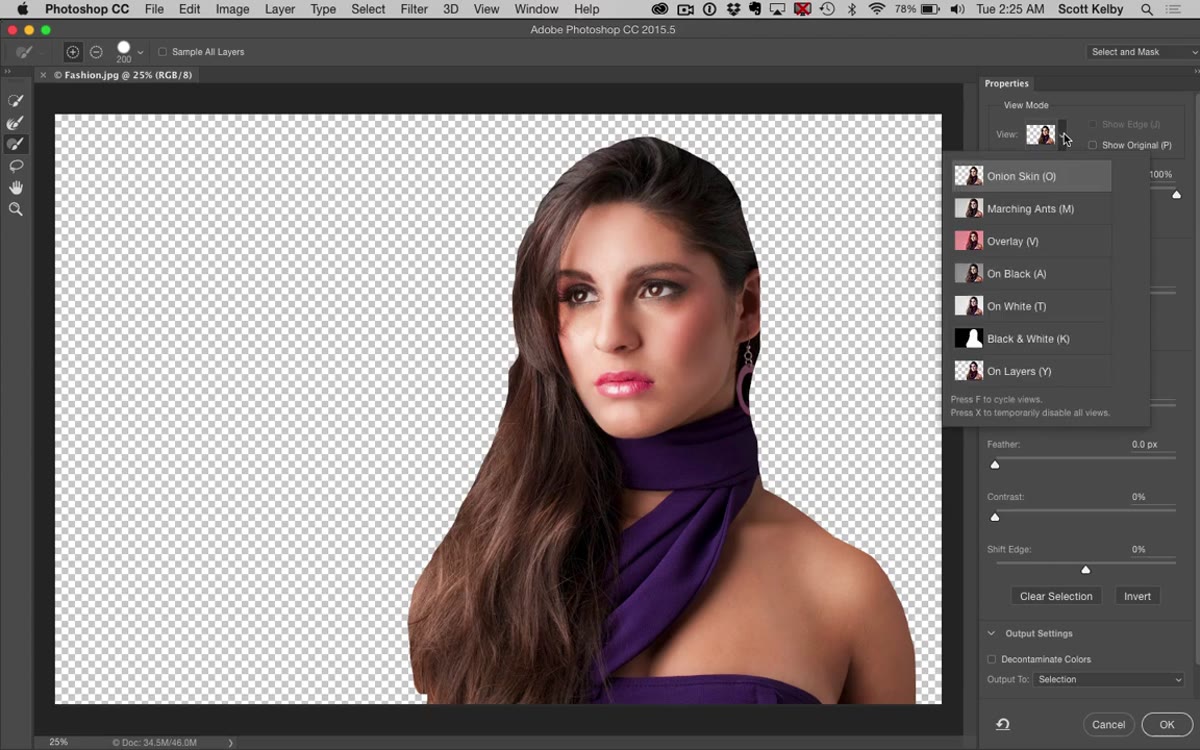 Onion Skin view mode showing semi-transparent background over subject
The view mode options should feel familiar if you’ve used Refine Edge before, but Kelby points out a new one worth learning: Onion Skin. It renders the unselected areas as semi-transparent, so you can see your subject with a ghost of the background showing through. There’s a transparency slider you can adjust.
Onion Skin view mode showing semi-transparent background over subject
The view mode options should feel familiar if you’ve used Refine Edge before, but Kelby points out a new one worth learning: Onion Skin. It renders the unselected areas as semi-transparent, so you can see your subject with a ghost of the background showing through. There’s a transparency slider you can adjust.
Pull the transparency down and you immediately see what you’ve captured and what you’ve missed. Areas of hair that didn’t make it into your rough selection will be visible as darker or more opaque zones. This gives you a working map of what the Refine Edge Brush will need to recover. Don’t skip this step. Going in blind means you won’t know what you’re fixing.
Step 4: Paint the Hair Edges with the Refine Edge Brush
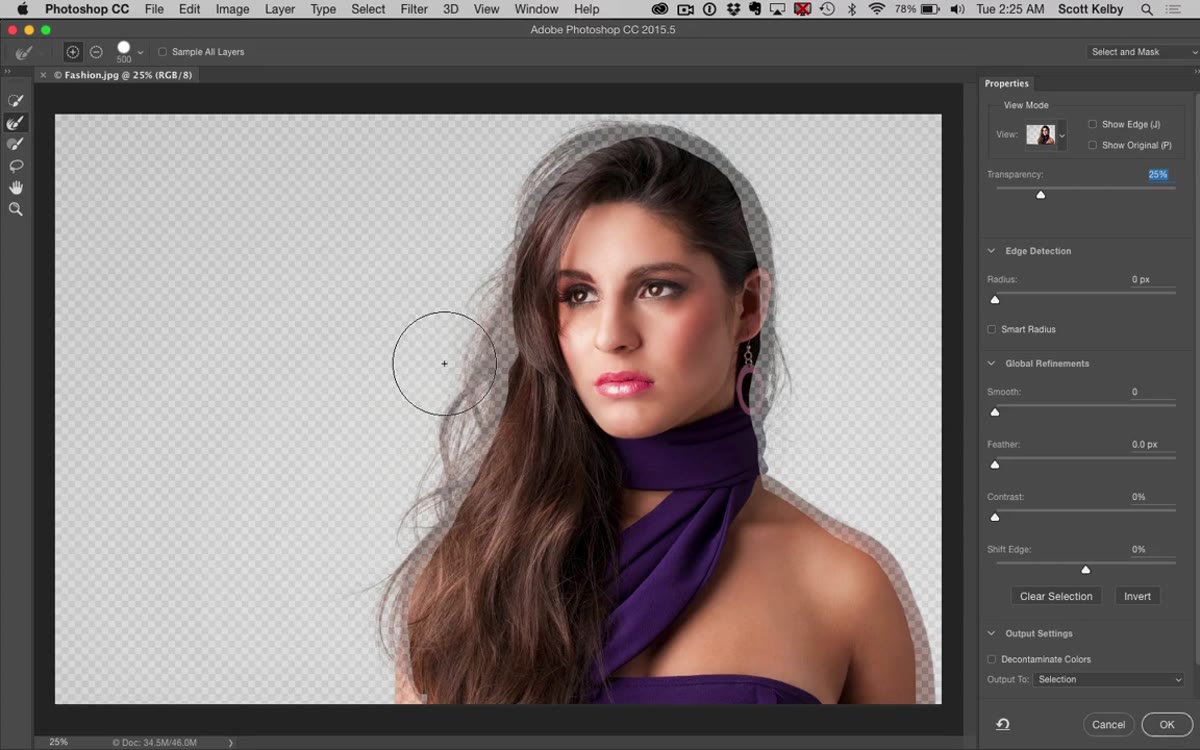 Refine Edge Brush painting along the hairline edge
This is where the real magic happens. Select the Refine Edge Brush, which is the second tool in the left panel toolbar, and choose a brush size that covers a few strands at a time without being so large it bleeds into the solid parts of your selection. Kelby recommends working slowly along the edge, but you’ll find that even at a moderate pace, the results are immediate and visible.
Refine Edge Brush painting along the hairline edge
This is where the real magic happens. Select the Refine Edge Brush, which is the second tool in the left panel toolbar, and choose a brush size that covers a few strands at a time without being so large it bleeds into the solid parts of your selection. Kelby recommends working slowly along the edge, but you’ll find that even at a moderate pace, the results are immediate and visible.
Paint along the hairline, following the contour of the hair rather than trying to be precise about individual strands. Photoshop is analyzing the pixel data in that transition zone and making probability-based decisions about what belongs to the subject and what belongs to the background. You will see strands appear as you brush. The algorithm picks up fine detail that no manual selection technique can match at this speed. Work your way around the full perimeter of the hair. Where the selection looks solid and clean, you don’t need to brush at all.
Step 5: Use the Standard Brush to Recover Any Dropped Areas
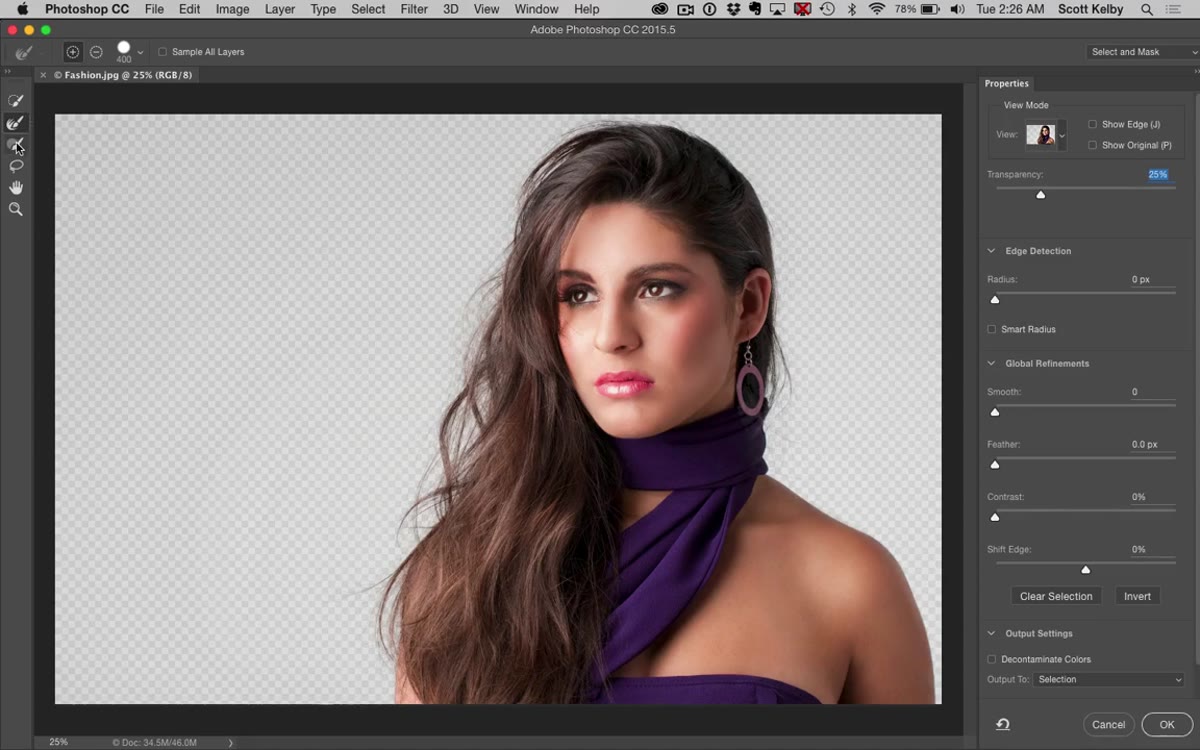 Standard brush tool adding back a missed section of the selection
After you’ve run the Refine Edge Brush around the hair, there will occasionally be small areas where the selection dropped out. A chunk of the subject’s shoulder, a section of the neck, a clump of hair that got partially deselected. Switch to the standard Brush tool in the same toolbar and paint those areas back in manually.
Standard brush tool adding back a missed section of the selection
After you’ve run the Refine Edge Brush around the hair, there will occasionally be small areas where the selection dropped out. A chunk of the subject’s shoulder, a section of the neck, a clump of hair that got partially deselected. Switch to the standard Brush tool in the same toolbar and paint those areas back in manually.
This is a straightforward add/subtract operation with no algorithmic analysis behind it. It’s the cleanup pass, not the star of the show. Kelby notes it openly: he missed a small area near the bottom and didn’t catch it in the moment. That kind of thing happens. The point is that the correction is quick, and one small oversight doesn’t mean you redo the whole process.
Step 6: Preview at Full Transparency and Export
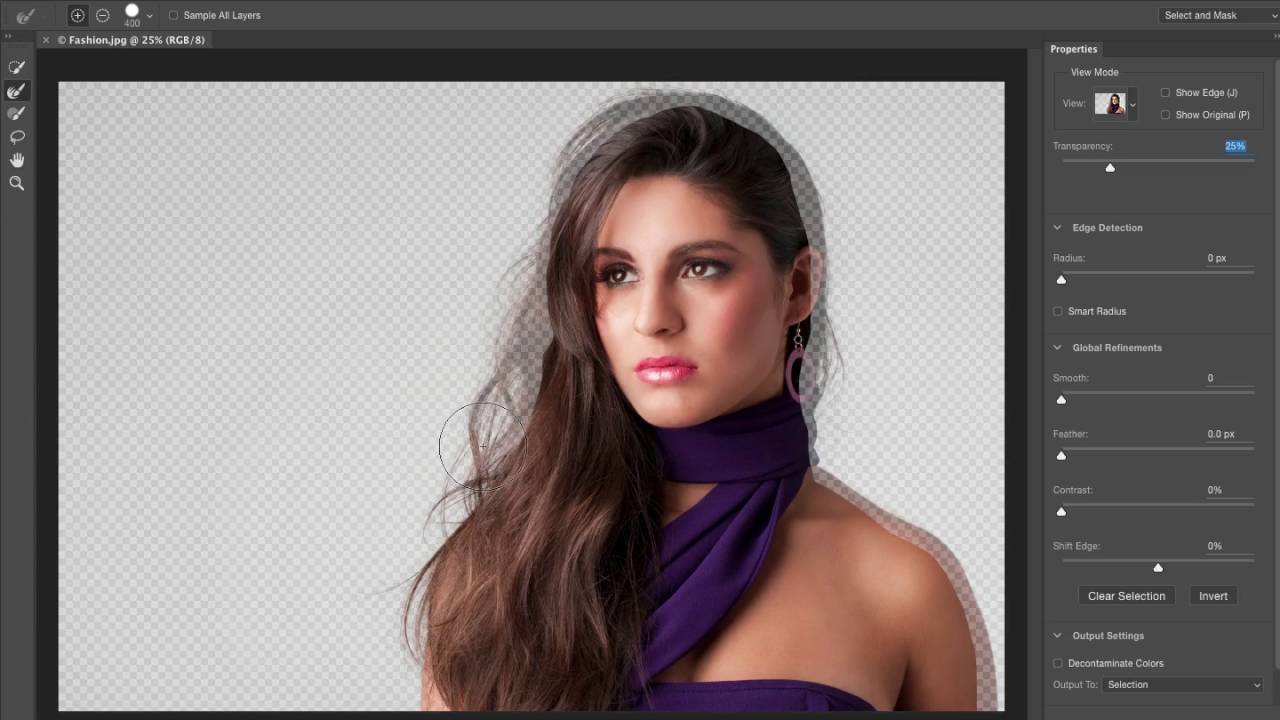
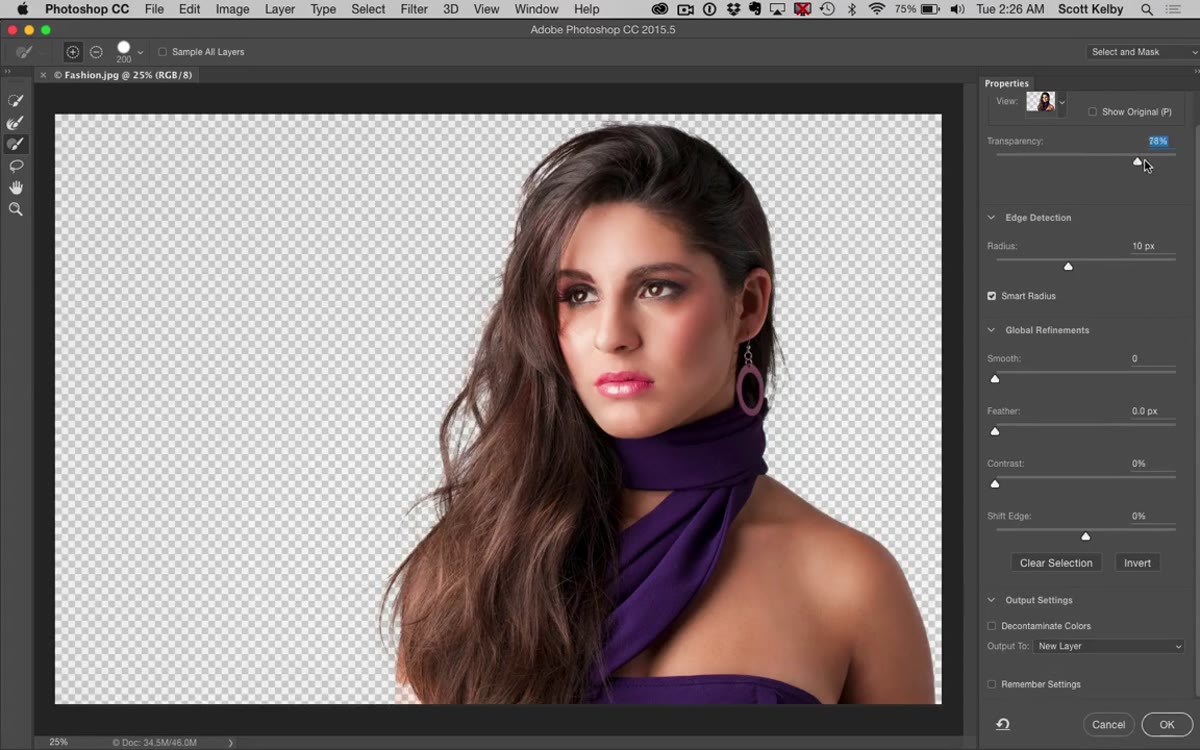 Transparency slider raised to 100% showing final mask result
Before committing, raise the Onion Skin transparency slider back to 100%. Now you’re seeing exactly what the mask will look like when applied. Evaluate the hair edges at this stage. Look for haloing, missing strands, or areas where the background is bleeding through as a color fringe. If you see contamination, the Decontaminate Colors checkbox in the Global Refinements section can help, though Kelby notes he rarely touches the Global Refinements sliders.
Transparency slider raised to 100% showing final mask result
Before committing, raise the Onion Skin transparency slider back to 100%. Now you’re seeing exactly what the mask will look like when applied. Evaluate the hair edges at this stage. Look for haloing, missing strands, or areas where the background is bleeding through as a color fringe. If you see contamination, the Decontaminate Colors checkbox in the Global Refinements section can help, though Kelby notes he rarely touches the Global Refinements sliders.
When you’re satisfied, use the Output Settings at the bottom of the Properties panel to choose where the result goes. Kelby selects “New Layer with Layer Mask,” which is the most flexible option for compositing work. It keeps your original layer intact and gives you an editable mask to refine further if the comp requires it.
What I’d Add From My Own Workflow
The one thing Kelby doesn’t cover here, probably because it’s outside the tutorial’s scope, is background preparation. Select and Mask performs noticeably better when there’s reasonable contrast between the subject and background in your source image. If you’re working with stock photography where the subject was shot against a plain backdrop, you’ll get near-perfect results almost immediately. If you’re trying to extract someone shot against a cluttered or similarly-toned background, the Refine Edge Brush has less information to work with and the edges will be softer and less accurate.
My habit now is to evaluate the source image before I even open Select and Mask. If the background is problematic, I’ll sometimes make a rough luminosity or color range selection first, just to give the algorithm a cleaner contrast signal to read. It’s one extra step, but it’s the difference between a mask you refine for five minutes and one you spend an hour patching.
The bottom line: a rough selection plus the Refine Edge Brush inside Select and Mask will get you 90% of the way to a usable hair mask in under five minutes. That used to take me an afternoon. Start loose, let the tool do the edge work, and export to a layer mask you can keep refining. Watch the full tutorial on YouTube to see Kelby’s speed and brushwork in real time. It’s worth watching at least once just to calibrate your own pace against his.
Comments (2)
Finally someone explains this in a way that actually makes sense.
Been doing this wrong for years apparently. Thanks for the wake-up call.
Leave a Comment