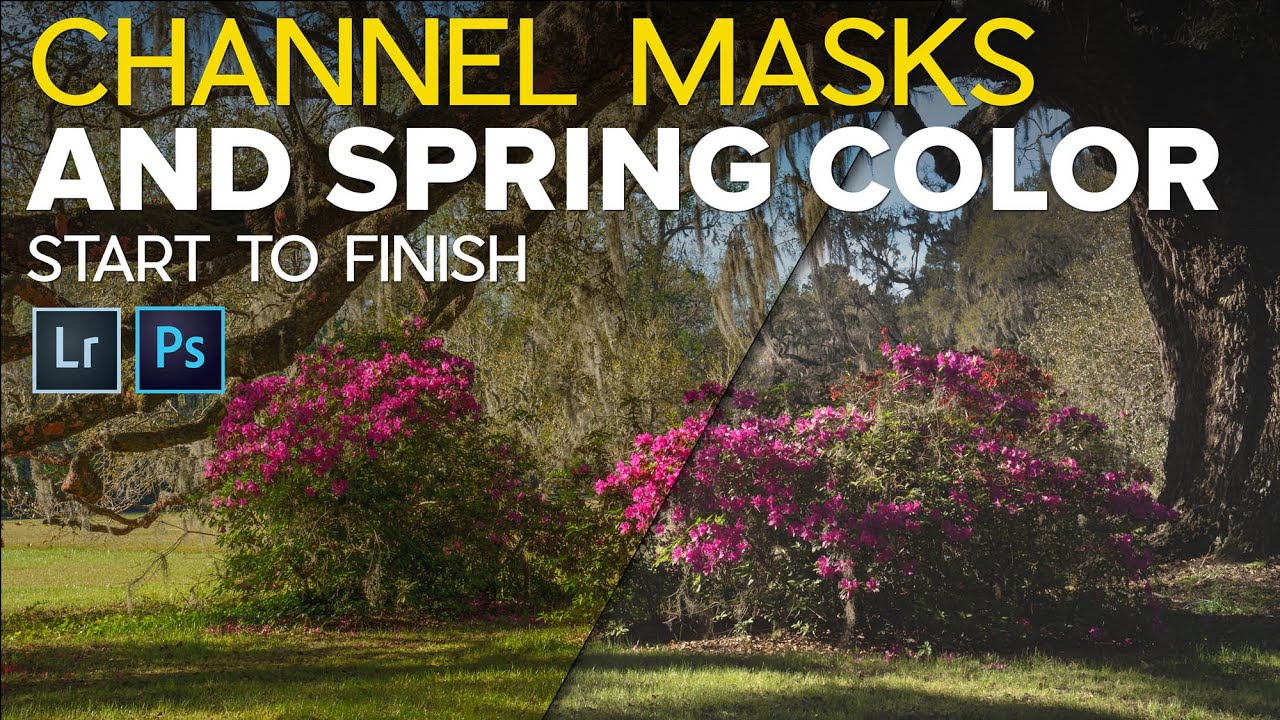
There’s a specific kind of frustration I know well: you get to a location at the wrong hour. The light is harsh, the shadows are fighting the highlights, and the histogram looks like someone punched it. I’ve been there on location shoots for book covers and album art more times than I want to admit. The image has potential, but the raw file is working against you. That’s exactly the situation Matt Kloskowski walks into at the top of this tutorial, shot at Magnolia Plantation in Charleston, South Carolina, at the end of March when the flowers were peaking but the light had already climbed too high. Watch the full tutorial on YouTube
What makes this walkthrough worth your time is that Matt doesn’t just show you what he did. He shows you what he tried first and why it failed. That kind of transparency is rare, and for someone who spends hours every month reviewing my own folder of failed composites, it’s the part that actually teaches. The channel mask technique he lands on is the kind of move that looks simple once you see it but takes years to reach for instinctively. Here’s how it works, step by step.
Step 1: Start with Lightroom’s Basic Panel, Shadows and Highlights First
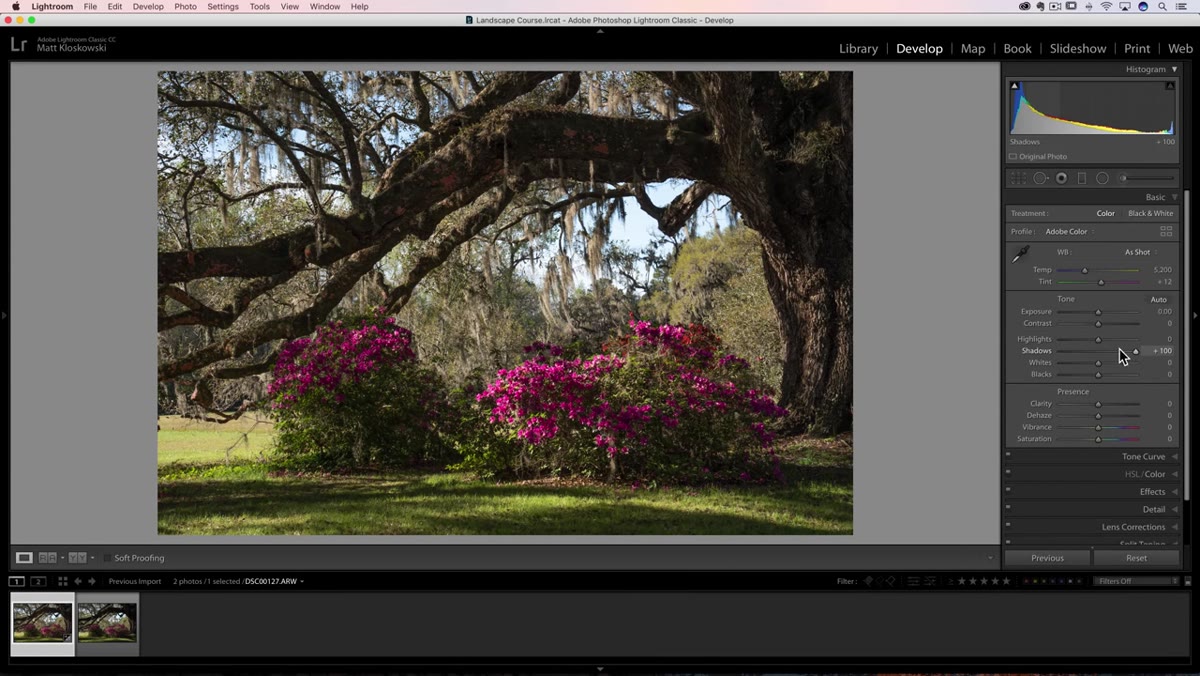 Lightroom exposure and shadow sliders being adjusted
Before anything else, Matt’s first pass in Lightroom targets the structural problems in the exposure. His order of operations here is deliberate: shadows and highlights first, then a micro-adjustment to overall exposure after. Pulling the highlights down and lifting the shadows softens the contrast without flattening the photo entirely. Think of it as narrowing the dynamic range before you decide what to do with it.
Lightroom exposure and shadow sliders being adjusted
Before anything else, Matt’s first pass in Lightroom targets the structural problems in the exposure. His order of operations here is deliberate: shadows and highlights first, then a micro-adjustment to overall exposure after. Pulling the highlights down and lifting the shadows softens the contrast without flattening the photo entirely. Think of it as narrowing the dynamic range before you decide what to do with it.
He’s clear that the Basic panel alone won’t solve everything here, and that honesty matters. When your starting point is harsh midday light, global adjustments can only take you so far. You’re setting the floor and ceiling, not painting the details.
Step 2: Try the Graduated Filter with Range Masking, Then Know When to Abandon It
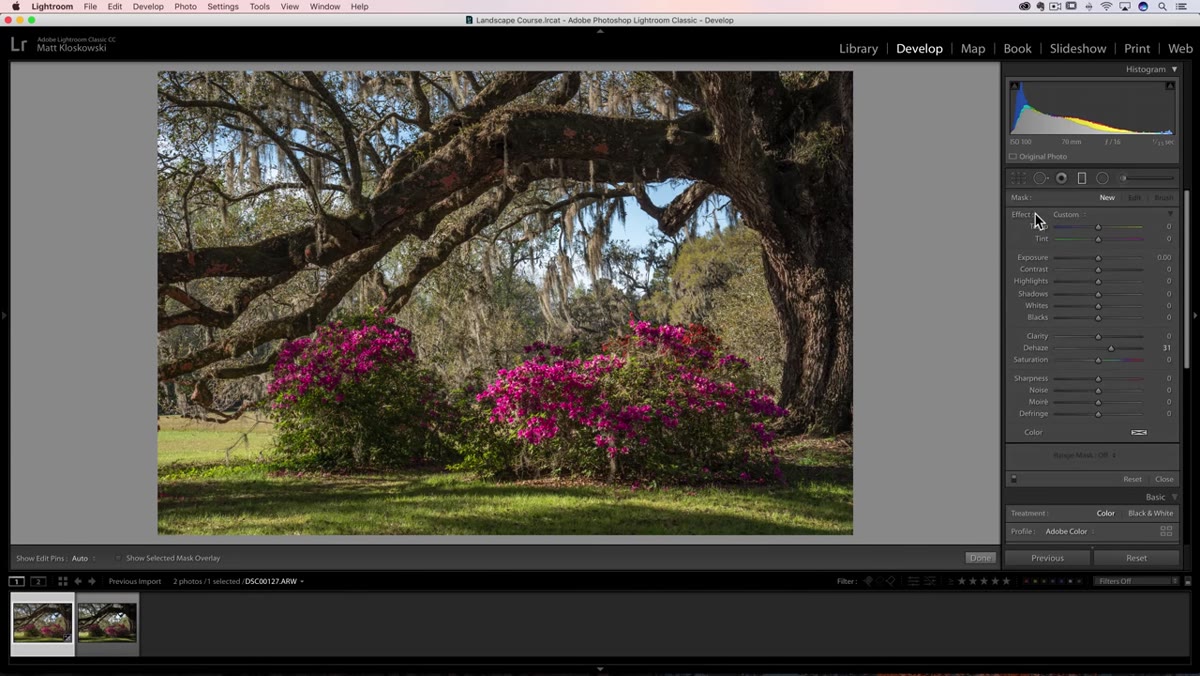 Graduated filter applied with luminance range mask visible
Matt’s second attempt uses a graduated filter dragged across the lower portion of the frame, pulling the exposure down to balance the bright areas. It’s a reasonable instinct. But the result looks artificial, so he goes a level deeper and opens the Range Mask set to Luminance. The idea is to restrict the darkening effect to only the brightest tones, leaving the shadows untouched.
Graduated filter applied with luminance range mask visible
Matt’s second attempt uses a graduated filter dragged across the lower portion of the frame, pulling the exposure down to balance the bright areas. It’s a reasonable instinct. But the result looks artificial, so he goes a level deeper and opens the Range Mask set to Luminance. The idea is to restrict the darkening effect to only the brightest tones, leaving the shadows untouched.
The problem he runs into is one I’ve hit plenty of times: when you pull contrast out of a specific tonal range, you can make the image feel flat and lifeless in that zone. The luminance mask is doing its job technically, but visually it’s costing you something. Knowing when to stop and reach for a different tool is the real skill being demonstrated here. He closes Lightroom’s toolbox and opens Photoshop.
Step 3: Apply a Camera Matching Profile Before Leaving Lightroom
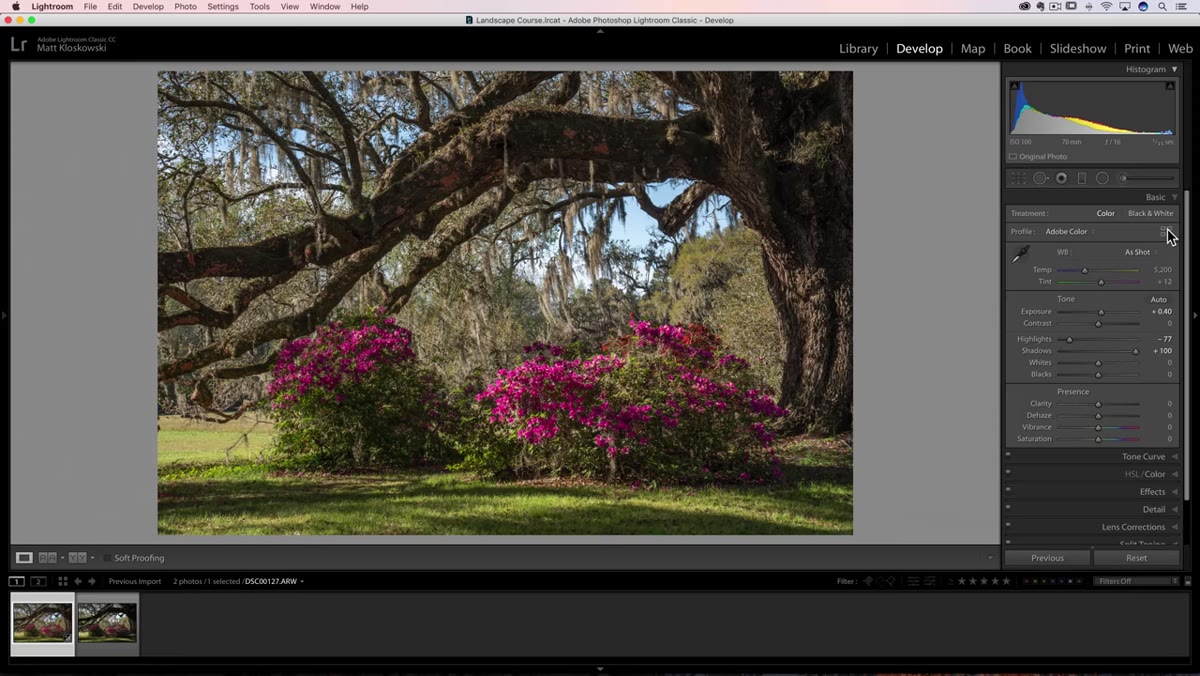 Lightroom profile browser showing camera matching profile selected
Before making the jump to Photoshop, Matt makes one more Lightroom move that’s easy to overlook: he switches the profile from the default Standard to a camera matching profile. In his case, this gently flattens and opens up the image in a way that actually works in favor of the high-contrast shot. It reduces some of that harsh contrast at the rendering stage rather than fighting it with sliders.
Lightroom profile browser showing camera matching profile selected
Before making the jump to Photoshop, Matt makes one more Lightroom move that’s easy to overlook: he switches the profile from the default Standard to a camera matching profile. In his case, this gently flattens and opens up the image in a way that actually works in favor of the high-contrast shot. It reduces some of that harsh contrast at the rendering stage rather than fighting it with sliders.
The critical detail here is timing. Camera matching profiles are only available on raw or DNG files inside Lightroom. The moment you send the image to Photoshop and it comes back as a layered TIFF or PSD, those profile options are gone. If this is a move you want to make, it has to happen now, before you edit in Photoshop. Consider it part of your raw processing checklist, not an afterthought.
Step 4: Open the Channels Panel and Load the RGB Channel as a Selection
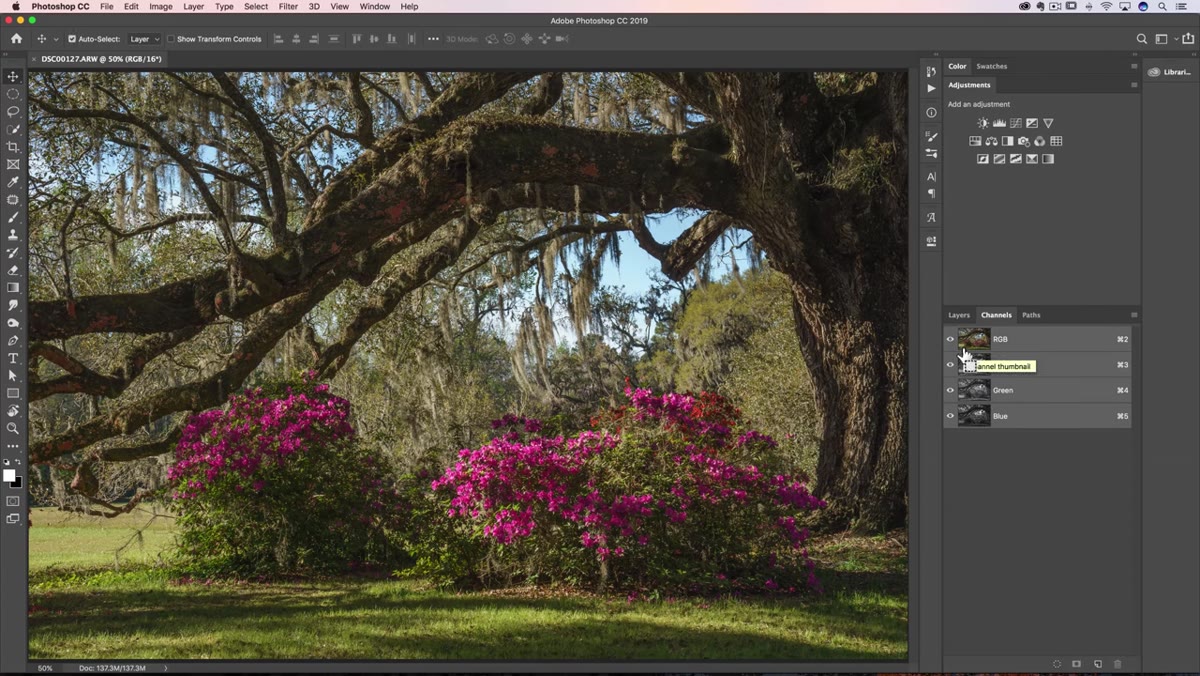 Channels panel with RGB channel being Cmd/Ctrl-clicked
This is the core technique. Once you’re in Photoshop, navigate to the Channels panel (Window > Channels if it’s not visible). Hold down Command on Mac or Control on Windows, then click directly on the composite RGB channel at the top of the panel. This loads a selection built from the luminance values of the image itself. Bright areas get fully selected, midtones get partially selected, and dark areas get little to no selection. It’s not a freehand mask or a painted selection. The image is selecting itself based on what it actually looks like.
Channels panel with RGB channel being Cmd/Ctrl-clicked
This is the core technique. Once you’re in Photoshop, navigate to the Channels panel (Window > Channels if it’s not visible). Hold down Command on Mac or Control on Windows, then click directly on the composite RGB channel at the top of the panel. This loads a selection built from the luminance values of the image itself. Bright areas get fully selected, midtones get partially selected, and dark areas get little to no selection. It’s not a freehand mask or a painted selection. The image is selecting itself based on what it actually looks like.
After loading that selection, click the small “Save Selection as Channel” button at the bottom of the Channels panel (it looks like a square with a circle inside). When you deselect and look at the new alpha channel that appears, you’ll see a grayscale representation of your image’s luminance. White areas are fully selected, black areas are not selected at all.
Step 5: Evaluate the Channel and Understand Why It Needs Refinement
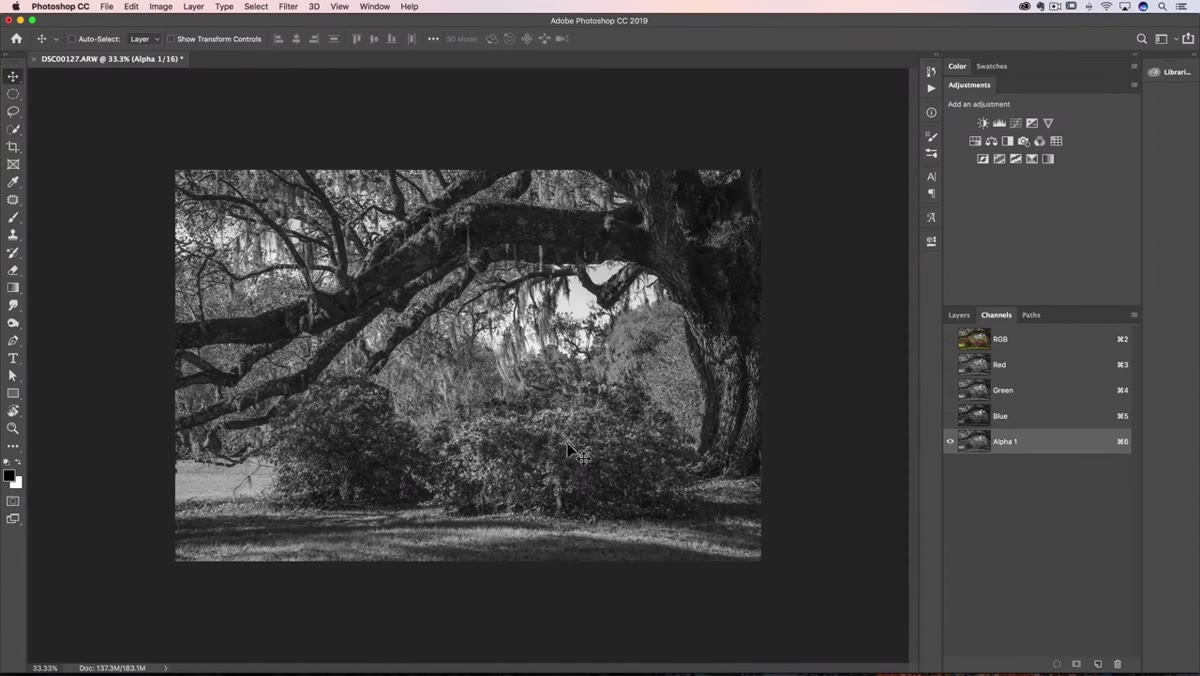 Alpha channel thumbnail showing bright areas as white
Matt’s honest observation at this point is that the raw luminosity selection is too much. The entire bright half of the image is essentially fully selected, which means any adjustment you apply will hit the midtones right alongside the highlights. That’s not surgical enough for what he needs.
Alpha channel thumbnail showing bright areas as white
Matt’s honest observation at this point is that the raw luminosity selection is too much. The entire bright half of the image is essentially fully selected, which means any adjustment you apply will hit the midtones right alongside the highlights. That’s not surgical enough for what he needs.
This is where the work actually begins. The channel you’ve saved is a starting point, not a finished mask. What you do next is apply adjustments to the channel itself, typically using Curves or Levels inside the channel, to push the selection toward only the very brightest areas. Increase the contrast of the channel: drag the black point up to cut out midtones, and compress the white point to isolate true highlights. When you reload that refined channel as a selection, only the blown-out hot spots will carry significant selection weight.
Step 6: Apply Targeted Adjustments Using the Refined Mask
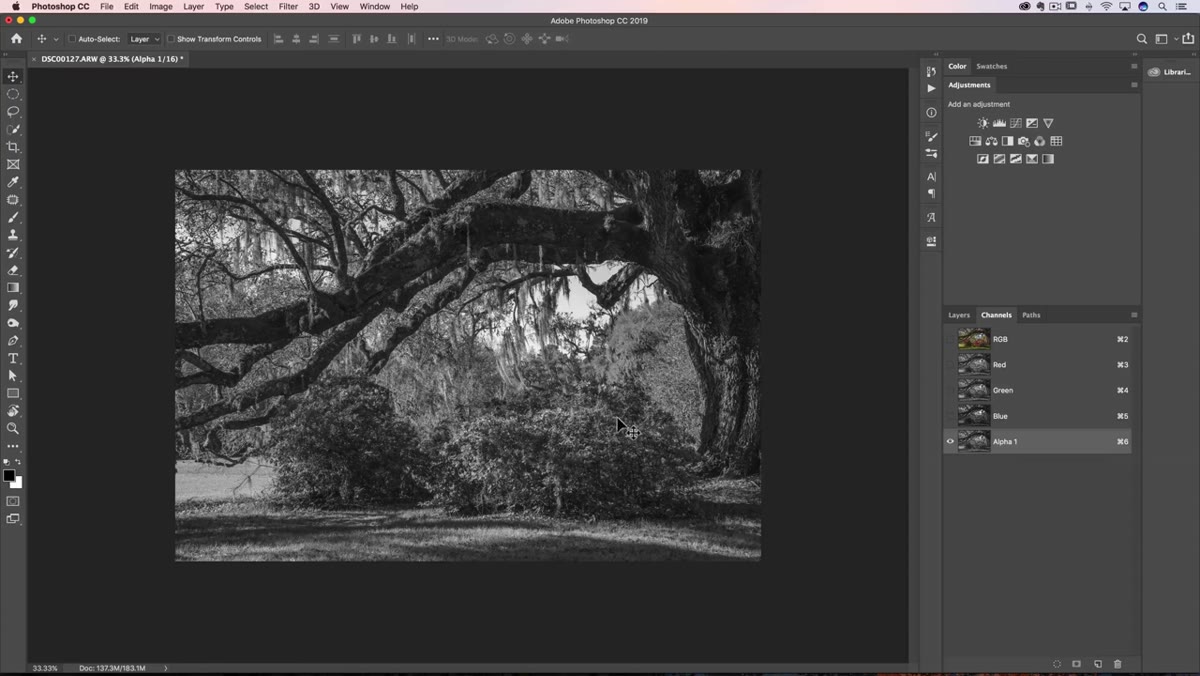 Selection active on canvas ready for adjustment layer
With the refined channel loaded as a selection, you can now add a Curves or Levels adjustment layer. Photoshop will automatically use your selection as the layer mask, meaning the adjustment only affects the areas you’ve isolated. Pull the highlights down in the Curves dialog, and watch the hot spots come under control while the rest of the image stays untouched.
Selection active on canvas ready for adjustment layer
With the refined channel loaded as a selection, you can now add a Curves or Levels adjustment layer. Photoshop will automatically use your selection as the layer mask, meaning the adjustment only affects the areas you’ve isolated. Pull the highlights down in the Curves dialog, and watch the hot spots come under control while the rest of the image stays untouched.
This is luminosity masking without the plugin. It’s the same math, done manually, which means you understand exactly what’s happening and can refine it at any point by painting on the mask directly.
A Note from My Own Practice
I work with a lot of composited skies and reflective surfaces for album art, and channel-based selections saved me on a project where I spent six months studying how light behaves on water. No selection tool could isolate glare on rippled water the way a luminosity channel could. The technique Matt demonstrates here transfers directly to that kind of work. One thing I’d add: after refining the channel, zoom to 100% and check the mask edges at the transition between selected and unselected areas. A slight Gaussian Blur (0.3 to 0.5 pixels) on the channel before loading the selection can smooth out any harsh transitions that show up on your adjustment layer mask.
The biggest lesson in this tutorial isn’t the mechanics of channel masks. It’s the decision tree: Matt tries the simple tools first, diagnoses why they fail, and only then reaches for the more precise technique. That’s the workflow of someone who’s made enough mistakes to respect the order of operations. Channel-based selections are not advanced Photoshop. They’re foundational Photoshop that most people skip because the shortcut isn’t obvious.
Watch the full tutorial on YouTube to see Matt work through the full color treatment that follows the masking work.
Comments (4)
Would love to see a follow-up going deeper into this topic.
Never thought of approaching it this way. Really creative.
Great breakdown. The step-by-step approach really helps.
Just subscribed. If the rest of your content is this good, I'm in.
Leave a Comment