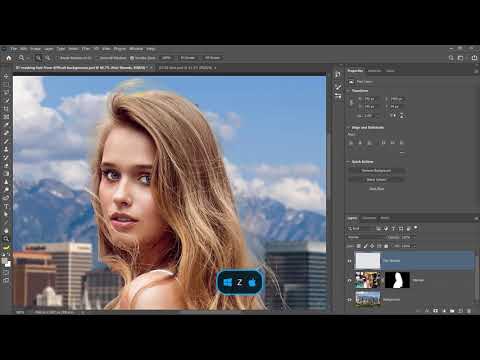
Hair masking is where composites go to die. I’ve been building images for movie posters and album covers long enough to have a folder called “failures” that I review every month, and I can tell you that at least a third of the early entries involve hair. Specifically, they involve the moment I realized that the subject I’d spent an hour cutting out still had a halo of the original background clinging to every strand. The problem gets dramatically worse when you’re dealing with blonde or light-colored hair against a busy, similarly-toned background. You can’t rely on contrast to save you. You have to work smarter.
In this CreativeLive tutorial, the instructor walks through exactly this scenario: a blonde woman photographed on a busy street, with yellow tones and grays in the background that bleed right into her hair. The contrast separation that makes masking easy simply isn’t there. What I want to do here is break down the actual technique step by step, because there’s a professional mindset embedded in this workflow that doesn’t get stated explicitly enough. Once you understand it, the way you approach difficult masks changes permanently.
Step 1: Start With Remove Background as a Draft, Not a Final
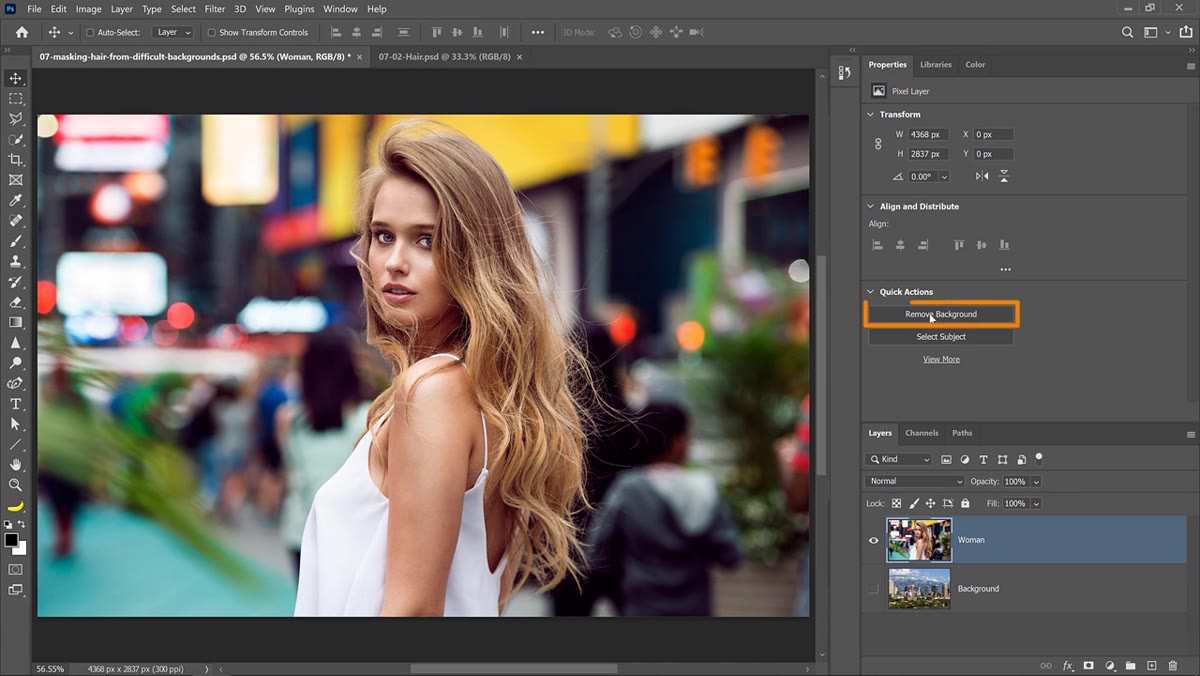 Photoshop’s Remove Background button applied to the woman layer
The first move is to select your subject layer and click the Remove Background button. This is not the final mask. Think of it as a rough draft that gives Photoshop’s AI a starting point to work from. For a difficult shot like this one, the one-click result will have visible problems around the hair edges, but it will get the broad shapes right. The value is in the time it saves compared to starting from scratch with a manual selection. Accept the imperfect result and move to the next step.
Photoshop’s Remove Background button applied to the woman layer
The first move is to select your subject layer and click the Remove Background button. This is not the final mask. Think of it as a rough draft that gives Photoshop’s AI a starting point to work from. For a difficult shot like this one, the one-click result will have visible problems around the hair edges, but it will get the broad shapes right. The value is in the time it saves compared to starting from scratch with a manual selection. Accept the imperfect result and move to the next step.
Step 2: Open the Select and Mask Workspace
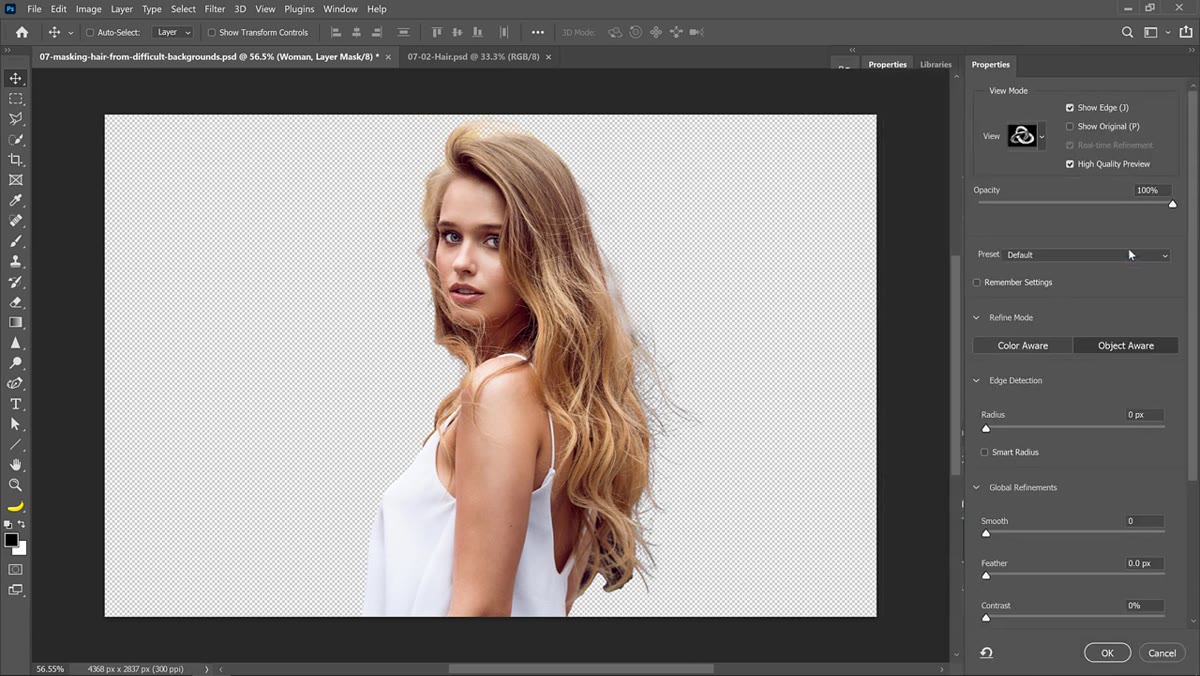 Clicking the Select and Mask button with layer mask thumbnail selected
With the layer mask thumbnail selected in the Layers panel, click the Select and Mask button. This opens the dedicated workspace where the real refinement happens. Set your view to On Black for now. On Black gives you a clear read of what’s actually masked and what isn’t, especially useful when evaluating fine hair detail. You’re looking at your problem areas here, not solving them yet. Take a moment to assess where the hair is blending into the background and where it’s holding a clean edge.
Clicking the Select and Mask button with layer mask thumbnail selected
With the layer mask thumbnail selected in the Layers panel, click the Select and Mask button. This opens the dedicated workspace where the real refinement happens. Set your view to On Black for now. On Black gives you a clear read of what’s actually masked and what isn’t, especially useful when evaluating fine hair detail. You’re looking at your problem areas here, not solving them yet. Take a moment to assess where the hair is blending into the background and where it’s holding a clean edge.
Step 3: Use Refine Hair Before Touching Anything Else
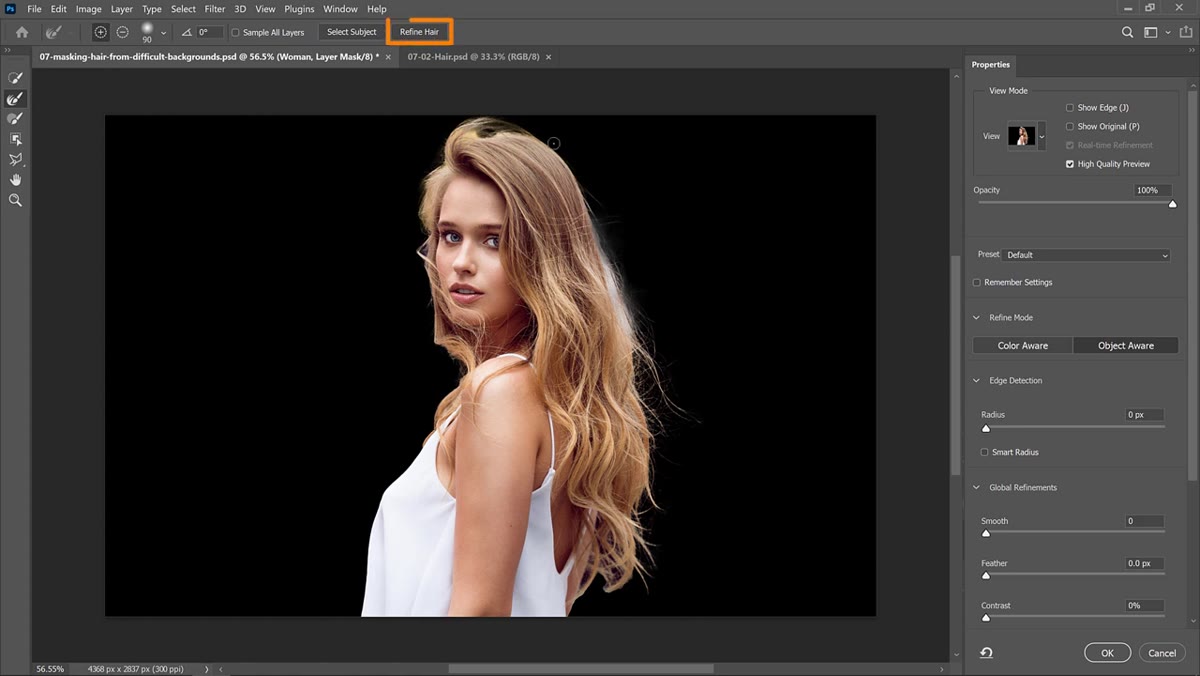 Clicking the Refine Hair button in Select and Mask workspace
Before you reach for any manual tools, click the Refine Hair button. This is an Adobe Sensei AI feature introduced in Photoshop 2021, and it functions like having Photoshop automatically paint the Refine Edge brush across every hair edge in the image. It detects where hair exists and applies edge refinement to those zones without any manual brushwork from you. The result isn’t always perfect, but it handles the underlying complexity of individual hair strands far faster than any manual approach. Run this first and evaluate before doing anything else.
Clicking the Refine Hair button in Select and Mask workspace
Before you reach for any manual tools, click the Refine Hair button. This is an Adobe Sensei AI feature introduced in Photoshop 2021, and it functions like having Photoshop automatically paint the Refine Edge brush across every hair edge in the image. It detects where hair exists and applies edge refinement to those zones without any manual brushwork from you. The result isn’t always perfect, but it handles the underlying complexity of individual hair strands far faster than any manual approach. Run this first and evaluate before doing anything else.
Step 4: Clean Up Areas the AI Misidentified
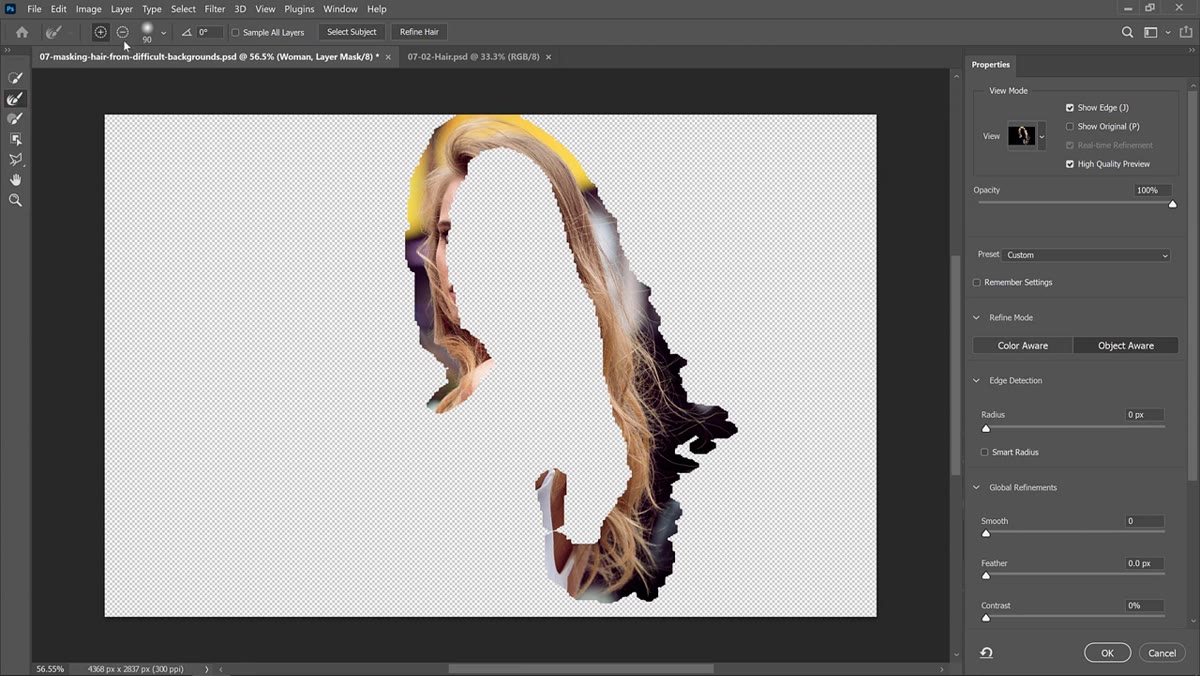 Using the minus brush to remove incorrectly refined areas
After Refine Hair runs, check the Show Edge option temporarily so you can see exactly where Photoshop applied its refinement. Some areas it targeted may not actually be hair edges. To correct this, select the Refine Edge Brush tool, switch it to subtract mode using the minus icon in the toolbar, and paint over any zones that were incorrectly treated. In this example the problem areas are small, but on a more complex image you might need to spend several minutes here. Once you’ve removed the false positives, uncheck Show Edge and review the overall result.
Using the minus brush to remove incorrectly refined areas
After Refine Hair runs, check the Show Edge option temporarily so you can see exactly where Photoshop applied its refinement. Some areas it targeted may not actually be hair edges. To correct this, select the Refine Edge Brush tool, switch it to subtract mode using the minus icon in the toolbar, and paint over any zones that were incorrectly treated. In this example the problem areas are small, but on a more complex image you might need to spend several minutes here. Once you’ve removed the false positives, uncheck Show Edge and review the overall result.
Step 5: Apply Smoothing and Contrast Before Exiting
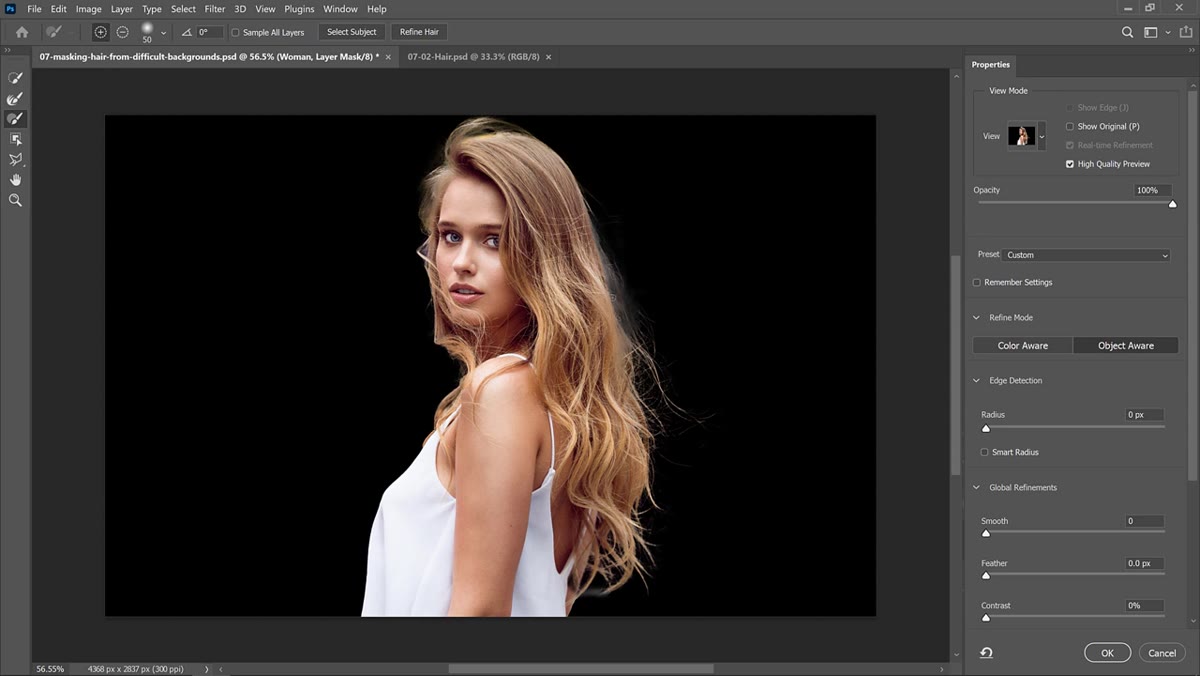 Adjusting Smooth and Contrast sliders in Select and Mask properties
Before clicking OK to exit the workspace, make two small adjustments in the Global Refinements panel. Increase the Smooth slider slightly to eliminate jagged transitions along the mask edge, and bring up the Contrast slider to sharpen the boundary between selected and unselected areas. You don’t need large values here. The goal is to tighten what’s already been accomplished, not to overprocess. Once those adjustments are in, click OK and return to your main document.
Adjusting Smooth and Contrast sliders in Select and Mask properties
Before clicking OK to exit the workspace, make two small adjustments in the Global Refinements panel. Increase the Smooth slider slightly to eliminate jagged transitions along the mask edge, and bring up the Contrast slider to sharpen the boundary between selected and unselected areas. You don’t need large values here. The goal is to tighten what’s already been accomplished, not to overprocess. Once those adjustments are in, click OK and return to your main document.
Step 6: Enable the Background and Make the Call on What to Keep
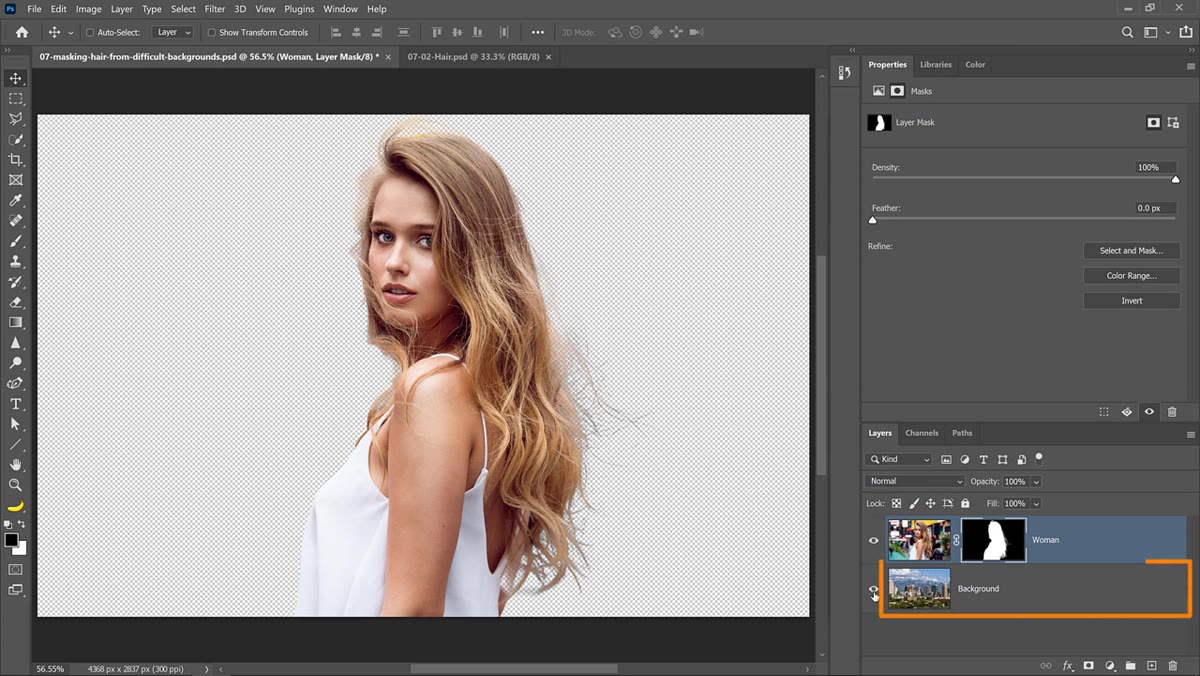 Background layer enabled, revealing how the hair sits against the new scene
Turn on your destination background layer so you can evaluate the hair against the actual composite environment. This is a critical decision point. Some of the edge hair will read well against the new background. Some of it will carry color contamination from the original scene. Look at each zone honestly and decide what’s salvageable. The instructor’s framing here is exactly right: you’re not trying to save everything.
Background layer enabled, revealing how the hair sits against the new scene
Turn on your destination background layer so you can evaluate the hair against the actual composite environment. This is a critical decision point. Some of the edge hair will read well against the new background. Some of it will carry color contamination from the original scene. Look at each zone honestly and decide what’s salvageable. The instructor’s framing here is exactly right: you’re not trying to save everything.
Step 7: Hide What You Can’t Save and Paint It Back
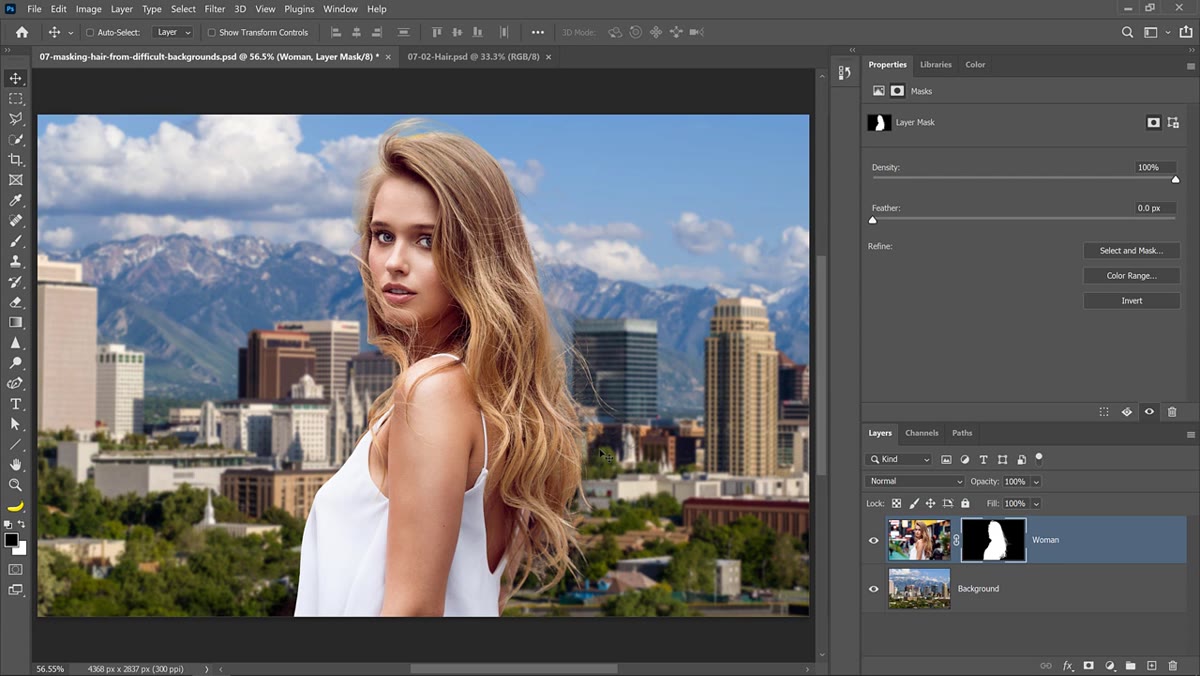 New blank layer created, named “hair strands,” above the subject
This is the step most tutorials skip over, and it’s the one that separates working compositors from hobbyists. Create a new blank layer above your subject and name it something like “hair strands.” For hair that was impossible to cleanly extract, paint it back manually. If you’re working with a Wacom tablet, go into your Brush Settings and set Spacing to 1%, enable Shape Dynamics, and tie Size Jitter to Pen Pressure. Increase the brush hardness so you’re laying down defined strands rather than soft blobs. Sample color from the visible hair and build the strands back in with light pressure, following the natural direction of the hair.
New blank layer created, named “hair strands,” above the subject
This is the step most tutorials skip over, and it’s the one that separates working compositors from hobbyists. Create a new blank layer above your subject and name it something like “hair strands.” For hair that was impossible to cleanly extract, paint it back manually. If you’re working with a Wacom tablet, go into your Brush Settings and set Spacing to 1%, enable Shape Dynamics, and tie Size Jitter to Pen Pressure. Increase the brush hardness so you’re laying down defined strands rather than soft blobs. Sample color from the visible hair and build the strands back in with light pressure, following the natural direction of the hair.
A Note on When to Paint vs. When to Keep Masking
I sketch every composite on paper before I open Photoshop. One thing that habit has taught me is that hair in the periphery of a frame almost always gets obscured by something in the final composition, whether that’s another element, a vignette, or simply the fact that the eye doesn’t travel there. Before you spend forty-five minutes painting individual strands, look at your full layout and identify which hair edges will actually be visible in the finished piece. Prioritize those. The rest you can handle with a simple brush on the mask itself. Painting realistic hair is a skill worth building, but it should be targeted, not reflexive.
The real lesson from this tutorial is philosophical as much as it’s technical: no masking tool will perfectly extract hair from a low-contrast background, and pretending otherwise wastes time. The professional approach combines automated tools like Remove Background and Refine Hair to get as far as the technology can take you, then accepts that some hair will need to be reconstructed rather than extracted. That mental shift, from “how do I select this” to “what do I hide and repaint,” is what makes the difference between a composite that looks forced and one that reads as real.
Watch the full tutorial on YouTube to see the instructor demonstrate each of these steps in real time, particularly the brush settings for painting hair strands, which are much easier to understand when you can see the stroke behavior directly.
Comments (2)
Finally someone explains this in a way that actually makes sense.
Really solid breakdown. This pairs perfectly with the business work I've been writing about.
Leave a Comment