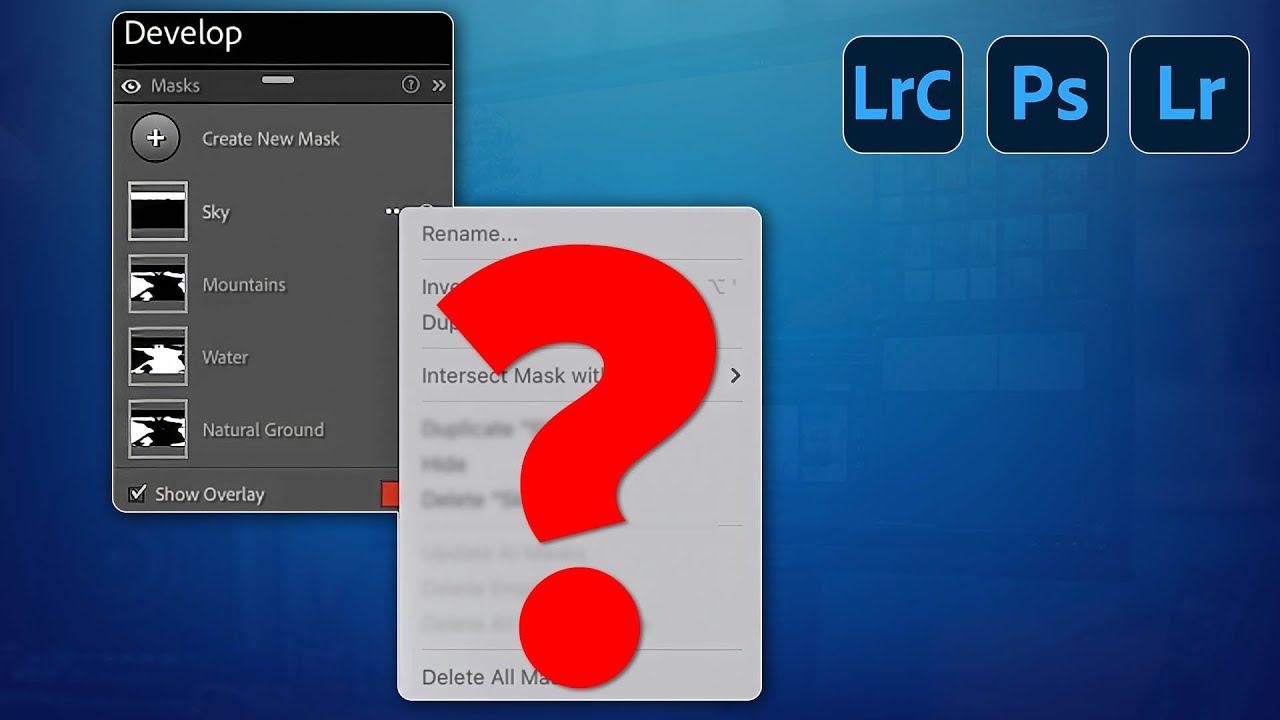
There’s a particular kind of frustration that comes from working with a tool for years and discovering it’s been quietly doing something inefficient the whole time. I run heavy composite files, often with dozens of layers and adjustment passes, so performance is never an abstraction for me. It’s either smooth or it’s not, and when it’s not, you feel every wasted second. That’s why a recent tutorial from Matt Kloskowski landed harder than I expected. Not because it revealed something exotic, but because it identified a drag on workflow that I had completely normalized.
Watch the full tutorial on YouTube
In this Matt Kloskowski tutorial, the focus is on a small but genuinely useful option buried inside Lightroom Classic’s masking panel. The setup matters here: this tip is most relevant when you’re using automated masking presets, the kind that generate every possible mask for a scene in a single click. Landscape segmentation masks, portrait component masks, you name it. The problem is that these presets don’t know what’s actually in your photo. Apply an all-landscape preset to a portrait, and Lightroom will dutifully create masks for architecture, vegetation, and artificial ground even if your frame has none of those things. Those masks sit there empty, flagged with a little exclamation point, doing nothing except adding overhead. The fix takes about two seconds once you know where to look.
Step 1: Open the Masking Panel in the Develop Module
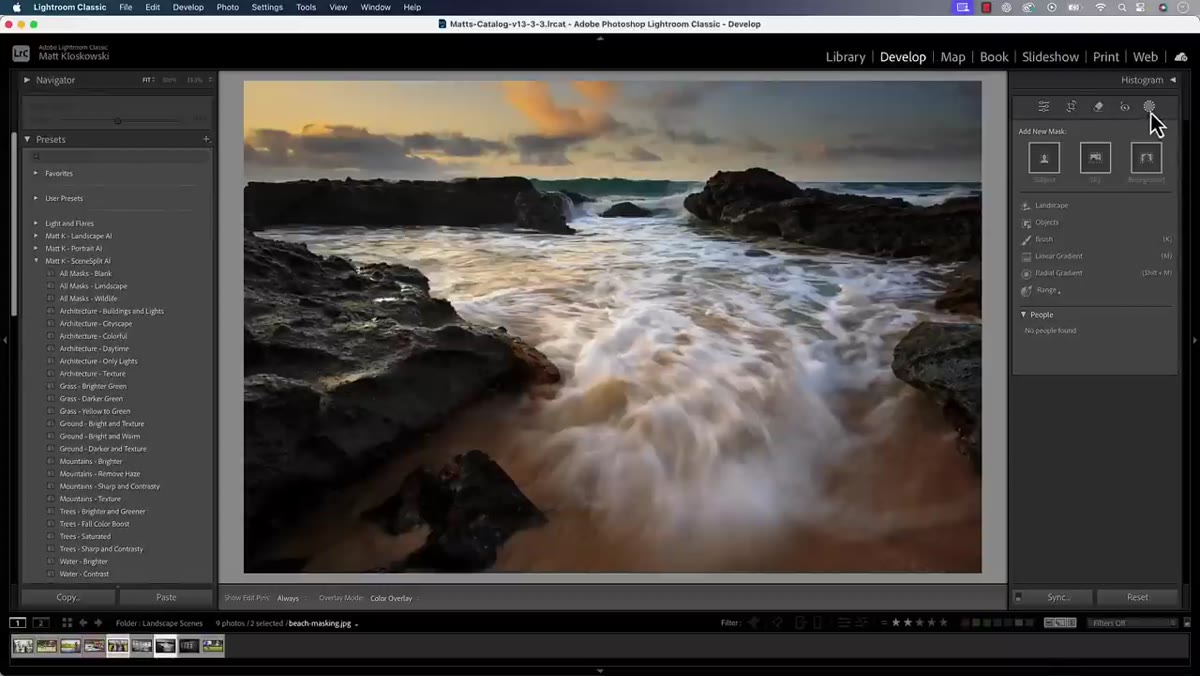 Masking panel open in Lightroom Classic Develop module
This tip works in Lightroom Classic, Lightroom, and Adobe Camera Raw. The masking panel is the same across all three environments. In Lightroom Classic, head to the Develop module and locate the masking panel on the right-hand side. If you’re in Camera Raw, the panel lives in the same relative position. You don’t need to do anything special to enable it. Just make sure you’re in the right module before moving forward.
Masking panel open in Lightroom Classic Develop module
This tip works in Lightroom Classic, Lightroom, and Adobe Camera Raw. The masking panel is the same across all three environments. In Lightroom Classic, head to the Develop module and locate the masking panel on the right-hand side. If you’re in Camera Raw, the panel lives in the same relative position. You don’t need to do anything special to enable it. Just make sure you’re in the right module before moving forward.
Step 2: Apply an Automated Masking Preset
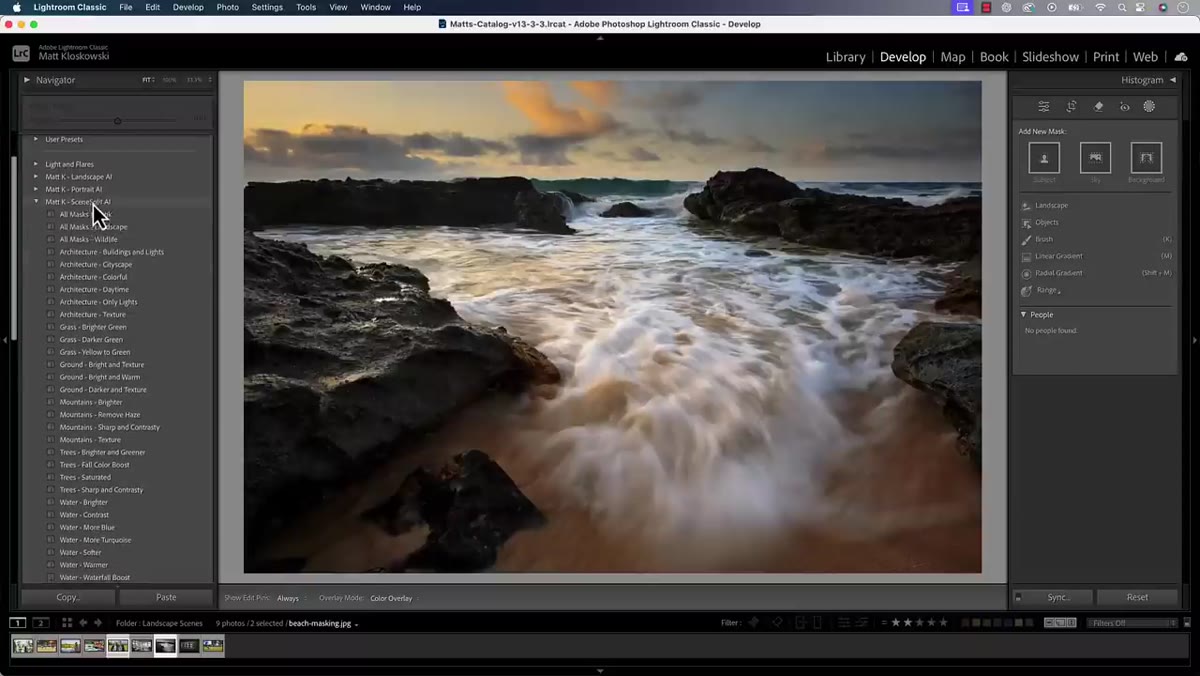 Landscape scene-split preset applied, multiple masks created
The scenario where this tip becomes necessary is when you apply a preset that auto-generates masks. Kloskowski demonstrates this with his landscape “scene split” presets, which create a full suite of segmentation masks covering sky, foreground, water, vegetation, and so on. Portrait presets work the same way. One click and Lightroom generates every mask category the preset is designed to handle, regardless of whether those elements exist in your image. Apply one of these presets to a photo and you may end up with anywhere from six to a dozen masks populating the panel.
Landscape scene-split preset applied, multiple masks created
The scenario where this tip becomes necessary is when you apply a preset that auto-generates masks. Kloskowski demonstrates this with his landscape “scene split” presets, which create a full suite of segmentation masks covering sky, foreground, water, vegetation, and so on. Portrait presets work the same way. One click and Lightroom generates every mask category the preset is designed to handle, regardless of whether those elements exist in your image. Apply one of these presets to a photo and you may end up with anywhere from six to a dozen masks populating the panel.
Step 3: Identify the Empty Masks
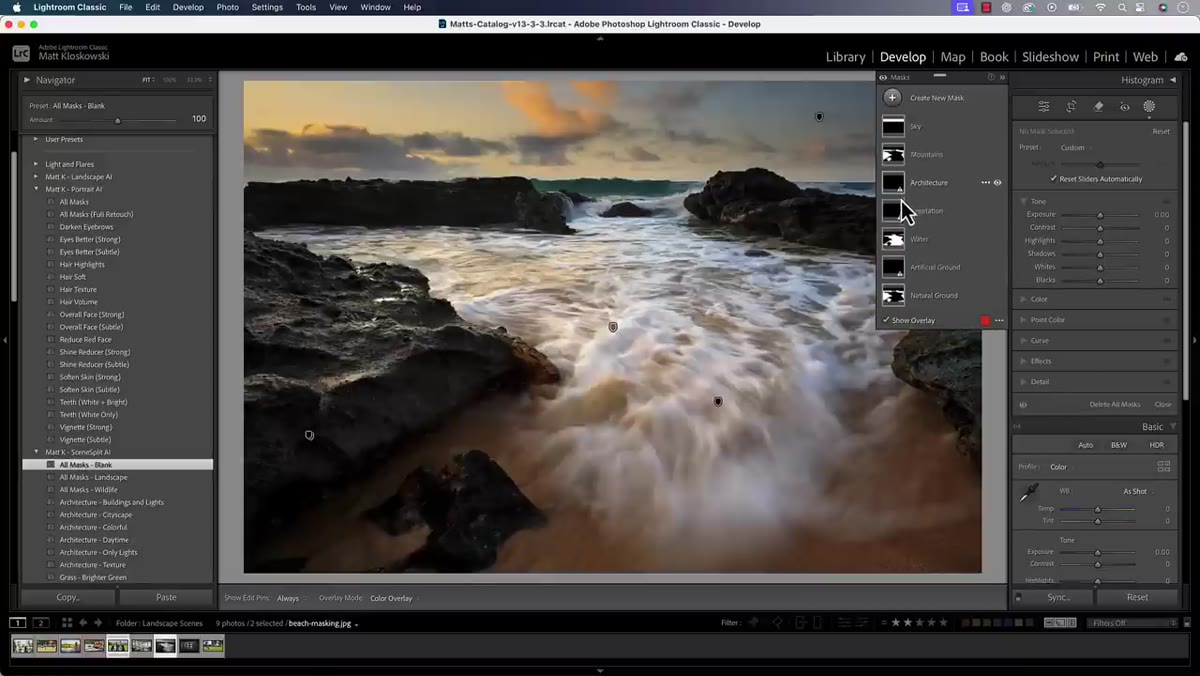 Exclamation point icons visible on architecture and vegetation masks
After the preset runs, scan the masking panel for any masks marked with a small exclamation point icon. That symbol is Lightroom’s way of telling you that it tried to detect a feature, couldn’t find it, and created an empty mask as a placeholder. On a portrait shot, you’ll commonly see empty masks for things like architecture or artificial ground. On a landscape with no water, the water mask will show the same flag. These aren’t errors exactly, but they’re not useful either, and Kloskowski makes the point clearly: empty masks still carry a performance cost. They add to the processing load Lightroom is managing, and in files where you’re already stacking edits and adjustments, that matters.
Exclamation point icons visible on architecture and vegetation masks
After the preset runs, scan the masking panel for any masks marked with a small exclamation point icon. That symbol is Lightroom’s way of telling you that it tried to detect a feature, couldn’t find it, and created an empty mask as a placeholder. On a portrait shot, you’ll commonly see empty masks for things like architecture or artificial ground. On a landscape with no water, the water mask will show the same flag. These aren’t errors exactly, but they’re not useful either, and Kloskowski makes the point clearly: empty masks still carry a performance cost. They add to the processing load Lightroom is managing, and in files where you’re already stacking edits and adjustments, that matters.
Step 4: Access the Mask Panel’s Pop-Out Menu
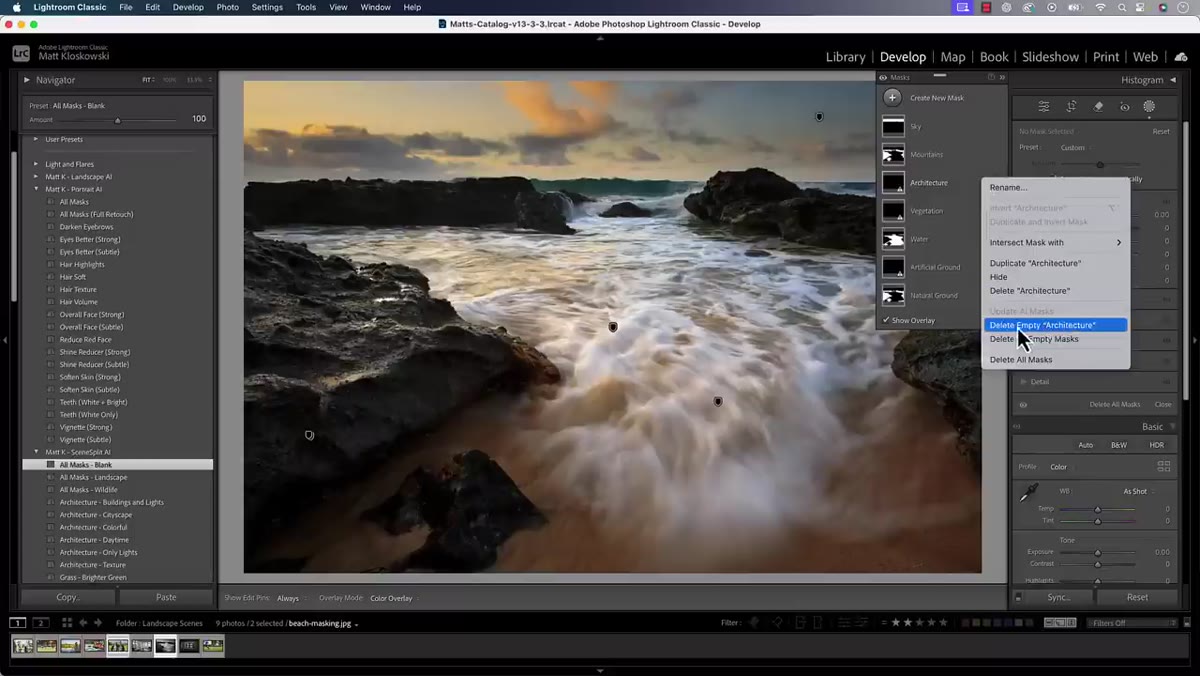 Pop-out menu open on the masking panel, showing delete options
This is the step most people miss entirely. Look for the small pop-out menu icon in the masking panel. It’s subtle, and easy to overlook if you’re not hunting for it. Click it and a short dropdown appears. You’ll see an option to delete a single empty mask, and below that, an option to delete all empty masks at once. This is the one you want. One click clears every flagged mask from the panel simultaneously, no need to select and delete them one by one.
Pop-out menu open on the masking panel, showing delete options
This is the step most people miss entirely. Look for the small pop-out menu icon in the masking panel. It’s subtle, and easy to overlook if you’re not hunting for it. Click it and a short dropdown appears. You’ll see an option to delete a single empty mask, and below that, an option to delete all empty masks at once. This is the one you want. One click clears every flagged mask from the panel simultaneously, no need to select and delete them one by one.
Step 5: Run “Delete All Empty Masks”
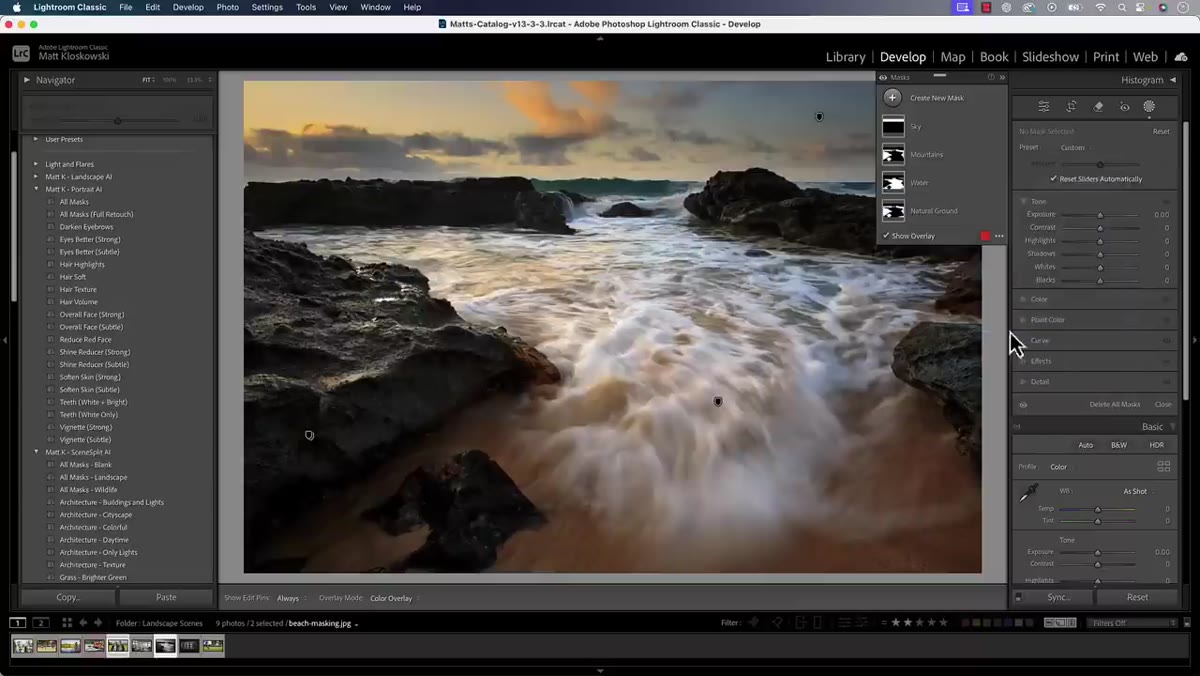 All empty masks removed, only valid masks remain in panel
Click “Delete All Empty Masks” and the cleanup happens immediately. What’s left in the panel are only the masks that actually detected something in the image. The exclamation points are gone, the panel is cleaner, and the file is lighter. Kloskowski notes that this step can’t be baked into a preset, which is the one limitation worth knowing upfront. The mask deletion has to be done manually after the preset runs. It’s a small extra step, but given what it removes, it’s worth making a habit.
All empty masks removed, only valid masks remain in panel
Click “Delete All Empty Masks” and the cleanup happens immediately. What’s left in the panel are only the masks that actually detected something in the image. The exclamation points are gone, the panel is cleaner, and the file is lighter. Kloskowski notes that this step can’t be baked into a preset, which is the one limitation worth knowing upfront. The mask deletion has to be done manually after the preset runs. It’s a small extra step, but given what it removes, it’s worth making a habit.
Step 6: Click the Mask to Expose the Add and Subtract Controls
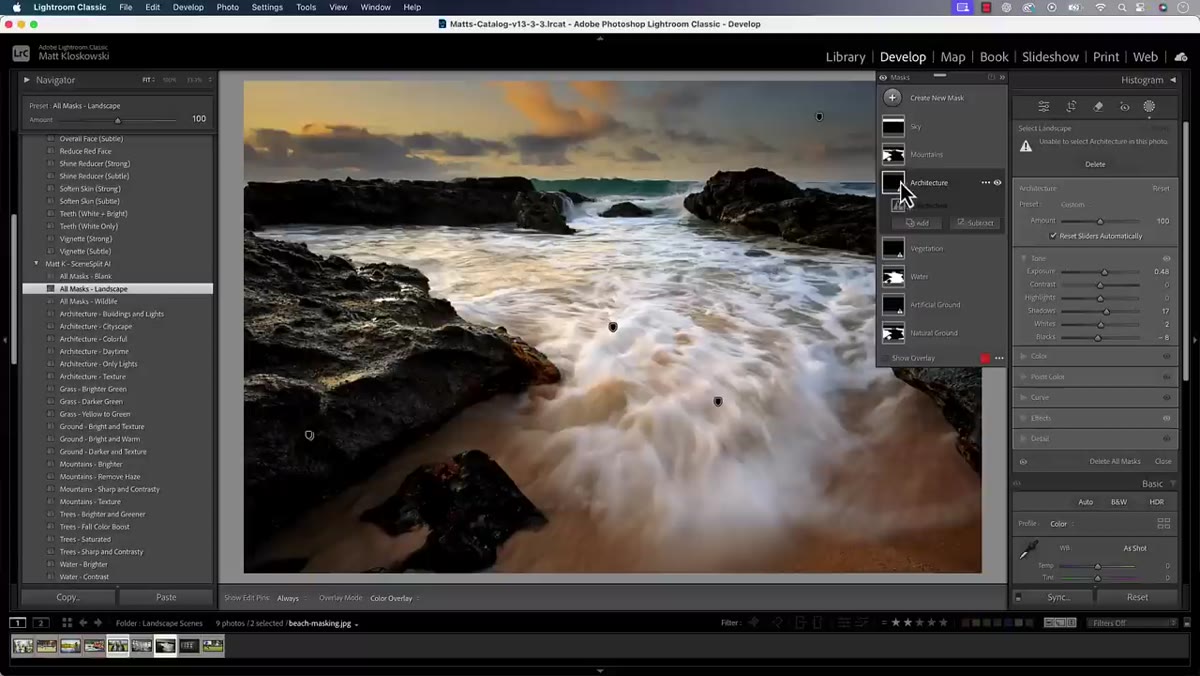 Mask selected, Add and Subtract buttons visible below
One bonus point from the tutorial that’s worth repeating: the Add and Subtract buttons inside the masking panel only appear once you click directly on a mask. A lot of people assume those controls are missing or that their version of Lightroom is broken. They’re not missing. They’re just contextual. Click the mask itself, not a sub-mask within it, and the controls appear below. Clicking a sub-mask won’t reveal them. This applies equally in Lightroom and Camera Raw.
Mask selected, Add and Subtract buttons visible below
One bonus point from the tutorial that’s worth repeating: the Add and Subtract buttons inside the masking panel only appear once you click directly on a mask. A lot of people assume those controls are missing or that their version of Lightroom is broken. They’re not missing. They’re just contextual. Click the mask itself, not a sub-mask within it, and the controls appear below. Clicking a sub-mask won’t reveal them. This applies equally in Lightroom and Camera Raw.
How This Changes the Way I Work With Presets
I don’t use presets as a final look, but I do use them as a structural starting point, especially on client work where consistency across a batch matters more than individual flourish. What I didn’t fully account for was the cumulative weight of empty masks across a large edit session. I keep reference folders organized by subject type and I often batch-apply a starting preset across similar images before doing any selective work. Running “Delete All Empty Masks” as a cleanup pass right after preset application is now part of that routine.
The broader lesson is one that comes up a lot in compositing: automated tools are powerful precisely because they’re fast, but fast doesn’t mean tidy. The landscape and portrait segmentation masks Adobe has built into Lightroom are genuinely impressive. They save real time. But they work best when paired with a quick manual audit of what they actually produced. The exclamation point icon is Lightroom doing its part of that audit. The delete option is you finishing it.
The single most important takeaway here is this: empty masks aren’t neutral. They have a cost, even when they’re doing nothing, and the option to remove all of them at once has been sitting in that pop-out menu the whole time. Check it once and you’ll never miss it again.
Watch the full tutorial on YouTube
Comments (1)
Shared this with my photography group. Everyone loved it.
Leave a Comment