
There is a problem every photo editor runs into eventually. You select a sky, you darken it, and the result looks exactly like what it is: a selection that was darkened. The horizon feels wrong. The transition is too abrupt. The bottom of the sky is the same density as the top, and the whole thing reads as edited rather than felt. For me, working on composites where every layer has to hold up to scrutiny, that kind of flat correction isn’t just aesthetically weak. It’s the kind of thing that breaks the illusion entirely.
I came across the solution in a Nigel Danson tutorial on Lightroom masking, and I want to break it down here because it solves the problem in a way that is both technically elegant and surprisingly simple. Watch the full tutorial on YouTube if you want to see it in motion. But what follows is a step-by-step walkthrough you can execute without leaving this page.
The core idea is mask intersection. Instead of applying a single AI-generated selection and calling it done, you layer two masks together so that only their overlapping region is affected. The result is a sky edit that actually behaves like a graduated exposure change, tighter at the top, feathering naturally toward the horizon. It is the kind of subtle refinement that separates a processed-looking image from one that just looks right.
Step 1: Open the Masking Panel
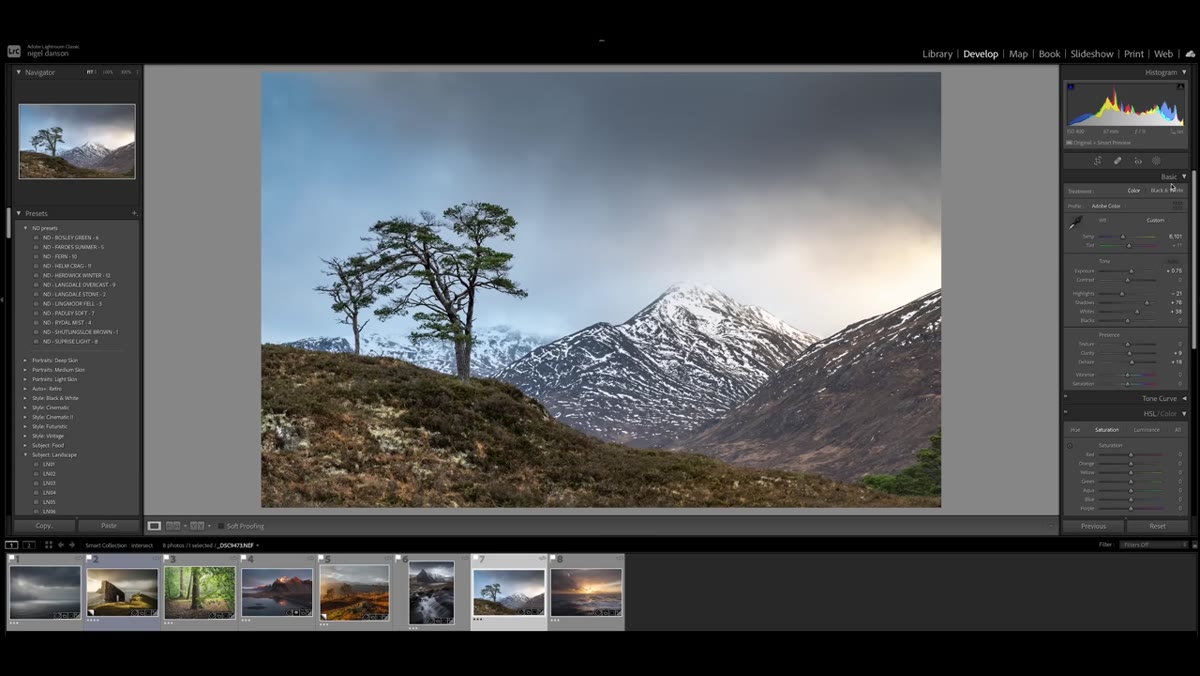 Clicking the masking icon to open the masking tools panel
In Lightroom’s Develop module, locate the masking icon in the right-side panel. It looks like a small circular symbol, sometimes described as a dotted circle. Click it to open the full masking interface. From here you can create new masks using a range of selection methods, including the AI-powered subject and sky tools, linear and radial gradients, and the brush. This panel is the starting point for everything that follows.
Clicking the masking icon to open the masking tools panel
In Lightroom’s Develop module, locate the masking icon in the right-side panel. It looks like a small circular symbol, sometimes described as a dotted circle. Click it to open the full masking interface. From here you can create new masks using a range of selection methods, including the AI-powered subject and sky tools, linear and radial gradients, and the brush. This panel is the starting point for everything that follows.
Step 2: Select the Sky Using the AI Tool
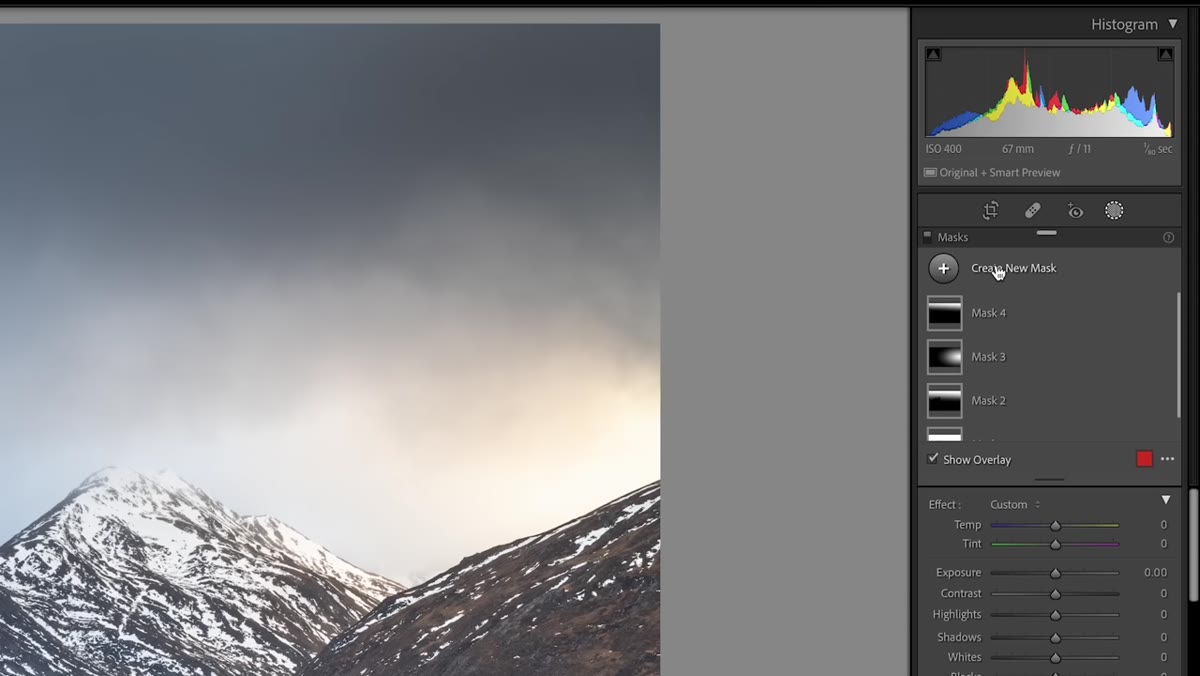 AI sky selection applied, showing mask overlay across the sky area
Click “Select Sky” from the masking menu. Lightroom’s AI will analyze the image and generate a mask that covers the sky region, tracing around trees, buildings, and other elements along the horizon with reasonable accuracy. You will see a red or white overlay indicating the selected area. On most landscape images, especially those with clear horizon lines and defined foliage, the selection is quite good right out of the gate. Do not make any exposure adjustments yet. The next step changes what you are working with.
AI sky selection applied, showing mask overlay across the sky area
Click “Select Sky” from the masking menu. Lightroom’s AI will analyze the image and generate a mask that covers the sky region, tracing around trees, buildings, and other elements along the horizon with reasonable accuracy. You will see a red or white overlay indicating the selected area. On most landscape images, especially those with clear horizon lines and defined foliage, the selection is quite good right out of the gate. Do not make any exposure adjustments yet. The next step changes what you are working with.
Step 3: Locate the Intersect Option
 Option key held down, revealing the Intersect button in the masking panel
This is the step most people miss entirely. With your sky mask active, hold down the Option key on a Mac (Alt on a PC). Watch the icons at the top of the masking panel change. Where you would normally see options to add or subtract from your mask, one of them shifts to read “Intersect.” This is the hidden function Danson highlights as the real power move in the workflow. The intersect operation limits your current mask to only the area where it overlaps with the next mask you create, so whatever falls outside that overlap simply will not be affected.
Option key held down, revealing the Intersect button in the masking panel
This is the step most people miss entirely. With your sky mask active, hold down the Option key on a Mac (Alt on a PC). Watch the icons at the top of the masking panel change. Where you would normally see options to add or subtract from your mask, one of them shifts to read “Intersect.” This is the hidden function Danson highlights as the real power move in the workflow. The intersect operation limits your current mask to only the area where it overlaps with the next mask you create, so whatever falls outside that overlap simply will not be affected.
Step 4: Intersect with a Linear Gradient
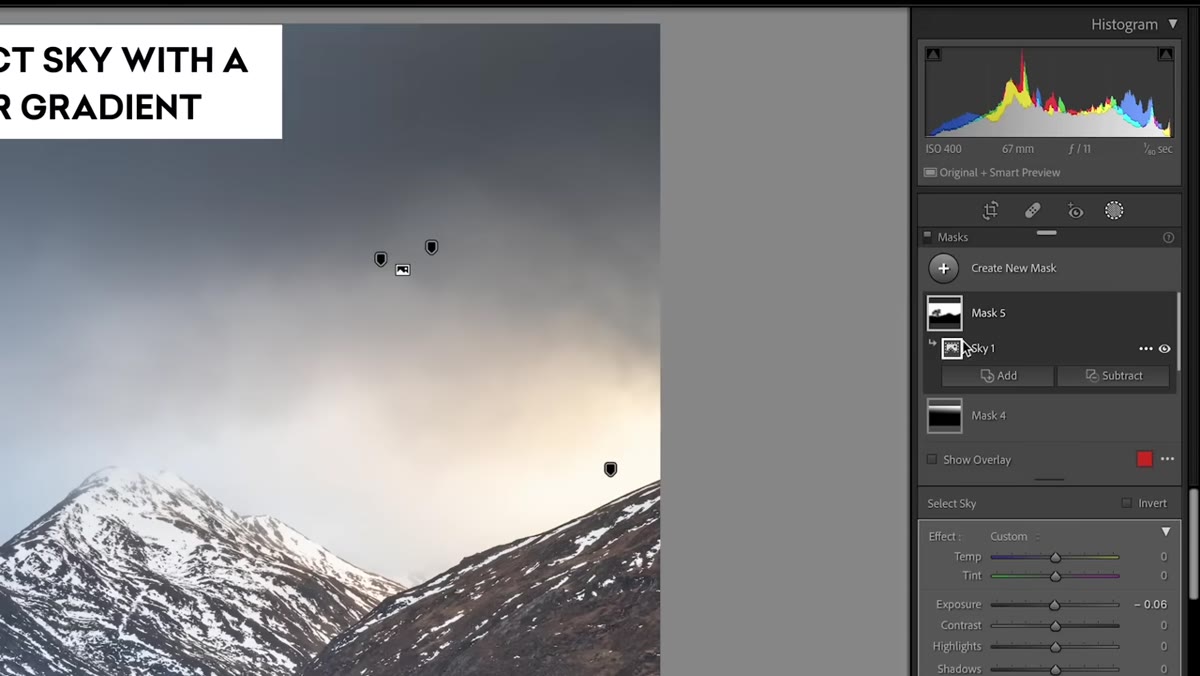 Linear gradient dragged over image, intersecting with the sky selection
While still holding Option (or Alt), click the Linear Gradient option. Now drag a gradient from the top of the image downward, stopping roughly where the horizon sits or slightly above it. What you are doing is constraining the sky selection so that it is strongest at the top of the frame and fades to nothing near the horizon. Look at the mask overlay now. Instead of a hard, even selection across the entire sky, you will see the mask density dropping off as it descends. This is the key difference. The sky still stays within its original boundary, respecting trees and edges, but now it also graduates naturally from top to bottom.
Linear gradient dragged over image, intersecting with the sky selection
While still holding Option (or Alt), click the Linear Gradient option. Now drag a gradient from the top of the image downward, stopping roughly where the horizon sits or slightly above it. What you are doing is constraining the sky selection so that it is strongest at the top of the frame and fades to nothing near the horizon. Look at the mask overlay now. Instead of a hard, even selection across the entire sky, you will see the mask density dropping off as it descends. This is the key difference. The sky still stays within its original boundary, respecting trees and edges, but now it also graduates naturally from top to bottom.
Step 5: Apply the Exposure Adjustment
 Exposure slider pulled down, showing graduated darkening effect on the sky
With the intersected mask in place, go ahead and pull down the Exposure slider. The darkening effect will fall off gracefully as it approaches the horizon, giving the sky a sense of depth and natural light falloff rather than a flat correction. Try a reduction somewhere between minus 0.5 and minus 1.5 stops depending on how bright your sky is. You can also experiment with the Highlights and Whites sliders to bring down blown-out areas without affecting the graduated feel you have built into the mask. The result should look like the light in the image shifted, not like a selection was applied.
Exposure slider pulled down, showing graduated darkening effect on the sky
With the intersected mask in place, go ahead and pull down the Exposure slider. The darkening effect will fall off gracefully as it approaches the horizon, giving the sky a sense of depth and natural light falloff rather than a flat correction. Try a reduction somewhere between minus 0.5 and minus 1.5 stops depending on how bright your sky is. You can also experiment with the Highlights and Whites sliders to bring down blown-out areas without affecting the graduated feel you have built into the mask. The result should look like the light in the image shifted, not like a selection was applied.
Step 6: Use the Brush Intersect for Detail Work
 Brush tool intersected with a selection, painting targeted brightness onto a branch
The intersection technique is not limited to gradients. Danson also demonstrates using the intersect option with the brush tool for more precise local edits. If you have already created a subject or object selection and want to paint adjustments only within that boundary, hold Option or Alt and choose Brush. Now paint over the area you want to affect. Only the strokes that fall inside the original selection will register. This is particularly useful for adding brightness or contrast to specific elements, like the lit edge of a tree trunk or a highlighted foreground rock, without any of that adjustment bleeding into the surrounding area.
Brush tool intersected with a selection, painting targeted brightness onto a branch
The intersection technique is not limited to gradients. Danson also demonstrates using the intersect option with the brush tool for more precise local edits. If you have already created a subject or object selection and want to paint adjustments only within that boundary, hold Option or Alt and choose Brush. Now paint over the area you want to affect. Only the strokes that fall inside the original selection will register. This is particularly useful for adding brightness or contrast to specific elements, like the lit edge of a tree trunk or a highlighted foreground rock, without any of that adjustment bleeding into the surrounding area.
What I Would Add from My Own Work
Working in compositing rather than straight photography, I use a version of this technique whenever I need to blend a sky replacement convincingly. After masking in a new sky, I will create a luminosity-based or gradient intersect mask on the transition zone and use it to fine-tune how the color grading of the new sky bleeds into the foreground. The intersection stops me from pushing adjustments into areas I do not control, which keeps blending layers from looking patchy. I would also suggest naming every intersected mask in the panel immediately after creating it. Lightroom does not label them automatically, and three intersected masks deep, it becomes genuinely difficult to know which is which without descriptive names.
One thing I keep coming back to with this workflow is how much it mirrors the logic of blend-if sliders in Photoshop or luminosity masking in Capture One. The underlying idea is the same: stop thinking in single selections and start thinking in constrained zones. When two conditions have to be true simultaneously for a pixel to be affected, you get results that look intentional rather than applied.
Every tool in photo editing has a version of this principle buried somewhere inside it. Finding those intersections, literal or logical, is most of the actual craft. Danson’s tutorial makes this one unusually easy to act on.
Watch the full tutorial on YouTube to see Nigel Danson walk through additional use cases, including a drone shot example where the same technique prevents the over-darkened horizon problem that trips up so many sky edits.
Comments (1)
Finally someone explains this in a way that actually makes sense.
Leave a Comment