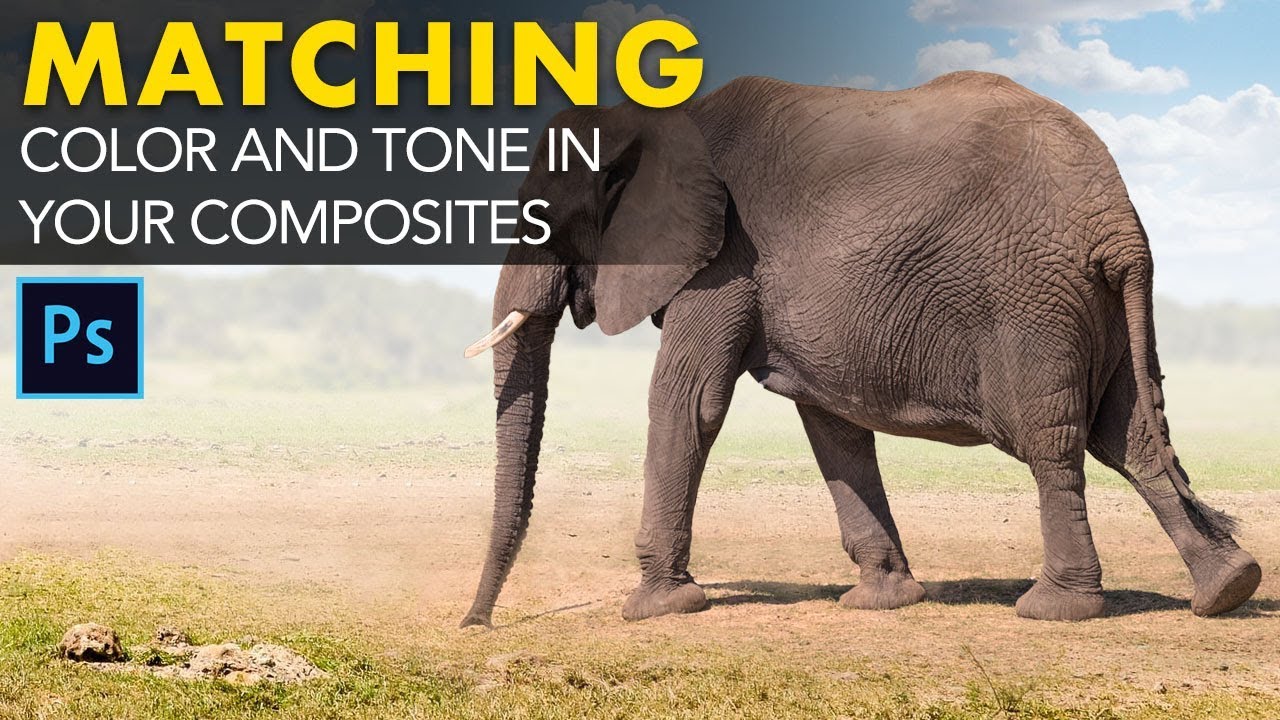
Every composite I’ve ever built starts with the same quiet dread: getting the subject onto the new background and realizing immediately that the colors are living in completely different worlds. The subject looks pasted. Not because the masking is bad, not because the lighting direction is wrong, but because the color temperature is fighting itself. Warm, golden background. Cool, flat subject. The eye catches it before the brain does, and once it’s seen, it can’t be unseen. I’ve spent years working on movie posters and album covers, and I’ll tell you straight: color temperature mismatch is the most common thing that separates a composite that reads as real from one that just looks assembled.
This is exactly the problem that Watch the full tutorial on YouTube from Matt Kloskowski addresses, and he does it with a deceptively simple tool that most people walk past every single day in Photoshop. The Photo Filter adjustment layer. I had used it for global color grading before, but never really thought about it as a compositing repair tool. Watching Matt apply it as a clipped adjustment to a single layer changed how I work. Here’s the full walkthrough so you can follow along without missing a step.
Step 1: Identify the Color Temperature Problem
 Before and after showing warm background, cool subject
Before you touch a single tool, you need to name the problem. Open your composite and look at the relationship between the subject and the background. Matt demonstrates this with a portrait placed against a warm, sun-drenched background. The subject reads cooler, slightly bluish, disconnected. Your eye won’t always give you precise language for it, but you’re looking for a mismatch in warmth. Is the background pulling orange and golden? Is the subject sitting in a cooler, more neutral or blue-toned light? That gap is what you’re fixing. Don’t try to adjust anything until you’ve spent thirty seconds just studying which direction the temperature needs to move.
Before and after showing warm background, cool subject
Before you touch a single tool, you need to name the problem. Open your composite and look at the relationship between the subject and the background. Matt demonstrates this with a portrait placed against a warm, sun-drenched background. The subject reads cooler, slightly bluish, disconnected. Your eye won’t always give you precise language for it, but you’re looking for a mismatch in warmth. Is the background pulling orange and golden? Is the subject sitting in a cooler, more neutral or blue-toned light? That gap is what you’re fixing. Don’t try to adjust anything until you’ve spent thirty seconds just studying which direction the temperature needs to move.
Step 2: Confirm Your Subject Is Already on Its Own Layer
 Layers panel showing subject isolated on its own layer
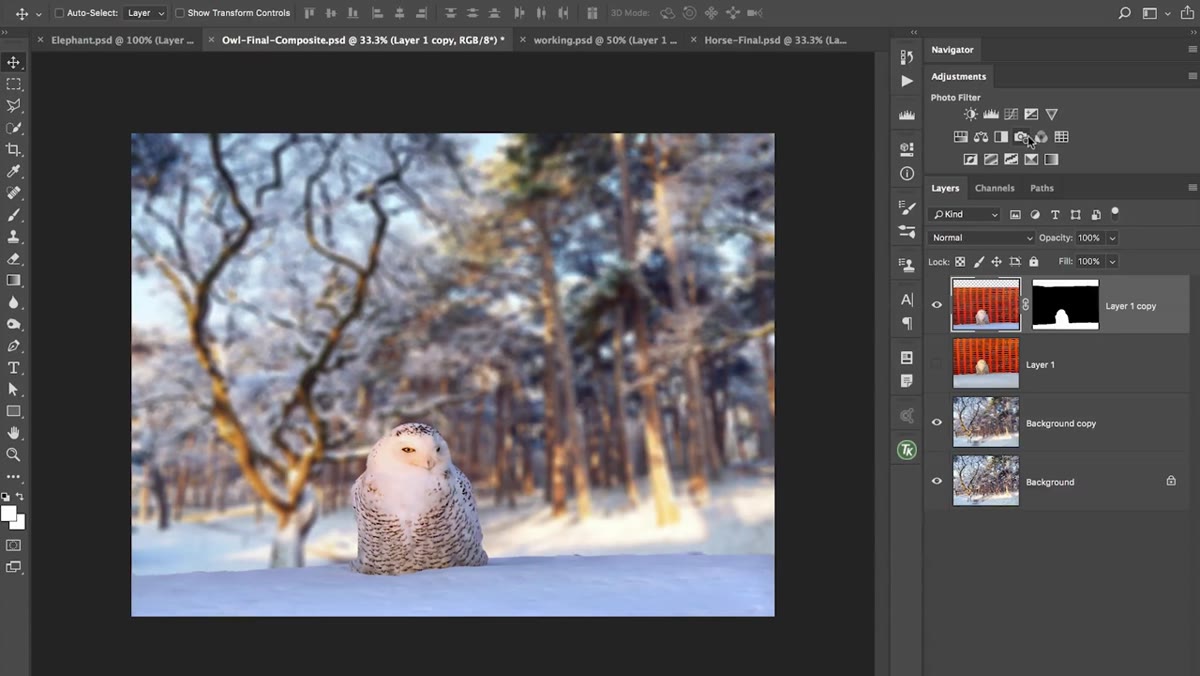
This technique depends entirely on your subject being isolated on a separate layer from the background. If you’ve already done a selection and masked your subject, you’re ready. Matt points out that the masking work you’ve already done is exactly what makes this technique clean and non-destructive. Check your layers panel and confirm the subject layer is sitting above the background. If you haven’t done the isolation yet, do that first. The clipping method in the next steps won’t work without a clean layer separation. This is worth stating plainly because it’s easy to rush past.
Layers panel showing subject isolated on its own layer
This technique depends entirely on your subject being isolated on a separate layer from the background. If you’ve already done a selection and masked your subject, you’re ready. Matt points out that the masking work you’ve already done is exactly what makes this technique clean and non-destructive. Check your layers panel and confirm the subject layer is sitting above the background. If you haven’t done the isolation yet, do that first. The clipping method in the next steps won’t work without a clean layer separation. This is worth stating plainly because it’s easy to rush past.
Step 3: Add a Photo Filter Adjustment Layer
 Adjustments panel with Photo Filter option highlighted
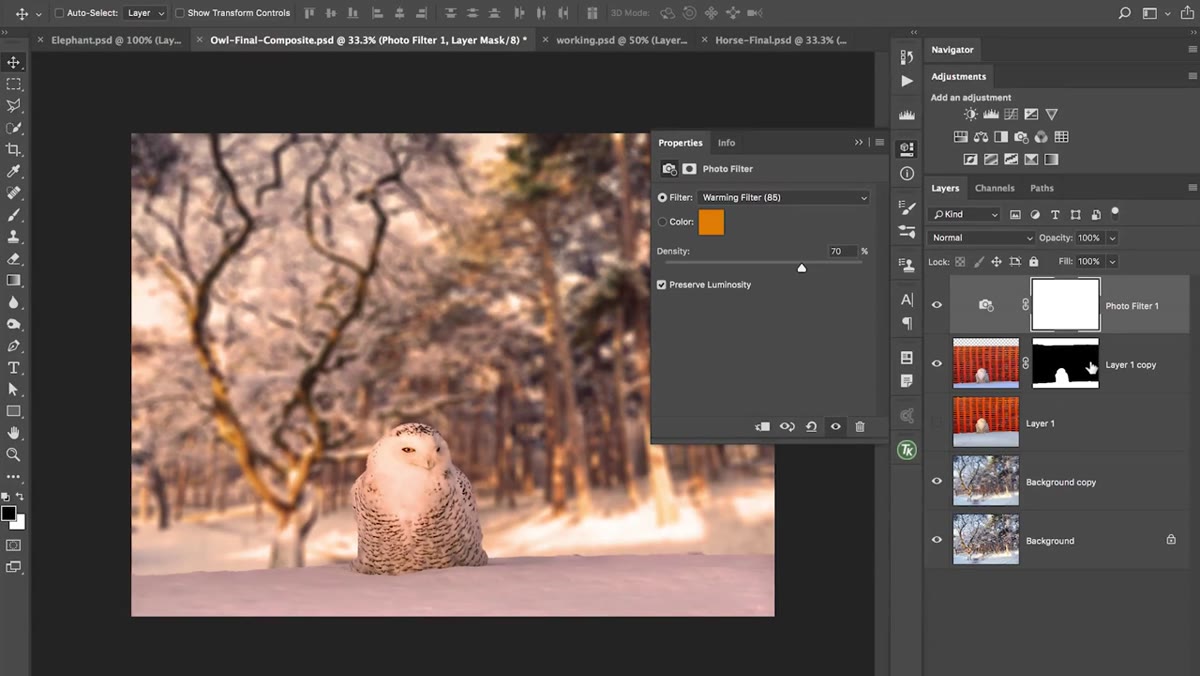
Go to the Adjustments panel and click on the Photo Filter option. It looks like a small camera lens icon. This will add a new adjustment layer above your current layer. By default, it applies to everything below it in the stack, which means right now it’s affecting your entire image. That’s fine for the moment. Matt’s approach is to crank the density slider up high first, even to an exaggerated degree, so the effect is obvious and you can see exactly where it’s landing before you dial it back. Choose the Warming Filter (85) from the Filter dropdown if your subject needs warmth, or the Cooling Filter (80) if you need to pull the temperature down. The exaggerated setting is just for visibility at this stage, not the final value.
Adjustments panel with Photo Filter option highlighted
Go to the Adjustments panel and click on the Photo Filter option. It looks like a small camera lens icon. This will add a new adjustment layer above your current layer. By default, it applies to everything below it in the stack, which means right now it’s affecting your entire image. That’s fine for the moment. Matt’s approach is to crank the density slider up high first, even to an exaggerated degree, so the effect is obvious and you can see exactly where it’s landing before you dial it back. Choose the Warming Filter (85) from the Filter dropdown if your subject needs warmth, or the Cooling Filter (80) if you need to pull the temperature down. The exaggerated setting is just for visibility at this stage, not the final value.
Step 4: Clip the Adjustment Layer to the Subject Layer
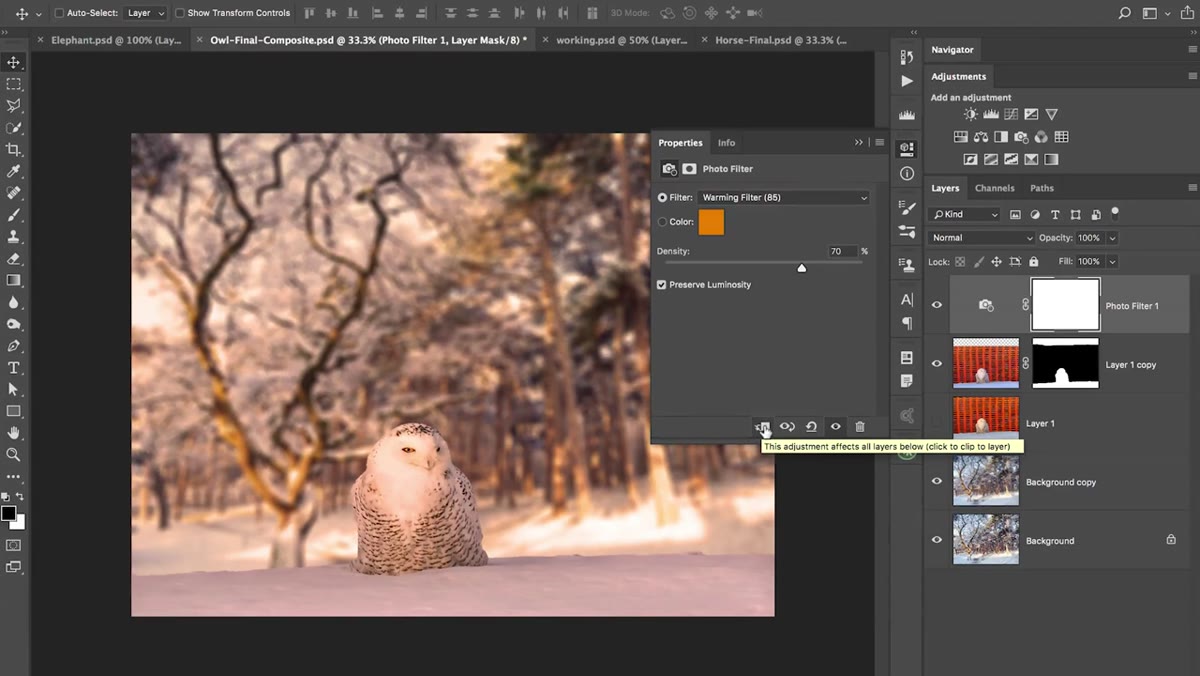 Properties panel showing the clip to layer icon being clicked
This is the move that makes the whole technique work. In the Properties panel for the Photo Filter adjustment layer, you’ll see a small icon at the bottom that looks like a rectangle with a downward-pointing arrow. Click it. This clips the adjustment layer so it only affects the layer directly beneath it, which is your isolated subject. You’ll see a small arrow appear in the Layers panel next to the adjustment layer, pointing down toward the subject layer. That arrow is your confirmation. The background is now untouched. Everything the Photo Filter does from this point applies only to the subject.
Properties panel showing the clip to layer icon being clicked
This is the move that makes the whole technique work. In the Properties panel for the Photo Filter adjustment layer, you’ll see a small icon at the bottom that looks like a rectangle with a downward-pointing arrow. Click it. This clips the adjustment layer so it only affects the layer directly beneath it, which is your isolated subject. You’ll see a small arrow appear in the Layers panel next to the adjustment layer, pointing down toward the subject layer. That arrow is your confirmation. The background is now untouched. Everything the Photo Filter does from this point applies only to the subject.
Step 5: Fine-Tune the Density to Match the Background
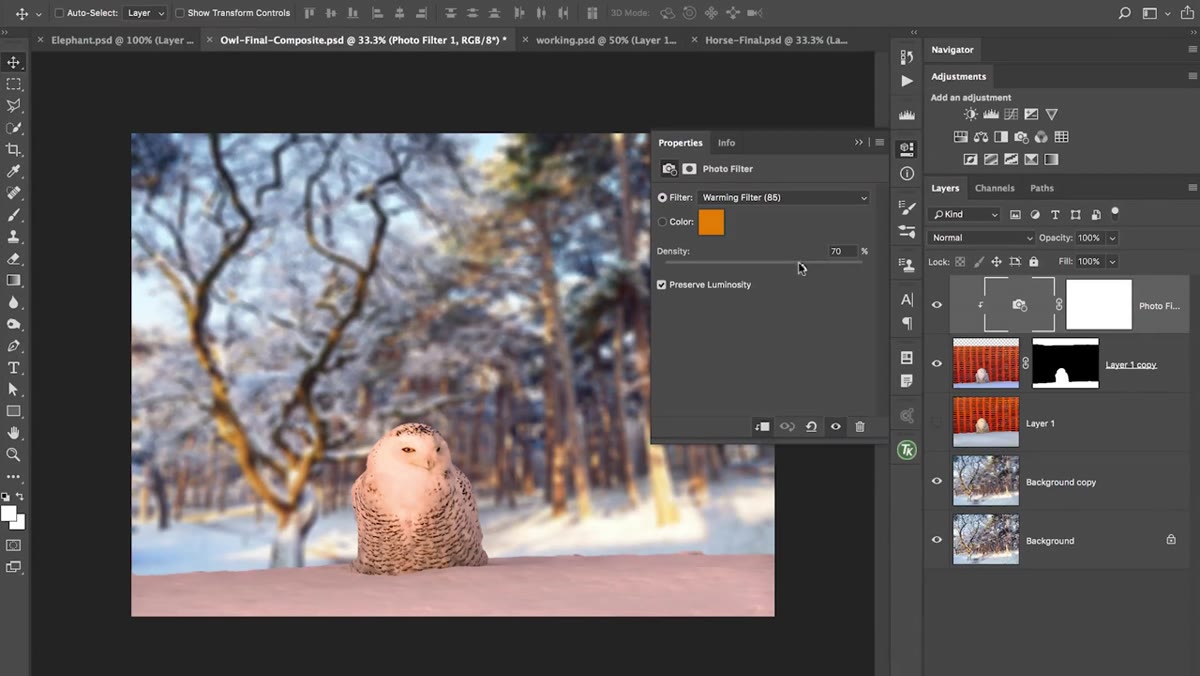 Photo Filter properties panel with density slider being adjusted
Now that the adjustment is clipped and isolated, double-click the adjustment layer thumbnail to reopen the Photo Filter properties. Pull the Density slider back from that exaggerated starting point and work toward a value that makes the subject’s color temperature feel like it belongs in the same light as the background. There’s no universal number here. Matt works by eye, nudging the slider until the transition between subject and background stops feeling jarring. A value somewhere between 15 and 40 is common for portraits in warm outdoor scenes, but trust your eye over any number I give you. Toggle the layer visibility on and off to compare against the original and check your progress honestly.
Photo Filter properties panel with density slider being adjusted
Now that the adjustment is clipped and isolated, double-click the adjustment layer thumbnail to reopen the Photo Filter properties. Pull the Density slider back from that exaggerated starting point and work toward a value that makes the subject’s color temperature feel like it belongs in the same light as the background. There’s no universal number here. Matt works by eye, nudging the slider until the transition between subject and background stops feeling jarring. A value somewhere between 15 and 40 is common for portraits in warm outdoor scenes, but trust your eye over any number I give you. Toggle the layer visibility on and off to compare against the original and check your progress honestly.
Step 6: Apply the Same Logic to a Different Subject Type
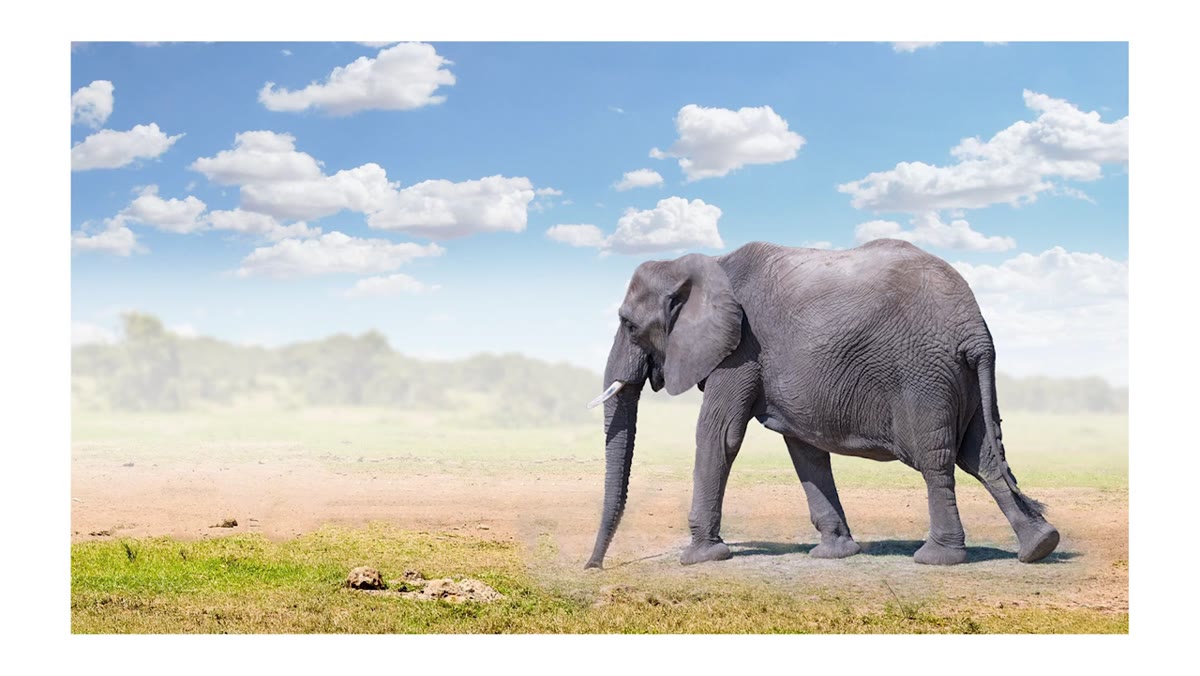
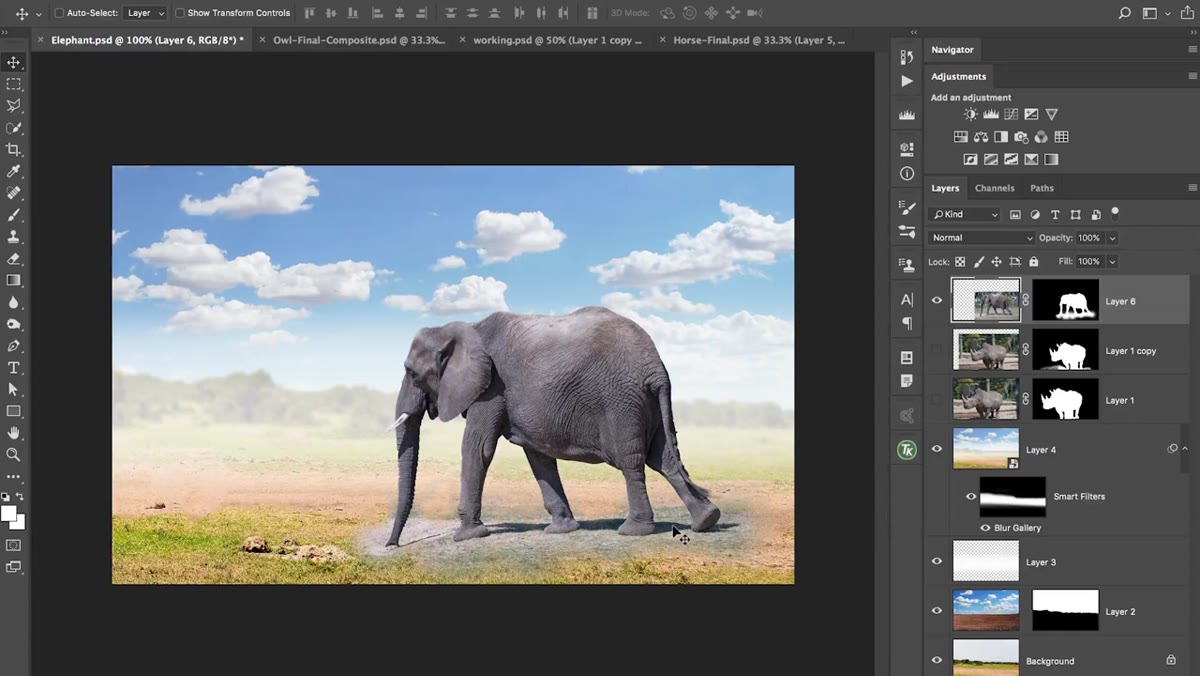 Elephant composite with warm background and cool-toned subject
Matt runs the same technique on a second composite, an elephant photographed at a zoo and placed against a warm environmental background. The animal’s tones read too cool and flat against the warmer scene. The process is identical: add the Photo Filter, clip it to the subject layer, crank the density to see where the warming is landing, then dial it back to something natural. What’s useful about seeing it applied to an animal subject rather than a portrait is that it reinforces that this isn’t a people-specific trick. Anything you pull into a warm scene, objects, animals, vehicles, needs the same color temperature consideration.
Elephant composite with warm background and cool-toned subject
Matt runs the same technique on a second composite, an elephant photographed at a zoo and placed against a warm environmental background. The animal’s tones read too cool and flat against the warmer scene. The process is identical: add the Photo Filter, clip it to the subject layer, crank the density to see where the warming is landing, then dial it back to something natural. What’s useful about seeing it applied to an animal subject rather than a portrait is that it reinforces that this isn’t a people-specific trick. Anything you pull into a warm scene, objects, animals, vehicles, needs the same color temperature consideration.
One Thing I’d Add From My Own Work
The Photo Filter gets you most of the way there, but when I’m working on something that needs to survive a close look, like a print-ready movie poster or a book cover that’s going on a shelf, I’ll run a second pass with a Hue/Saturation adjustment layer, also clipped to the subject. After warming or cooling the subject with the Photo Filter, there’s often a slight saturation imbalance that remains. The subject might now have the right temperature, but the warmth in the background has more richness and punch than what the subject is showing. A subtle saturation boost on the subject, usually just 5 to 10 points, closes that last gap and makes the color feel unified rather than just temperature-matched. These two adjustments together, Photo Filter for temperature, Hue/Saturation for richness, cover the majority of color integration problems I run into.
The single most important thing to take away from Matt’s tutorial is this: the selection work you’ve already done to isolate your subject is not just a masking tool. It’s a targeting system for every adjustment you make afterward. Clipping adjustment layers to individual subject layers is the difference between global grading and surgical compositing. Once you start thinking about your layers panel as a set of targets rather than just a stack, your compositing gets more precise and a lot faster.
Watch Matt walk through both examples and see the before-and-after in real time: Watch the full tutorial on YouTube
Comments (2)
I've watched a dozen tutorials on this and yours is the clearest by far.
Really solid breakdown. This pairs perfectly with the photography work I've been writing about.
Leave a Comment