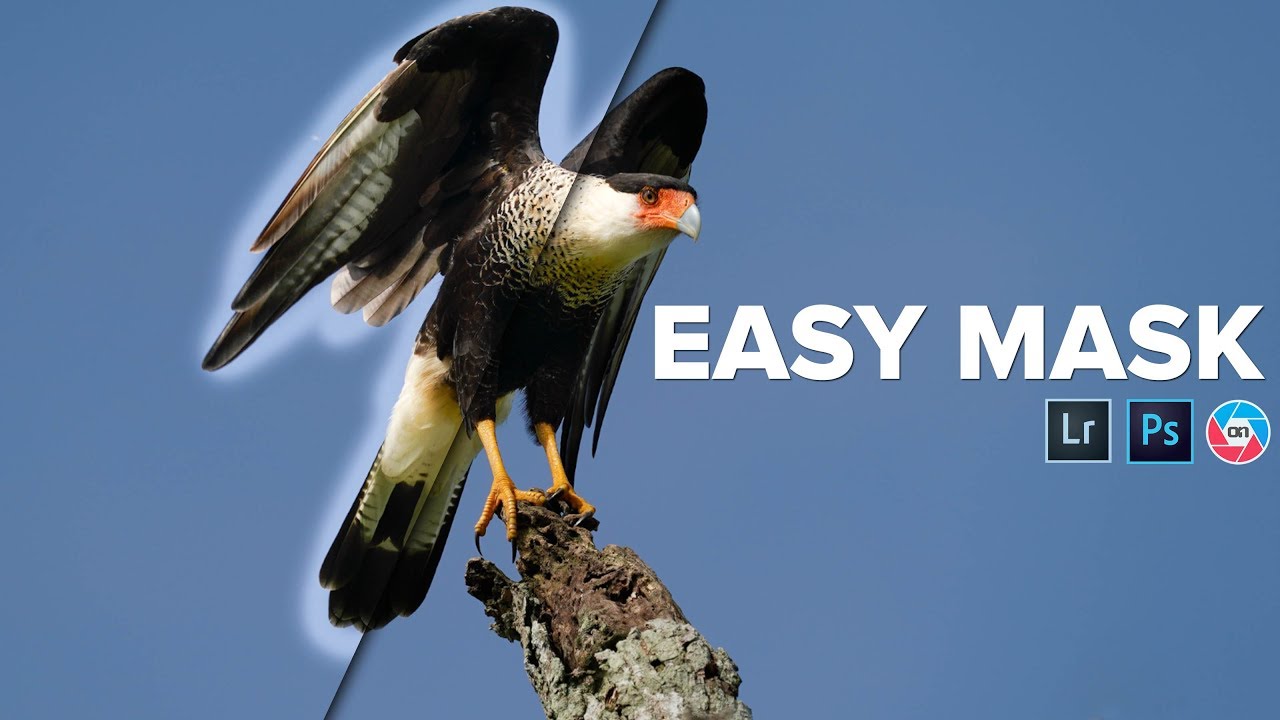
There is a particular kind of failure that only you notice. I have a composite from early in my career where the shadow under a figure falls at a completely different angle than every other shadow in the scene. The client approved it. The art director approved it. It ran. And I have thought about it roughly once a month for the past decade. The point is: small decisions about light and masking compound. Getting them right, or wrong, is what separates work that holds up from work that quietly falls apart under scrutiny.
That is why a technique like the one Matt Kloskowski walks through in this tutorial caught my attention. Watch the full tutorial on YouTube. On the surface it looks like a basic brush tool walkthrough. But the real lesson buried inside it is about judgment, specifically knowing when a technically correct tool is still the wrong choice for the image in front of you. That distinction matters enormously in compositing work, and it matters even more when you are trying to sell a scene as real.
The tutorial uses two very different photos to make this point. A bird against a contrasting background, where selective brightening makes complete logical sense. And a moody street scene with atmospheric light, where painting exposure onto the sidewalk would make it look staged and wrong even if the mask itself were perfect. Kloskowski is not just teaching a brush technique. He is teaching you to read a photograph before you touch it.
Step 1: Open the Brush Tool and Set Your Intent
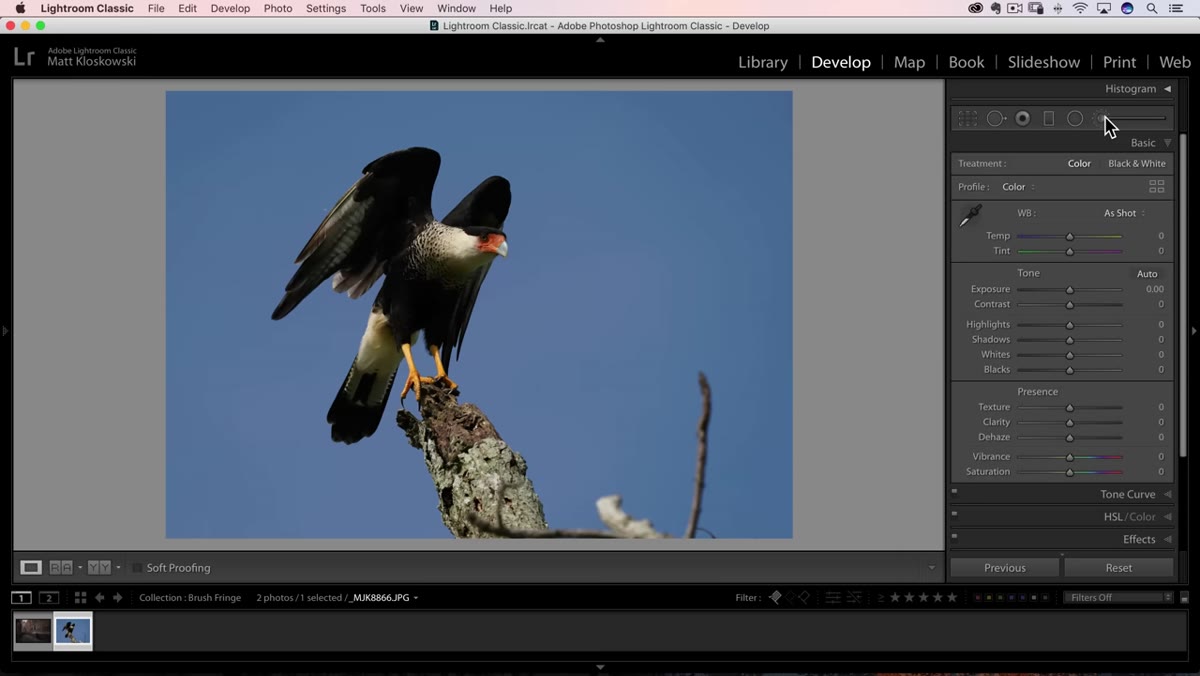 Lightroom brush tool selected, photo of bird open
Before you paint a single pixel, know what you are actually trying to do. In Lightroom, grab the Adjustment Brush from the toolbar. The same tool exists in Adobe Camera Raw inside Photoshop and behaves identically. Kloskowski starts with a bird photograph where the goal is straightforward: lift the shadow detail in the bird and bring a little more brightness to it overall. Decide upfront whether your subject genuinely needs to be brighter in context of the whole frame. If it does, proceed. If you are about to paint light onto something just because you can, stop and look at the image again.
Lightroom brush tool selected, photo of bird open
Before you paint a single pixel, know what you are actually trying to do. In Lightroom, grab the Adjustment Brush from the toolbar. The same tool exists in Adobe Camera Raw inside Photoshop and behaves identically. Kloskowski starts with a bird photograph where the goal is straightforward: lift the shadow detail in the bird and bring a little more brightness to it overall. Decide upfront whether your subject genuinely needs to be brighter in context of the whole frame. If it does, proceed. If you are about to paint light onto something just because you can, stop and look at the image again.
Step 2: Turn On Auto Mask and Paint the Subject Edges
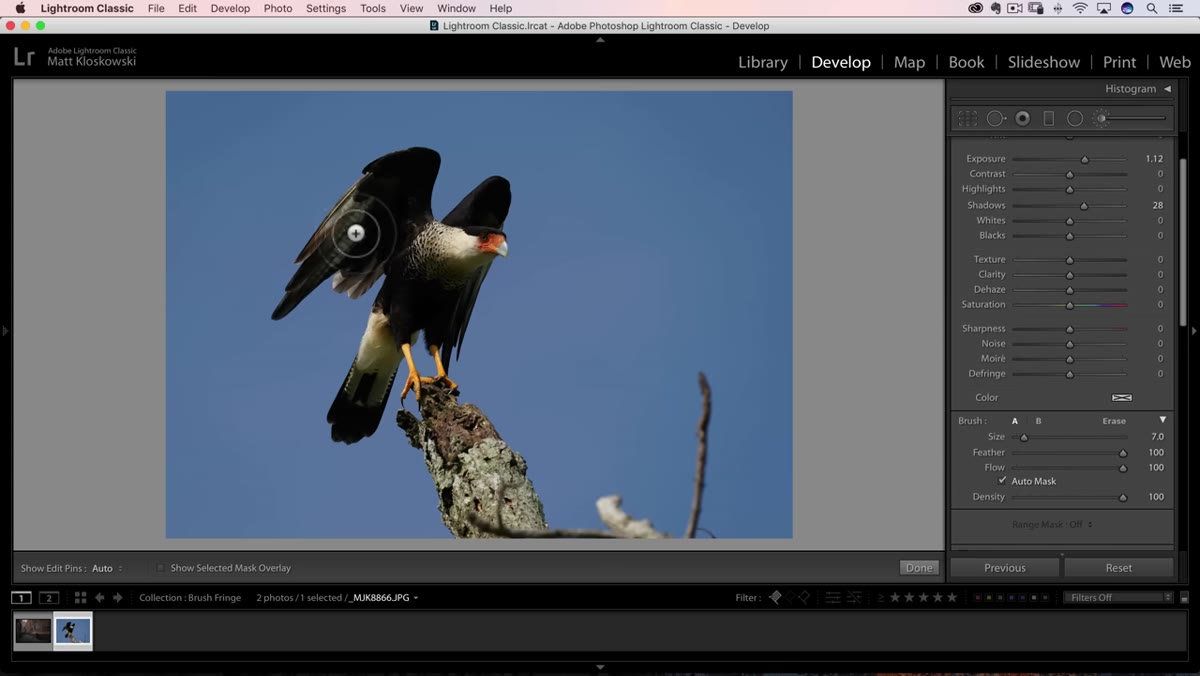 Auto Mask checkbox enabled, brush painting bird edges
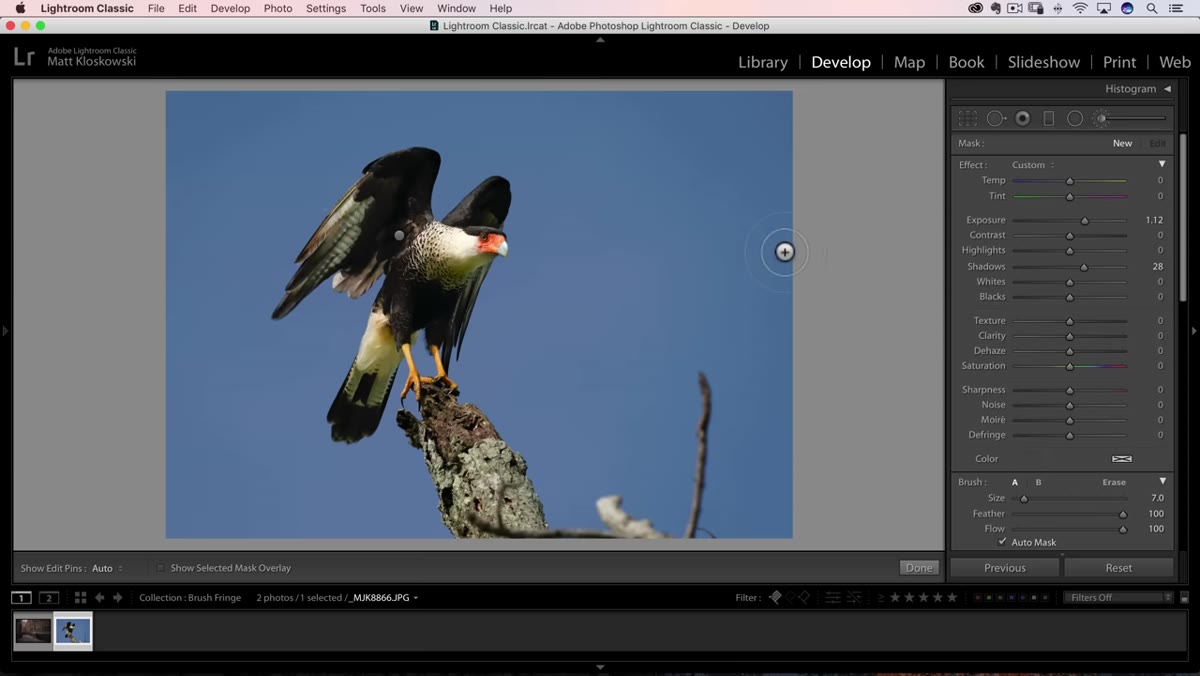
With Auto Mask enabled in the brush options, Lightroom uses the crosshair at the center of your brush to detect edges based on color and contrast. The key here is discipline: keep that crosshair inside the subject you want to affect. Your brush can be large, which speeds up coverage, but the moment that center point drifts over the background, you start contaminating the mask. Work around the outer edges of your subject first, where edge detection matters most, and use the left bracket key to reduce brush size for tighter areas.
Auto Mask checkbox enabled, brush painting bird edges
With Auto Mask enabled in the brush options, Lightroom uses the crosshair at the center of your brush to detect edges based on color and contrast. The key here is discipline: keep that crosshair inside the subject you want to affect. Your brush can be large, which speeds up coverage, but the moment that center point drifts over the background, you start contaminating the mask. Work around the outer edges of your subject first, where edge detection matters most, and use the left bracket key to reduce brush size for tighter areas.
Step 3: Fill the Interior with Auto Mask Off
 Auto Mask turned off, painting center of subject
Once you have painted the perimeter carefully, turn Auto Mask off before filling in the center of your subject. This is a detail a lot of people skip, and it causes problems. When Auto Mask is active, Lightroom is constantly recalculating edges as you paint. In flat, interior areas of your subject, that calculation can create subtle inconsistencies that show up as patchy or uneven adjustments. Switch it off, paint broadly across the middle, and you get a cleaner, more uniform result.
Auto Mask turned off, painting center of subject
Once you have painted the perimeter carefully, turn Auto Mask off before filling in the center of your subject. This is a detail a lot of people skip, and it causes problems. When Auto Mask is active, Lightroom is constantly recalculating edges as you paint. In flat, interior areas of your subject, that calculation can create subtle inconsistencies that show up as patchy or uneven adjustments. Switch it off, paint broadly across the middle, and you get a cleaner, more uniform result.
Step 4: Check Your Mask Overlay
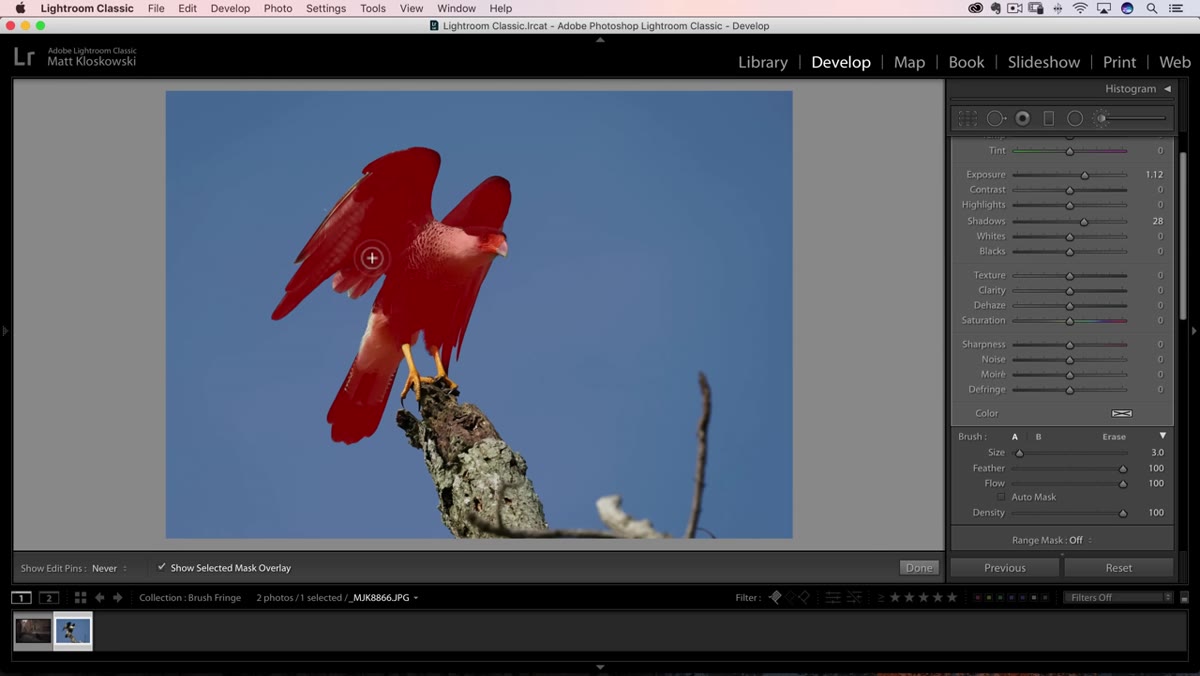
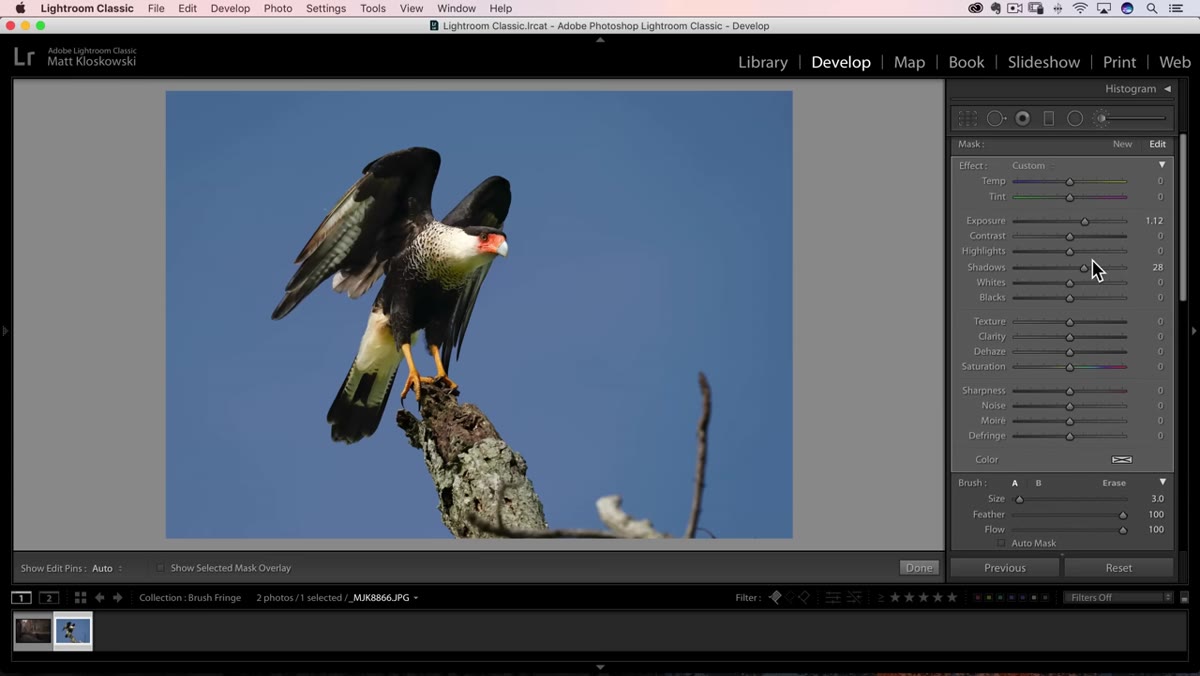 Red overlay visible showing brush mask coverage on bird
Press the letter O to toggle the mask overlay. This turns your painted area red (or whatever overlay color you have set) so you can see exactly where the adjustment is being applied. Look for gaps near the edges, bleed onto the background, and any splotchy areas in the center where the fill was uneven. Fix them now before you dial in your exposure settings. Trying to evaluate a mask and an exposure adjustment simultaneously just means you end up chasing two problems at once.
Red overlay visible showing brush mask coverage on bird
Press the letter O to toggle the mask overlay. This turns your painted area red (or whatever overlay color you have set) so you can see exactly where the adjustment is being applied. Look for gaps near the edges, bleed onto the background, and any splotchy areas in the center where the fill was uneven. Fix them now before you dial in your exposure settings. Trying to evaluate a mask and an exposure adjustment simultaneously just means you end up chasing two problems at once.
Step 5: Dial In Your Exposure and Shadow Settings
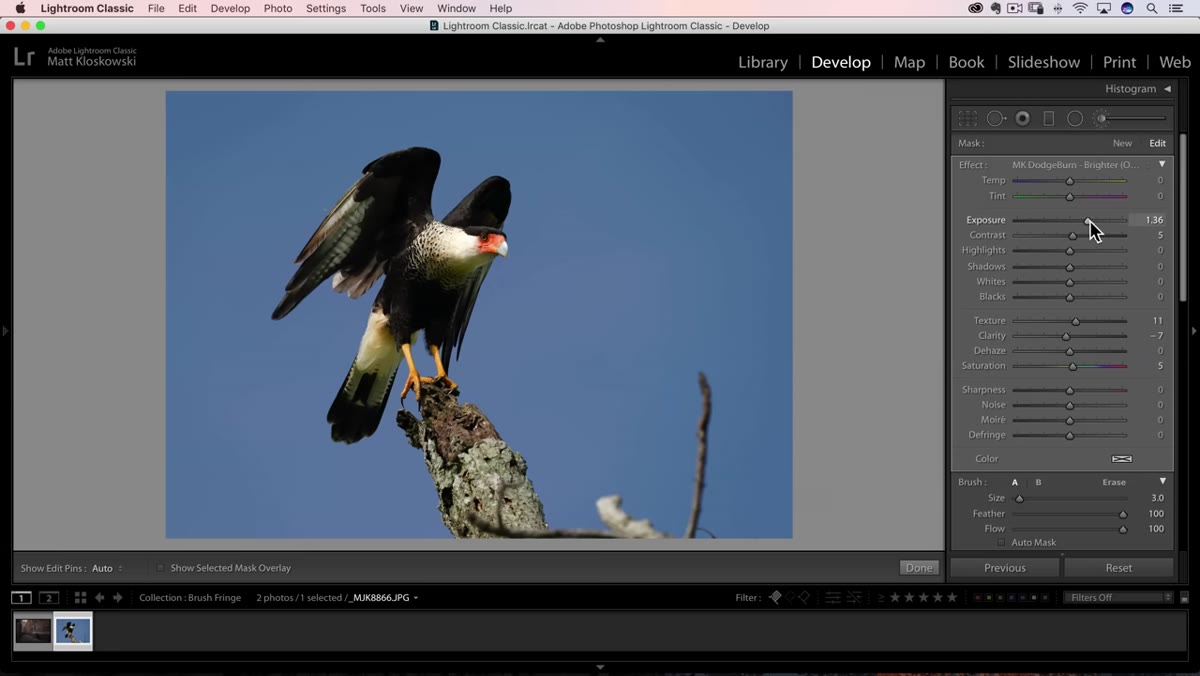 Adjustment sliders showing exposure and shadow values increased
With the mask confirmed, move to your adjustment sliders. Kloskowski reaches for a dodge and burn type preset that bumps overall brightness and then separately lifts the shadow slider to open up the darkest tones in the subject. Shadows and exposure work differently: exposure lifts the whole tonal range evenly, while shadows specifically targets the lower end of the histogram. For subjects with deep, blocked-up darks, like a dark feathered bird, shadows often does more useful work than raw exposure. Use them together rather than defaulting to one or the other.
Adjustment sliders showing exposure and shadow values increased
With the mask confirmed, move to your adjustment sliders. Kloskowski reaches for a dodge and burn type preset that bumps overall brightness and then separately lifts the shadow slider to open up the darkest tones in the subject. Shadows and exposure work differently: exposure lifts the whole tonal range evenly, while shadows specifically targets the lower end of the histogram. For subjects with deep, blocked-up darks, like a dark feathered bird, shadows often does more useful work than raw exposure. Use them together rather than defaulting to one or the other.
Step 6: Recognize When Brushed Light Is the Wrong Tool Entirely
 Street scene photograph open, moody ambient light visible
This is the step the tutorial earns its value on. Kloskowski switches to a second photograph, a nighttime street scene with beautiful, diffuse atmospheric light coming through from outside the frame. He starts to demonstrate what it would look like to paint exposure onto the sidewalk using the same Auto Mask approach. It starts looking wrong almost immediately, and the reason is not technical. The mask might be perfectly clean. The problem is that real light in that scene does not fall in a hard, subject-specific pool. It feathers. It wraps. It bleeds into the surroundings. Brushing a flat exposure increase onto one surface in a scene lit this way breaks the internal logic of the photograph.
Street scene photograph open, moody ambient light visible
This is the step the tutorial earns its value on. Kloskowski switches to a second photograph, a nighttime street scene with beautiful, diffuse atmospheric light coming through from outside the frame. He starts to demonstrate what it would look like to paint exposure onto the sidewalk using the same Auto Mask approach. It starts looking wrong almost immediately, and the reason is not technical. The mask might be perfectly clean. The problem is that real light in that scene does not fall in a hard, subject-specific pool. It feathers. It wraps. It bleeds into the surroundings. Brushing a flat exposure increase onto one surface in a scene lit this way breaks the internal logic of the photograph.
What I Would Add from My Own Work
The moment Kloskowski identifies in that street photograph is something I think about constantly in compositing: the difference between a correct adjustment and a believable one. In my work building composite scenes, I have learned to ask one question before I mask anything. Would a light source in this image actually behave this way? If the answer is no, then a technically clean mask is still going to produce a result that reads as fake to anyone paying attention, even if they cannot name exactly why.
When I am working in Photoshop on a composite with multiple light sources, I often sketch the lighting diagram on paper before I open a single mask. Not because I do not trust the tools, but because I need to understand the logic of the light before I start enforcing it digitally. Kloskowski is making the same argument here in a Lightroom context. The brush tool and Auto Mask are reliable. The judgment about when and where to use them is the skill that actually takes time to build.
The single most important thing this tutorial teaches is not the Auto Mask workflow itself. It is the habit of looking at how light already exists in a photograph before you decide to add more. Paint with the light that is already there. Fight against it and viewers will feel it, even if they cannot see it.
Watch the full tutorial on YouTube and pay particular attention to the moment Kloskowski switches between the two photographs. That transition is where the real lesson lives.
Comments
Leave a Comment